Unlocked
Article Number: CPU-7
Introduction
With any PC system build it is important that the CPU cooler is properly installed to ensure that heat is effectively dissipated to maintain appropriate operating temperatures.
Before handling any PC components and sensitive electronics such as the CPU please take necessary precautions, for example:
- Whenever possible, avoid working on a carpeted area, especially in cool, dry areas.
- Dissipate any static electricity by touching a grounded metal object, such as the system metal chassis before working with the system components.
- Use antistatic devices, such as wrist straps before handling any electronic devices.
For more information on handling an AMD CPU, please refer to article: Processor Handling Guidance
For the purpose of this article, the instructions provided are based on the AMD Socket AM4 Platform.
Installing the CPU Cooler
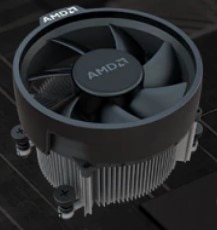
AMD bundled CPU coolers for Socket AM4 come in two different types. Each using a different locking mechanism, either by retention clips or spring-screws, to secure it to the motherboard.
For example:
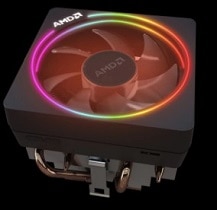
Installing a CPU cooler with retention clips:
Ensure that the CPU is properly seated in the socket. For instructions on how to install an AMD Ryzen processor, please refer to video: How to Install AMD Ryzen Processors. Instructions can also be found in your motherboard user manual.
- Regarding thermal grease:
If you are reinstalling the CPU cooler, the lid on the top of the CPU and the bottom plate of the CPU cooler should be clean and free of any old thermal grease. This can be achieved using isopropyl alcohol and a lint free cloth.
If you are installing a new CPU cooler, it may already have thermal grease pre-applied on it. In this case, you do not need to apply thermal grease to the CPU lid. Please skip to step #4
Carefully apply a thin bead of high-quality thermal grease in an X pattern across the CPU lid for best coverage. A list of high-quality thermal grease can be found in the Thermal Grease section of this article.
NOTE!Thermal grease may flow over the edges of the processor and reach the socket if excessive amounts are applied. This is not desirable and could damage the CPU and socket.
Position the CPU cooler on the processor so that the retention clips on each side of the heatsink align with the socket mounting lugs on the retention frame on the motherboard. For example, refer to the picture below:
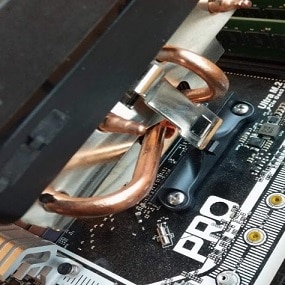
Carefully push down on the retention clips, one at a time, until both clips are hooked onto the socket mounting lugs. Some force may need to be applied.
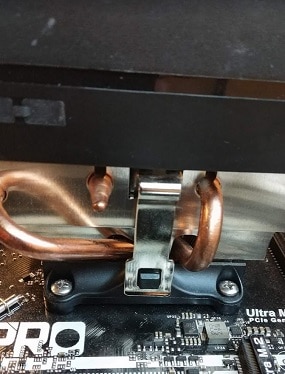
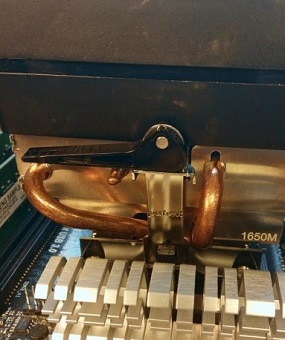
Adjust the cam lever position to lock the CPU cooler to the retention frame.
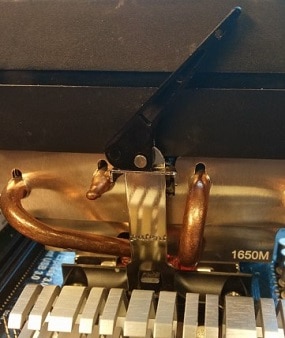
Locked
Connect the fan power lead on the CPU cooler to the CPU fan header on the motherboard. Refer to your motherboard user manual for the CPU fan header location.
- If the CPU cooler has RGB LED, connect the bundled RGB cable to CPU cooler and the RGB header on the motherboard. Refer to your motherboard user manual for the RGB header location.
Installing a CPU cooler with spring-screws:
- If this is a new system build, the motherboard may come with retention frame preinstalled. Remove the retention frame from the motherboard by unscrewing the four screws holding it in place.
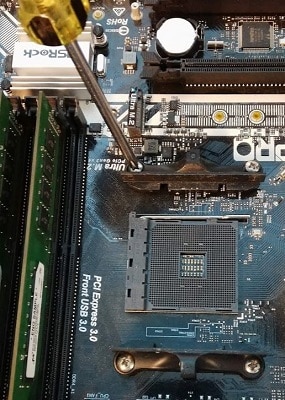
With the retention frame removed, ensure that the backplate remain in position with the holes on the motherboard.

Ensure that the CPU is properly seated in the socket. For instructions on how to install an AMD Ryzen processor, please refer to video: How to Install AMD Ryzen Processors. Instructions can also be found in the motherboard user manual.
- Regarding thermal grease:
If you are reinstalling the CPU cooler, the lid on the top of the CPU and the bottom plate on the CPU cooler should be clean and free of any residual thermal grease. This can be achieved using isopropyl alcohol and a lint free cloth.
If you are installing a new CPU cooler, it may already have thermal grease pre-applied. In this case, you do not need to apply thermal grease to the CPU lid. Please skip to step #6.
Carefully apply a thin bead of high-quality thermal grease in an X pattern across the CPU lid for best coverage. A list of high-quality thermal grease can be found in the Thermal Grease section of this article.
Position the CPU cooler so that the four spring-screws on the heatsink align with the four screw holes of the backplate. Once aligned, carefully place the heatsink onto the CPU.

Using a screwdriver, turn each spring-screw a half turn clockwise to ensure the spring-screw makes a connection with the backplate. Follow a diagonal pattern across the CPU cooler, further tighten each spring-screw with a full turn.
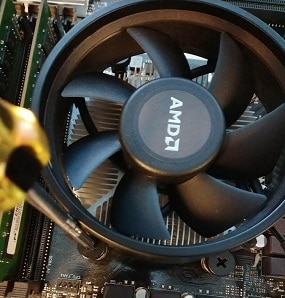
With all the spring-screws connected to the backplate, tighten them until you feel resistance. Then check the CPU cooler to ensure it is properly secured to the motherboard.
Connect the fan power lead on the CPU cooler to the CPU fan header on the motherboard. Refer to your motherboard user manual for the CPU fan header location.
If the CPU cooler has RGB LED, connect the bundled RGB cable to CPU cooler and the RGB header on the motherboard. Refer to your motherboard user manual for the RGB header location.
Removing the CPU Cooler
Removing the CPU cooler is usually performed when replacing with a new unit or applying fresh thermal grease.
If your system has been powered off for some time, the existing thermal grease may be in a hardened state which could make removing the CPU cooler difficult and potentially damage the CPU in the process. If feasible, power on the system for a few minutes to soften the existing thermal grease.
Removing a CPU cooler with retention brackets:
- Power down the system and switch off the PSU, disconnect the fan power lead from the CPU fan header on the motherboard. If applicable, disconnect the RGB cable from CPU cooler and the RGB header on the motherboard.
- Gently pull the cam lever up to unlock the CPU cooler from the retention frame.
Locked
Unlocked
Release the retention clips on each side of the heatsink from the motherboard socket mounting lugs.
Lightly twist the CPU cooler clockwise and counterclockwise to loosen the seal between the heatsink and the lid of the CPU.
Carefully lift the CPU cooler from the CPU. When done correctly the CPU should remain seated in the socket.
Removing a CPU cooler with spring-screws:
Power down the system and switch off the PSU, disconnect the fan power lead from the CPU fan header on the motherboard. If applicable, disconnect the RGB cable from CPU cooler and the RGB header on the motherboard.
Follow a diagonal pattern across the CPU cooler, using a screwdriver turn each spring-screw a full turn counterclockwise. Continue until each spring-screw is separated from the motherboard backplate.
Lightly twist the CPU cooler clockwise and counterclockwise to loosen the seal between the heatsink and the lid of the CPU.
- Carefully lift the CPU cooler from the CPU. When done correctly the CPU should remain seated in the socket.
Thermal Grease
The following table provides a list of 3rd party thermal grease products designed for CPUs. For more information on a particular thermal grease product, please visit the manufacturer website.
Manufacturer |
Product Name |
Thermal Grizzly |
Kryonaut |
Thermal Grizzly |
Hydronaut |
Gelid Solutions |
GC Extreme |
Innovation Cooling |
Diamond 24 |
Innovation Cooling |
Diamond 7 |
Kingpin Cooling |
KPx High Performance |
Phanteks |
PH-NDC |
Prolimatech |
PK-3 |
Prolimatech |
PK-1 |
Noctua |
NT-H1 |
Akasa Pro Grade |
AK-460 |
Deepcool |
Z9 |
Alphacool |
XPX-1 |
Arctic Silver |
Arctic Silver 5 |