Article Number: DH-023
Radeon™ ReLive (ReLive) allows users to capture, stream and share gameplay videos and screenshots. Capturing gameplay using Radeon ReLive is easy to configure and has a minimal impact on performance, which is measured in frames per second (FPS).
Radeon ReLive Requirements
Radeon™ ReLive is currently supported on systems with AMD Graphics Core Next (GCN) Architecture-based Desktop Graphics. These include:
- Radeon™ RX Vega Series
- Radeon™ RX 500 Series
- Radeon™ RX 400 Series
- Radeon™ Pro Duo
- AMD Radeon™ R9 Fury, R9 300, R7 300 Series
- AMD Radeon™ R9 200, R7 200, R5 300, R5 240 Series
- AMD Radeon™ HD 8500 – HD 8900 Series
- AMD Radeon™ HD 7700 – HD 7900 Series
NOTE! Radeon™ ReLive for AMD Radeon products is supported on the following Operating Systems:
- AMD Radeon™ RX Vega, Radeon™ RX 500 Series Graphics products and newer are only supported on Windows® 7 and Windows® 10 64-bit.
- AMD Radeon™ R9 Fury, Radeon™ Pro Duo and Radeon™ RX 400 Series Graphics products are only supported on Windows 7, Windows® 8.1 and Windows 10 64-bit.
All remaining products are supported under Windows 7, Windows 8.1 and Windows 10 32-bit and 64-bit versions.
Radeon™ ReLive is currently supported on DirectX® 9, 10 11, 12 and Vulkan® APIs.
The availability of specific Radeon ReLive recording functions will depend on the GPU being used. For more information on encoding support, please visit Radeon ReLive.
Radeon™ R9 300 Series and older products have encoding support up to 1080P resolution at up to 60 Frames Per Second (FPS).
Install and Enable Radeon ReLive
Radeon™ ReLive was first introduced with Radeon™ Software Crimson ReLive Edition 16.12.1 and further enhanced in Radeon Software Adrenalin 2019 Edition (18.12.2).
To download and install the latest Radeon Software Adrenalin Edition driver please visit AMD Drivers and Support page. For information on how to install Radeon Software, please refer to KB: How to Install Radeon Software on a Windows® Based System
At the end of the Radeon Software package installation, the following screen will appear for supported products as described in the section above.
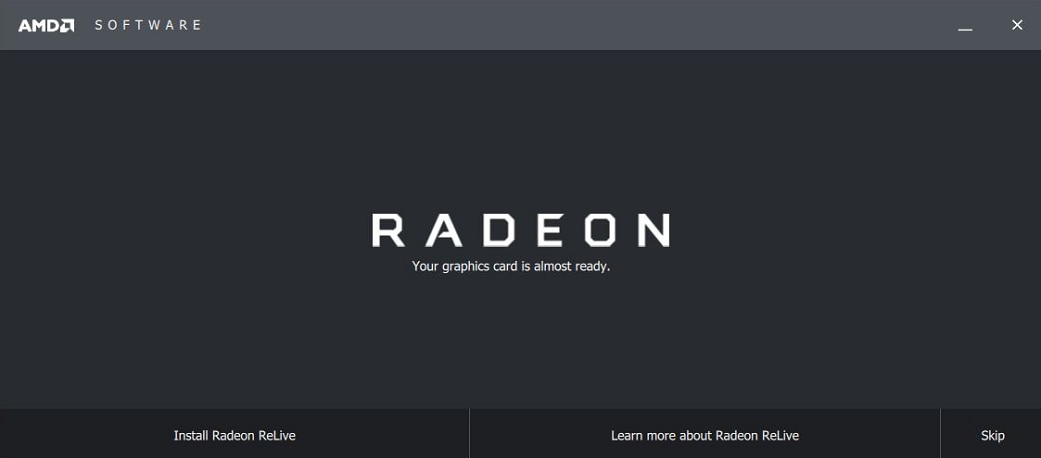
Select Install Radeon ReLive to install Radeon ReLive. Restart the system once the installation is complete.
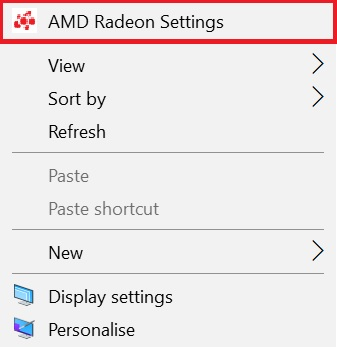
To use Radeon ReLive, it must first be enabled from within Radeon Settings. Open Radeon Settings by right clicking on your Desktop and select AMD Radeon Settings.
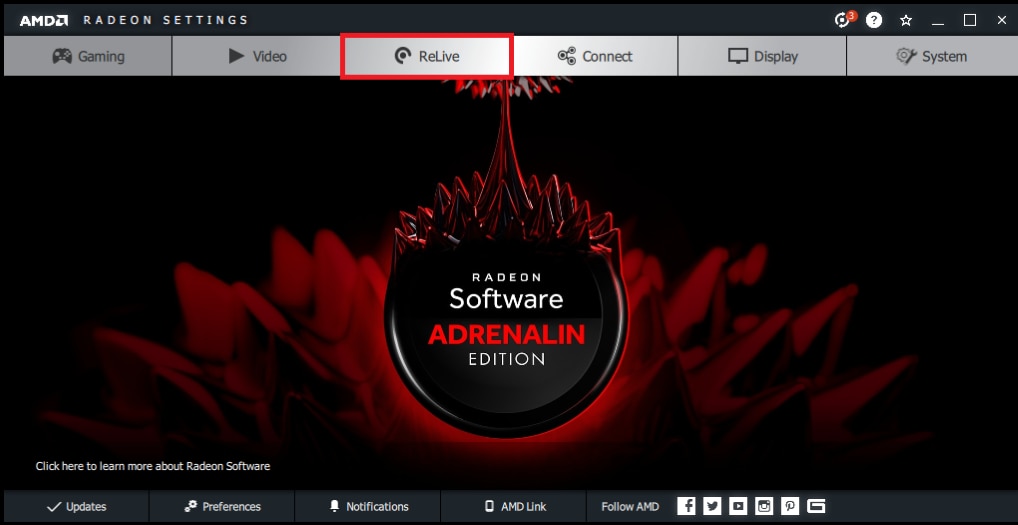
Select ReLive.
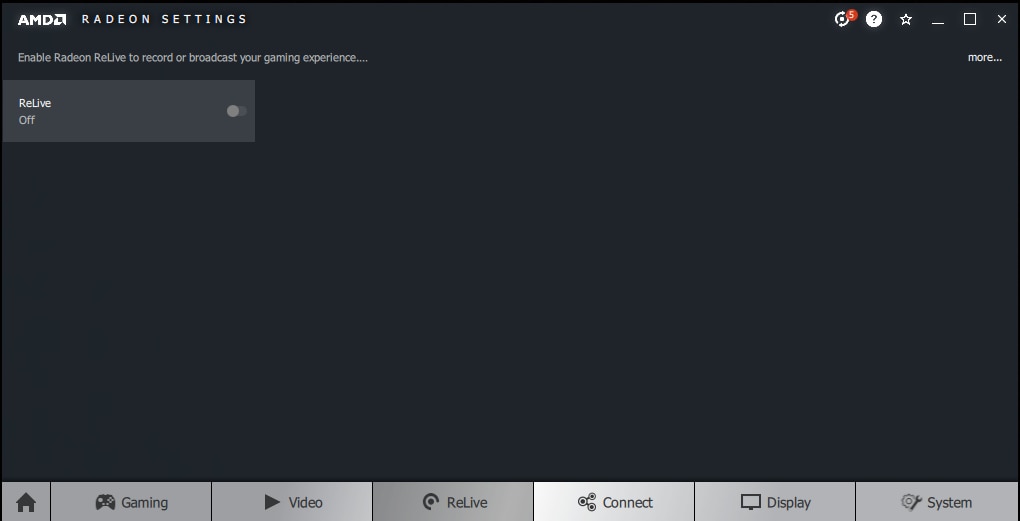
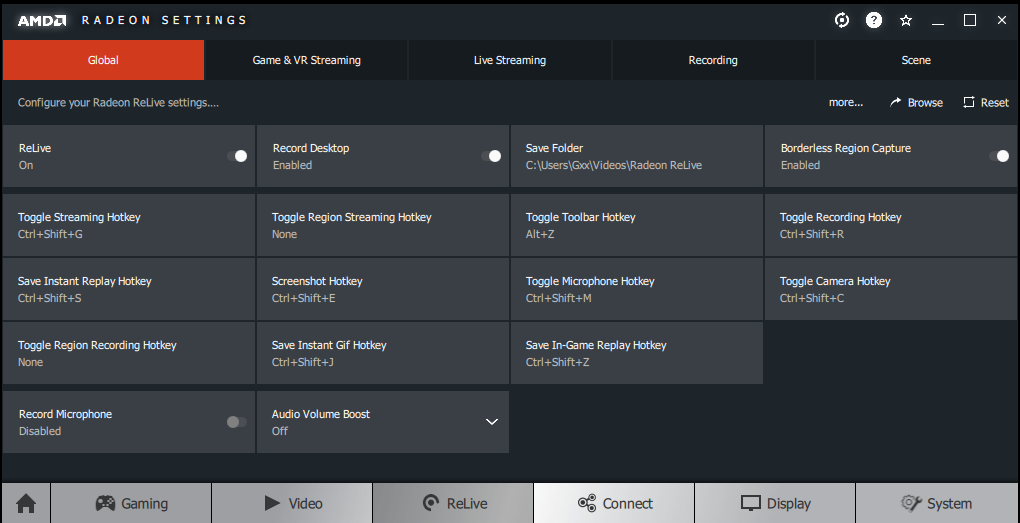
Enable Radeon ReLive by setting the feature to On.
Once enabled, Radeon ReLive provides many customizable hotkeys for; Live Streaming, Recording and Scene, all of which can be accessed from within the feature's designated tab..
Global Settings
Before you can begin capturing gameplay it is important to configure the options available within the Radeon ReLive, Global tab to suit your preferences. These options include:
- Record Desktop
- Save Folder
- Borderless Region Capture
- Audio Capture Device
- Customizing Hotkeys
- Record Microphone
- Audio Volume Boost
Record Desktop
Record Desktop is an option that once enabled allows capture of content directly from your Windows desktop.
NOTE! OpenGL applications may be recorded using the Record Desktop feature only when running in windowed mode.
Save Folder
The Save Folder is the location where all screenshots and gameplay videos are stored, and this can be changed to a folder or hard drive of your preference. The default location is within your Windows > Users > Username > Videos folder.
NOTE! Gameplay video recordings can be very large, please select a hard drive with adequate free disk space.
Borderless Region Capture
Borderless Region Capture is an option that once enabled allows capture of a selected application. More information about using Borderless Region Capture is available in the Radeon Overlay section of this document.
Audio Capture Device
Audio Capture Device allows selection from a list of detected microphones connected to your system to be used to capture audio while streaming or recording gameplay.
Customizing Hotkeys
Radeon ReLive uses default Hotkey combinations that can be customized to suit your preferences. These include:
- Toggle Toolbar Hotkey
- Toggle Recording Hotkey
- Save Instant Replay Hotkey
- Toggle Streaming Hotkey
- Screenshot Hotkey
- Toggle Microphone Hotkey
- Toggle Camera Hotkey
- Toggle Region Recording Hotkey
- Toggle Region Streaming Hotkey
- Save Instant Gif Hotkey
- Save In-Game Replay Hotkey
NOTE! Save Instant Gif Hotkey and Save In-Game Replay Hotkey are new features introduced with Radeon Adrenalin 2019 Edition (18.12.2).
Default hotkeys are shown in the screenshot below.
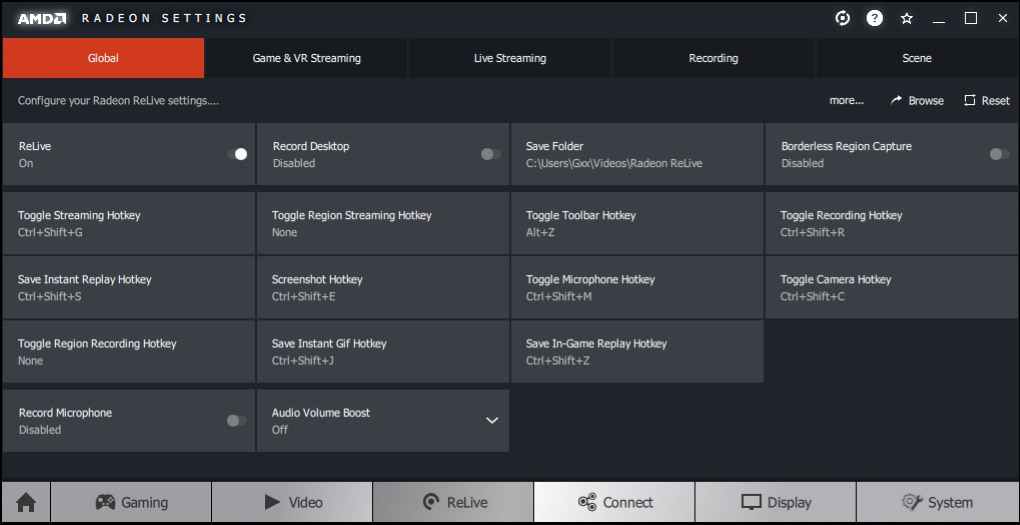
Click on a hotkey and then press the desired key on your keyboard to save the hotkey.
NOTE! Hotkey combinations must include the CTRL and/or ALT Keys.
NOTE! Do not choose a hotkey combination that is reserved by the Operating System or another application (for example, ALT+F4 is used by Windows to close the current application).
Record Microphone
Record Microphone is an option that allows capture of audio from the selected microphone and will record sound continuously while streaming or recording gameplay.
The default microphone volume is 50% and can be adjusted in increments of 1%.
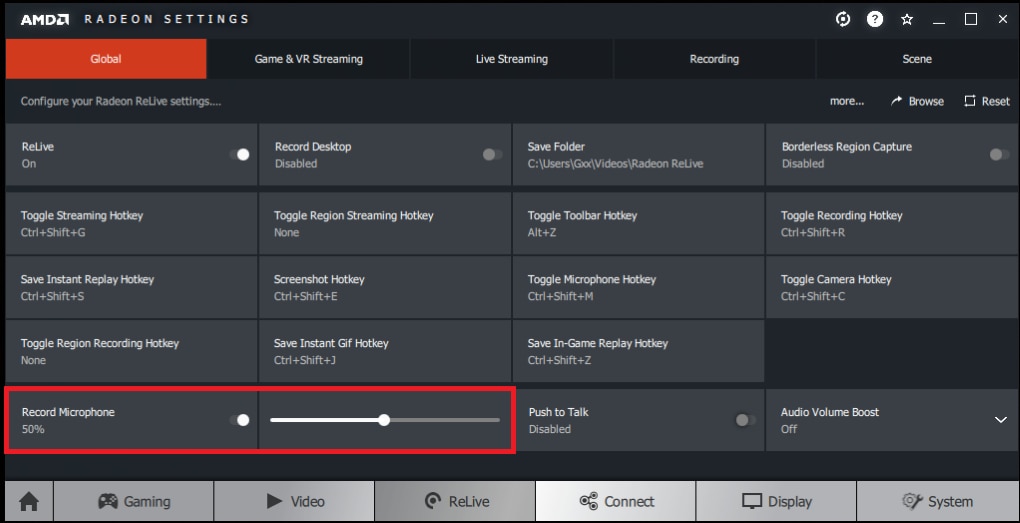
Push to Talk toggles microphone audio capture on/off through the use of a user defined hotkey.
After enabling Push to Talk, click the Push to Talk Hotkey option to specify the hotkey.

Audio Volume Boost
Audio Volume Boost is an option that once enabled, allows an increase in the volume of audio captured while recording or streaming.
The Audio Volume Boost options are:
- Off (Default)
- Low
- High
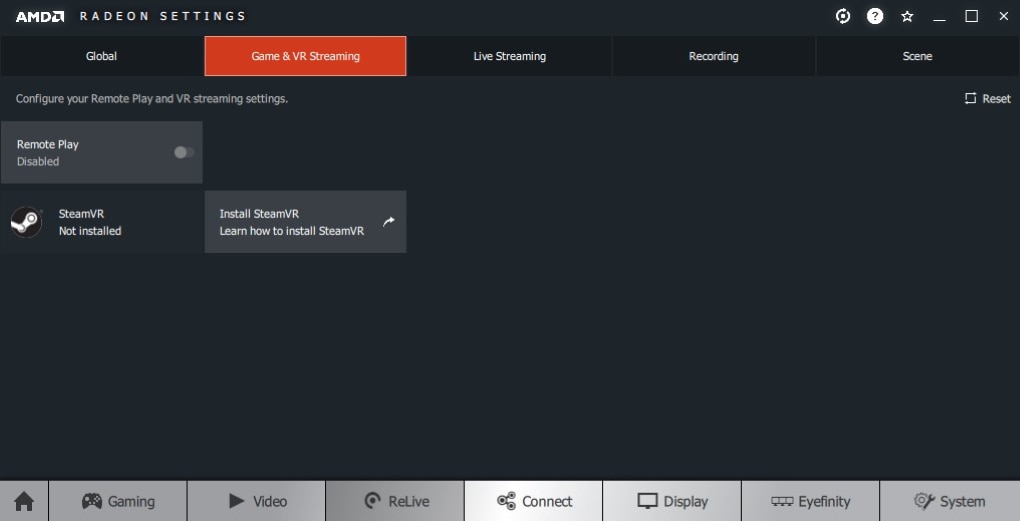
For more information about Remote Play, please refer to KB article: How to Setup and Configure Remote Play for Wireless VR Streaming Within Radeon™ Settings
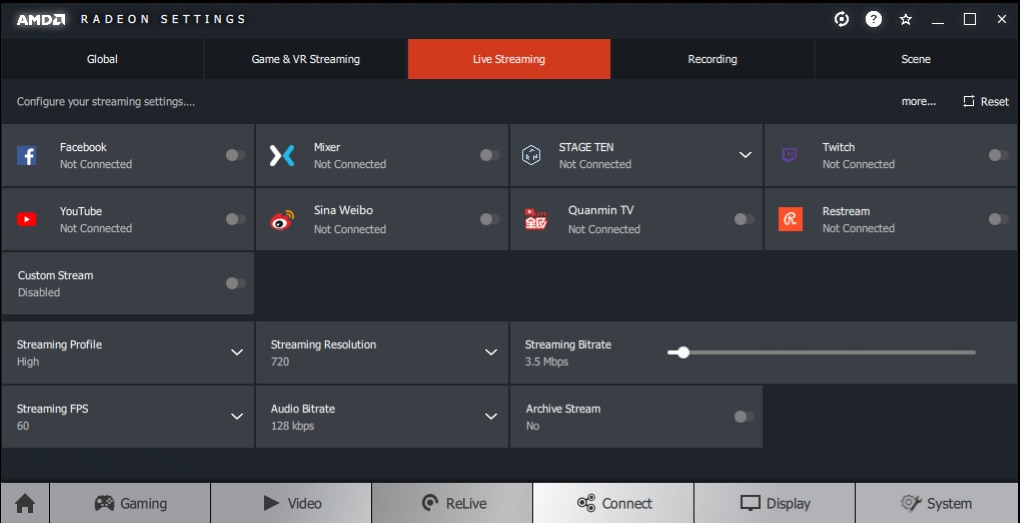
Live Streaming Settings
Live Streaming allows transmitting of your gameplay via streaming services such as Facebook, Mixer, Twitch, YouTube, Sina Weibo, STAGE TEN or Custom Streams to other users so that they can follow your session.
Radeon ReLive offers many customizable settings which can influence the quality of your stream. These include:
- Streaming Profile
- Streaming Resolution
- Streaming Bitrate
- Streaming FPS
- Audio Bitrate
- Archive Stream
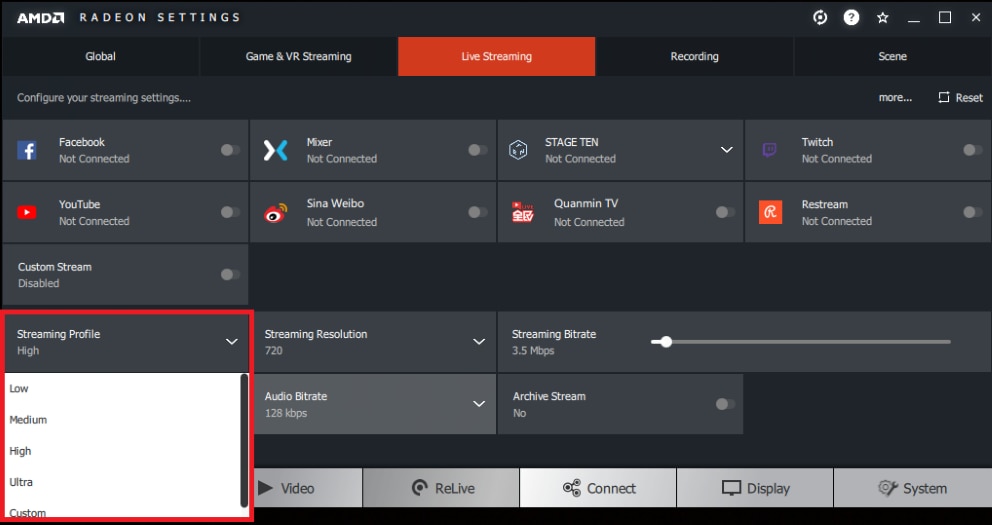
Streaming Profile
Streaming profile contains predefined settings that control the level of quality of your gameplay footage. These include:
- Low
- Medium
- High
- Ultra
- Custom
These profiles automatically adjust the streaming resolution and recording bitrate depending on which profile you use.
Note! Streaming consumes internet resources/bandwidth. Users with limited internet plans should verify that they have adequate bandwidth available. Depending on your internet service it may impact the quality of your stream and may potentially introduce more cost to your service.
In this example below, the Medium profile was selected.

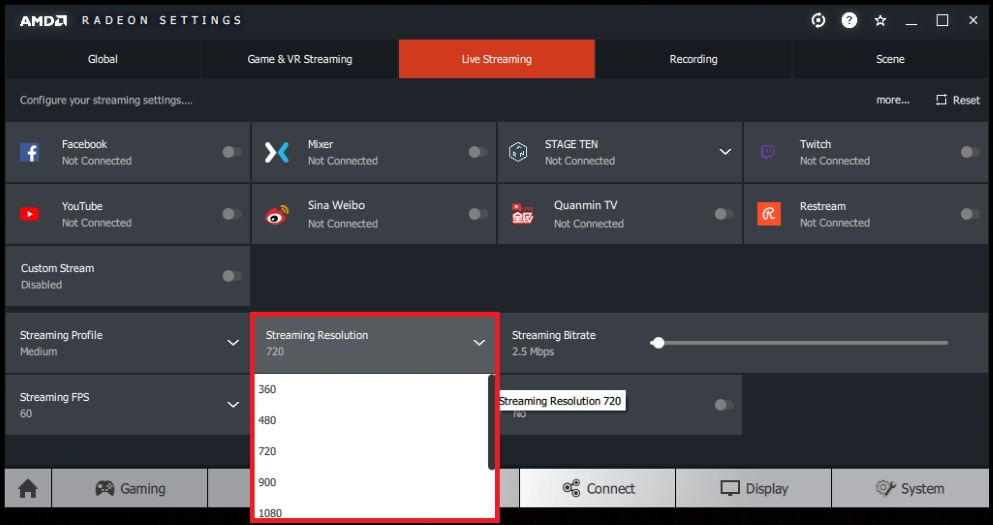
Streaming Resolution
Streaming Resolution allows customization of the output video resolution of your stream. Streaming Resolution is the quality at which you are broadcasting.
The Streaming Resolution drop down arrow allows selection of Streaming Resolutions of 360, 480, 720, 1080 and 1440.
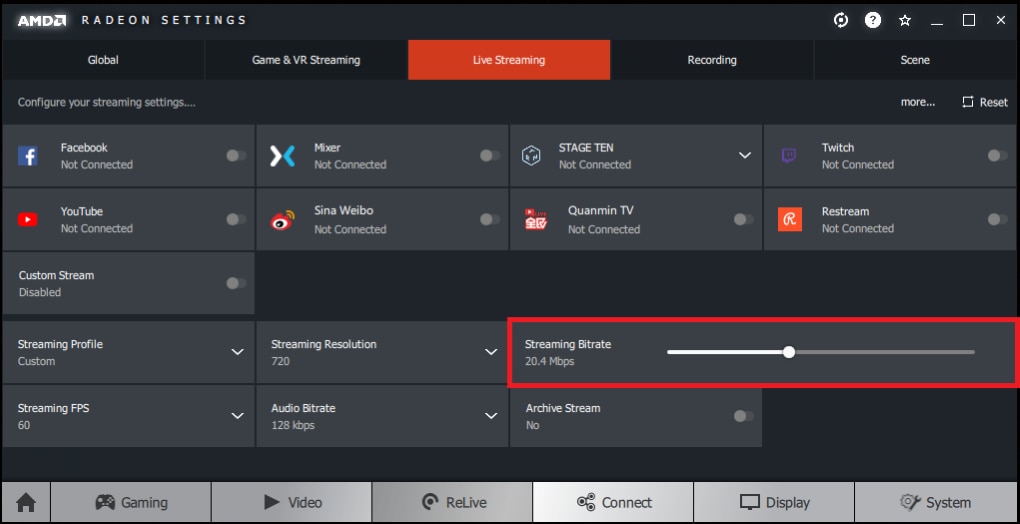
Streaming Bitrate
Streaming Bitrate is the amount of data measured in Mega Bits Per Second (Mbps) dedicated to a second of video. The higher the bit rate, the better stream video quality.
The Bitrate slider can be adjusted in increments of 0.1 Mbps.
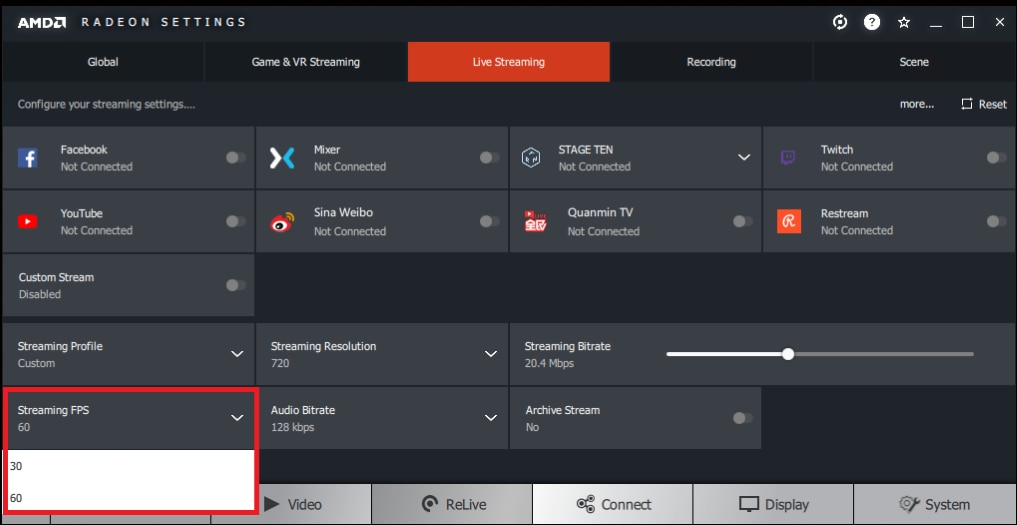
Streaming FPS
Streaming FPS allows customization of the frames per second used in the stream. Using a higher FPS value (up to a maximum of 60) will result in a smooth viewing experience for your viewers.
Streaming FPS can be set at 30 or 60.
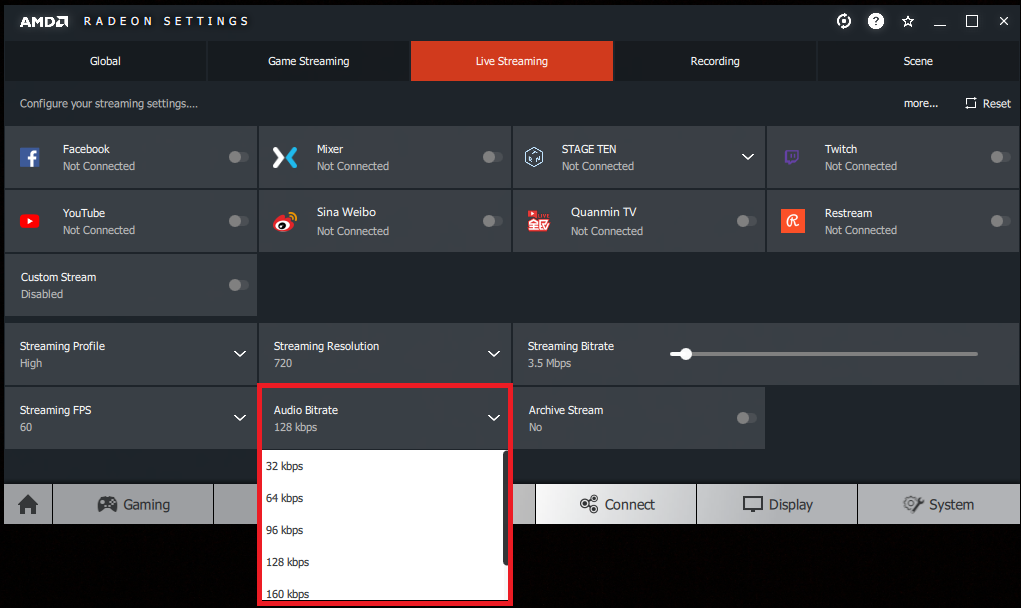
Audio Bitrate
Audio Bitrate is the amount of Audio data measured in Kilobits per Second (Kbps). The higher the Bitrate, the better the Audio quality of the stream.
The Audio Bitrate drop down arrow allows selection of Audio Bitrate from 32 Kbps up to 192 Kbps increasing in increments of 32 Kbps.
Archive Stream
When enabled, Archive Stream saves a video copy of the stream to the save folder which can be later viewed or edited.
By default, Archive Stream is set to Off.
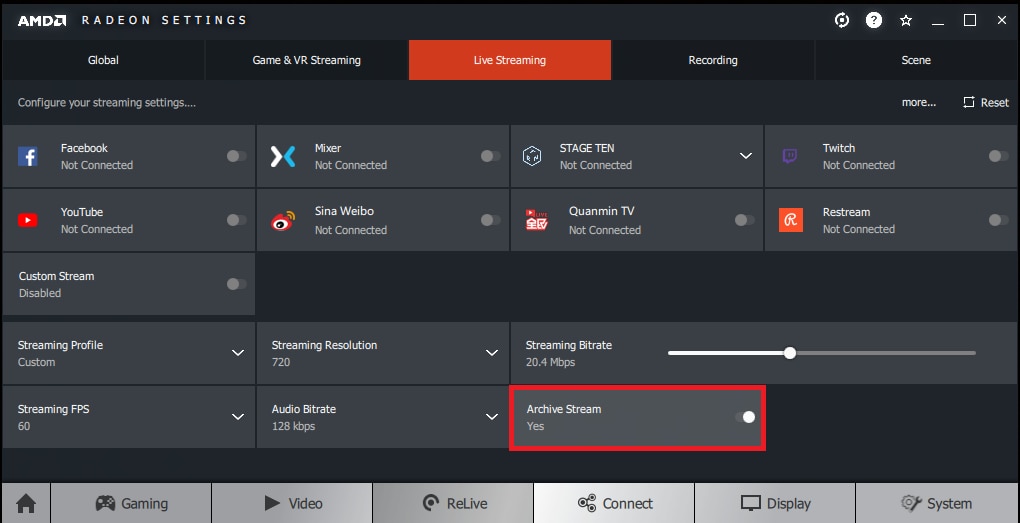
NOTE! When turning on Archive Stream, the video file size will vary depending on the Streaming profile selected and the duration of the session. Please ensure there is adequate hard drive space available.
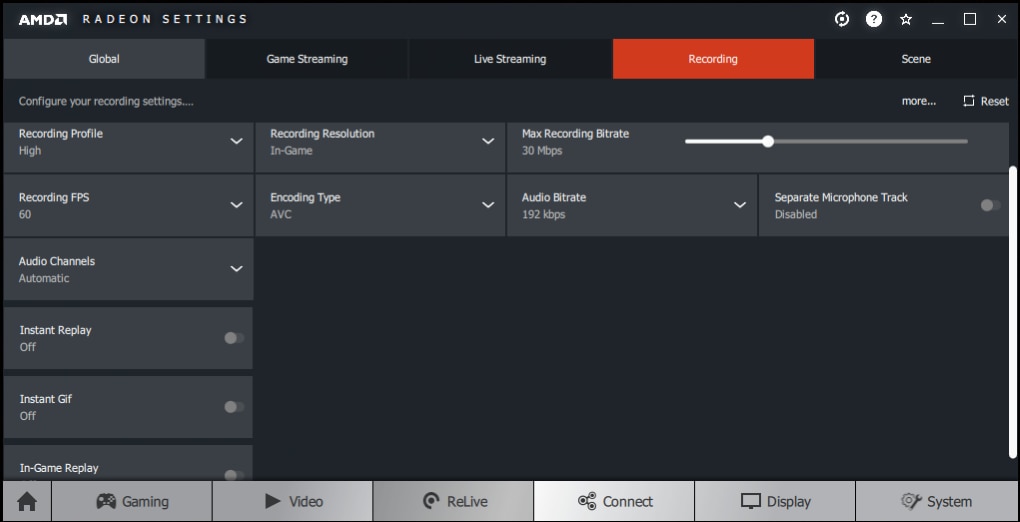
Recording Settings
The recording tab allows customization of the visual and sound quality of your gameplay footage and contains different settings which affect the file size of your video. These include:
- Recording Profile
- Recording Resolution
- Max Recording Bitrate
- Recording FPS
- Encoding Type
- Audio Bitrate
- Separate Microphone Track
- Instant Replay
- Instant Replay Estimated Size
- Instant Gif
- In-Game Replay
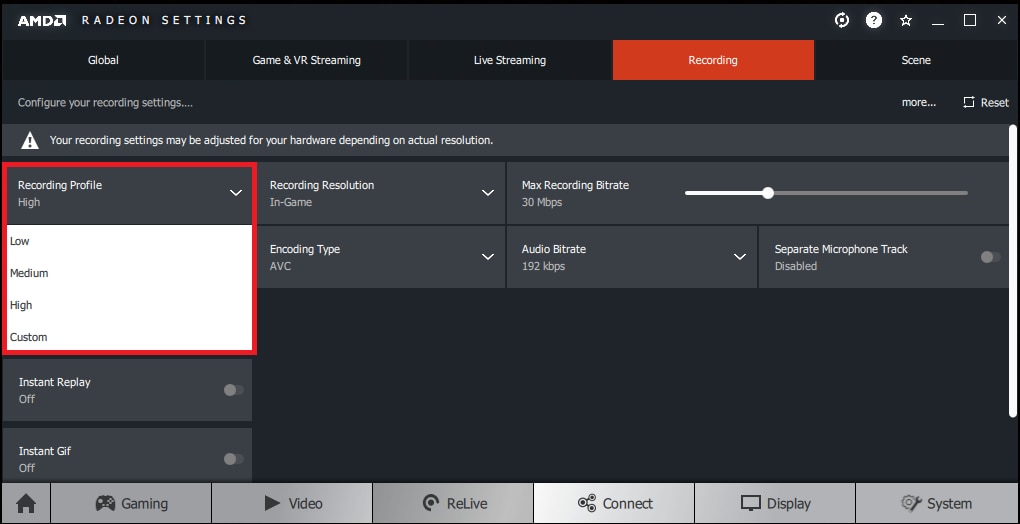
Recording Profile
Recording profile contains predefined quality settings that control the level of quality and file size of your gameplay footage. These include:
- Low
- Medium
- High
- Custom
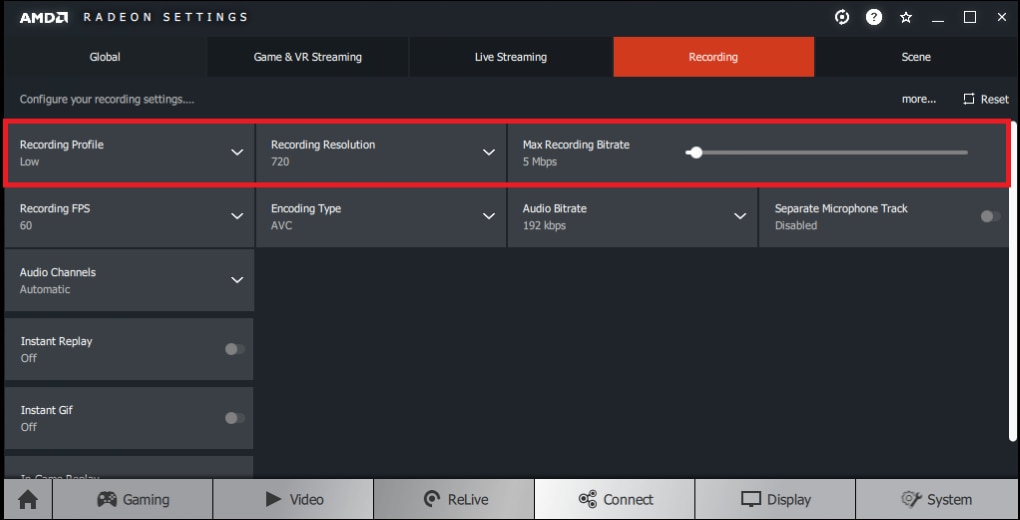
These profiles automatically adjust the recording resolution and recording bitrate depending on which profile you us
In the example below, the Low profile was selected.
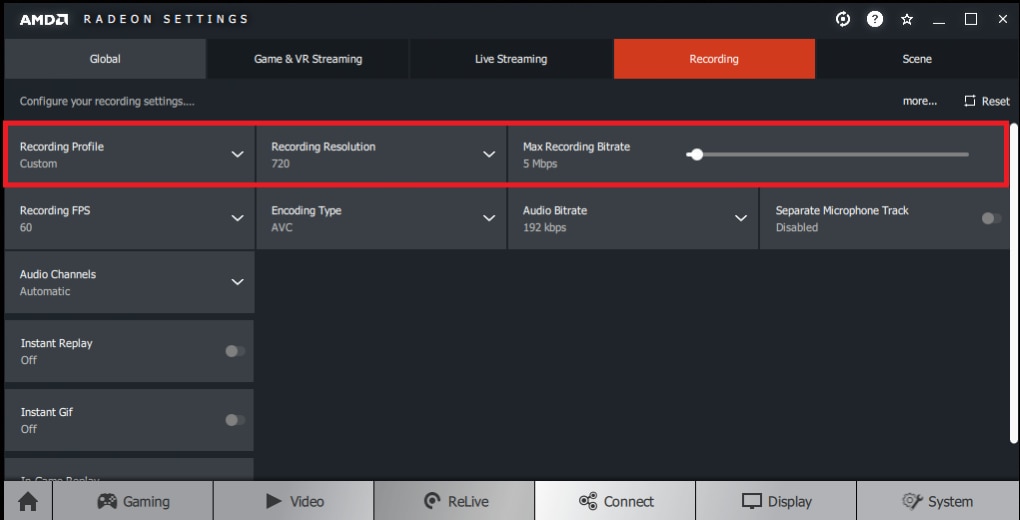
Selecting Custom allows full control over the Recording Resolution, Recording Bitrate and Recording FPS, as displayed in the image below.
Recording Resolution
Recording resolution allows customization of the output video resolution of your recording. Setting a lower resolution than the native resolution of your monitor will result in a smaller video file.
In-Game will automatically match the resolution used in your game with the Recording Resolution output video.
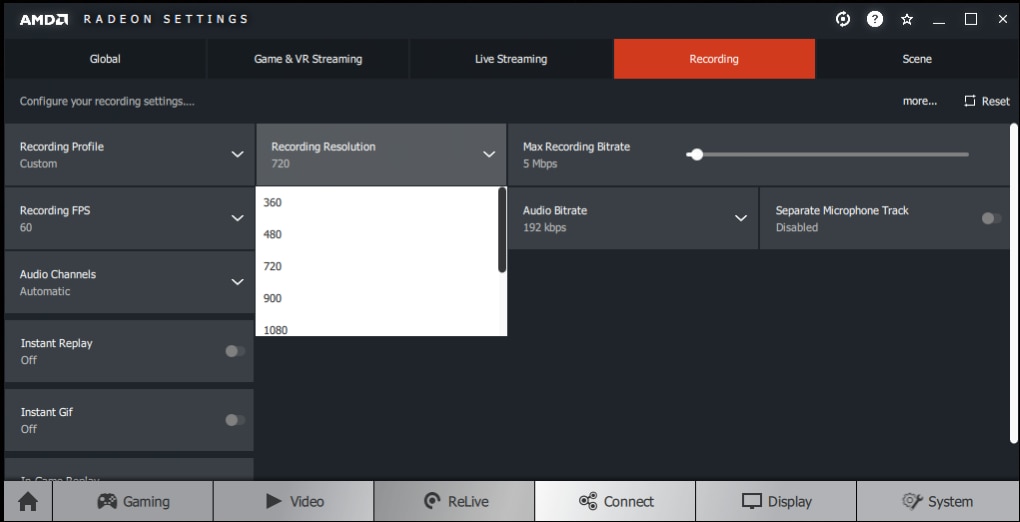
Note! The availability of Recording Resolutions will depend on the GPU being used.
Recording Bitrate
Bitrate is the amount of data measured in Megabits per Second (Mbps) dedicated to a second of video. The higher the bit rate, the better video image quality and the larger the file size of the output video file.
The default Bitrate is 30 Mbps and can be adjusted in increments of 0.1 Mbps.
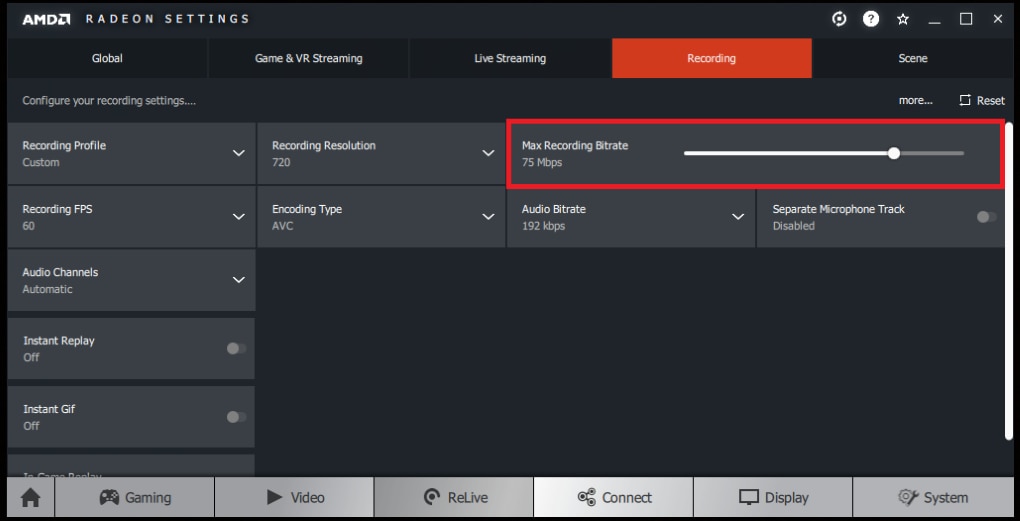
NOTE! When using high Bitrates, please ensure there is adequate free space on your hard drive.
Recording FPS
Recording FPS allows customization of the frames per second used in the video output file. Using a higher FPS value (up to a maximum of 60) will result in smooth video playback.
Recording FPS can be set at 30 or 60.
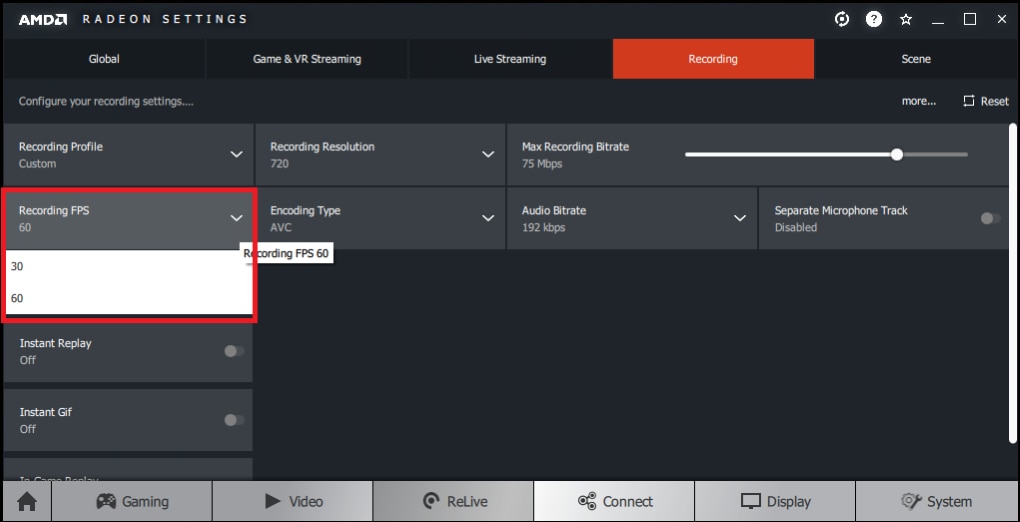
NOTE! The availability of 60 FPS will depend on the graphics card and resolution being used.
Encoding Type
Encoder type refers to the type of video encoding used to capture recorded gameplay.
HEVC (also known as H.265) is the latest video compression standard which offers higher quality and smaller file sizes as compared to AVC (H.264). More advanced information on these encoding formats is available online.
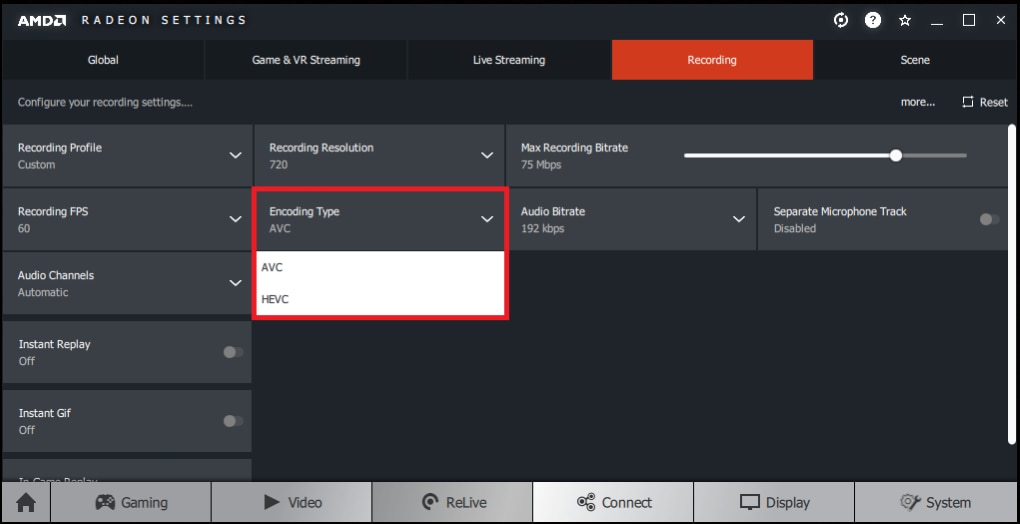
NOTE! HEVC is currently only supported on Radeon RX series and newer Graphics products.
NOTE! The availability of 60 FPS will depend on the Encoding Type and graphics card being used.
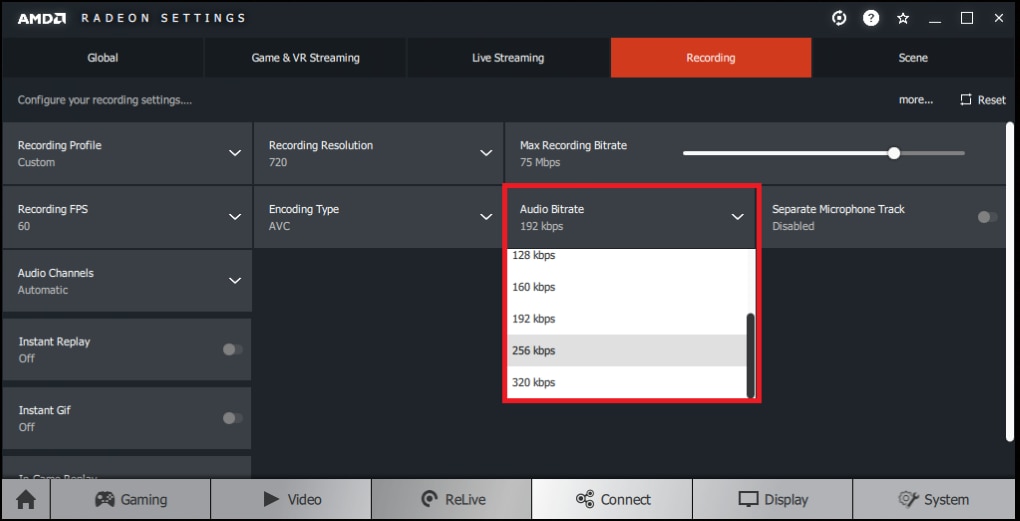
Audio Bitrate
Audio Bitrate is the amount of Audio data measured in Kilobits per Second (Kbps). The higher the Bitrate, the better the Audio quality and the larger the file size of the output file.
The Audio Bitrate drop down arrow allows selection of Audio Bitrate from 32 Kbps up to 320 Kbps increasing in increments of 32-64 Kbps.
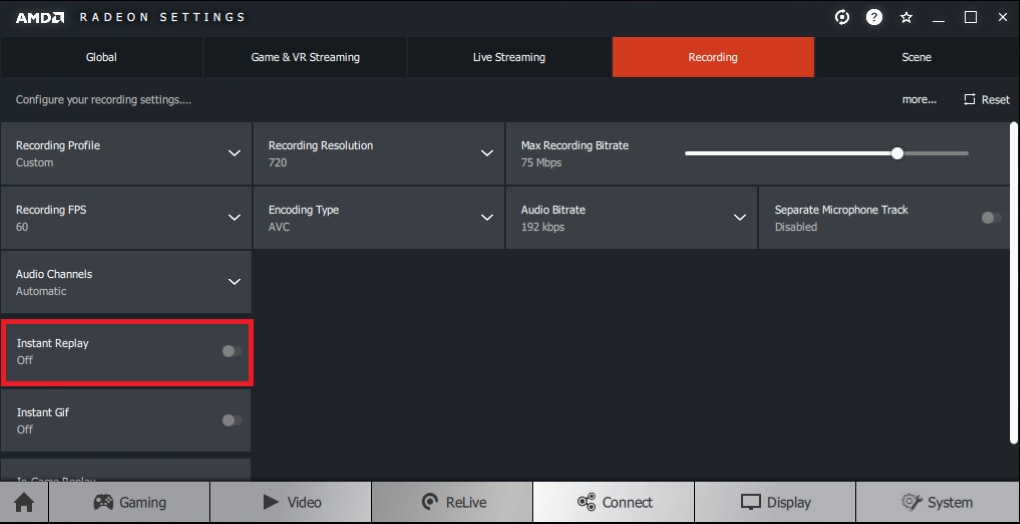
Instant Replay
When enabled, Instant Replay will continuously record your gameplay which allows you to playback up to the last 20 minutes of the session.
To access the replay footage, the video file is stored in your Save Folder. This can be useful to review recent content that was not captured.
To enable, click Instant Replay.
Once enabled, the Instant Replay slider can be adjusted in increments of 30 seconds, up to a maximum total of 20 minutes per session.
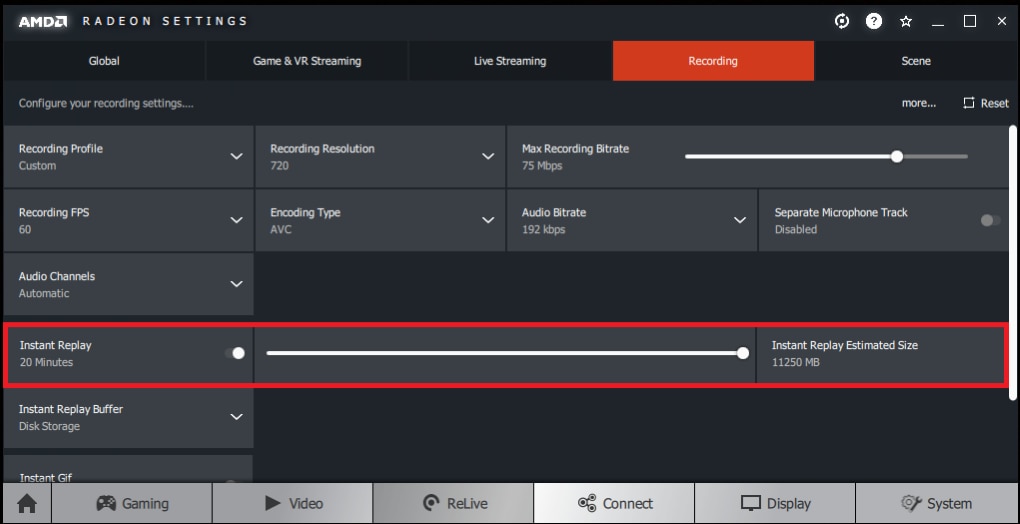
Note! The size of the Instant Replay footage is determined by the Recording Profile being used.
Instant Gif
Instant Gif allows short segments of game streaming video to be encoded into the Gif format. GIF stands for Graphics Interchange Format, a file format in which images and short videos are compressed to dramatically reduce file size.
Press the assigned hotkey to create an Instant Gif recording, at the point in gameplay where you wish to have an Instant Gif created. The hotkey assigned to Instant Gif is available on the Global tab as shown below.
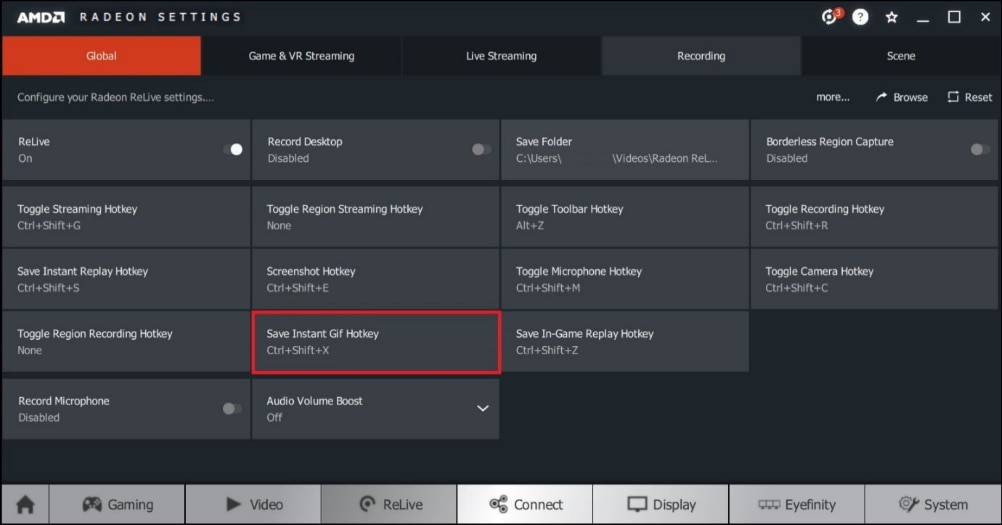
Click on Instant Gif on the Recording tab to enable the Instant Gif feature.

Drag the slider to increase the length, in seconds, of the Gif recording. Values can range from 5 to 30 seconds.
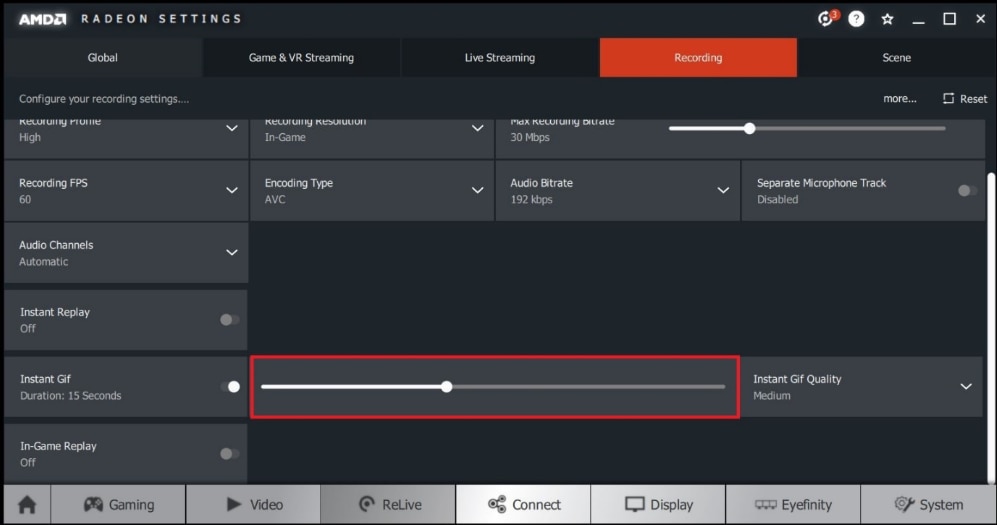
Click on the Instant Gif Quality option and choose between High (1280x720), Medium (960x540) or Low (640x360) quality settings.
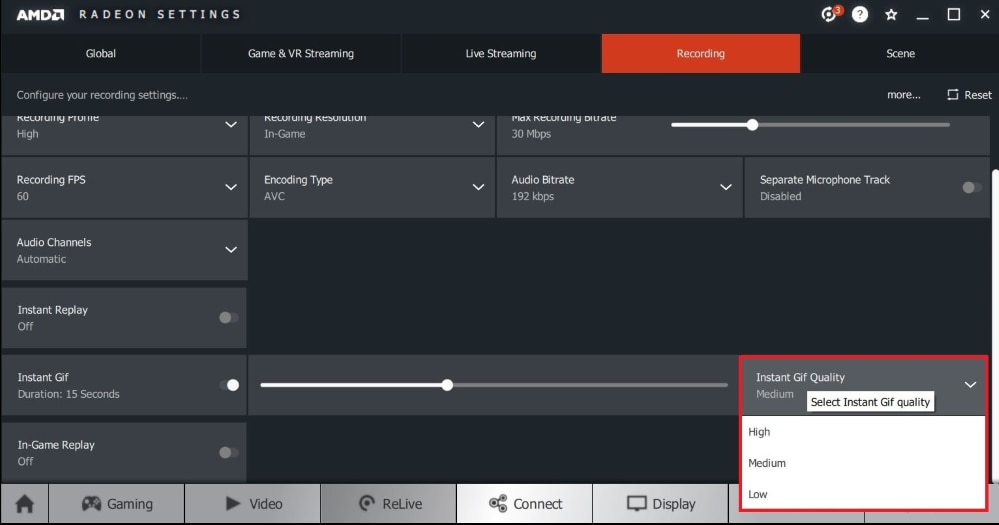
Now you have configured Instant Gif recording settings.
Begin playing the game and press the assigned hotkey when you wish to begin Instant Gif recording. A Gif file will be created in the “users\<username>\Videos\Radeon Relive\Instant Gif” folder.
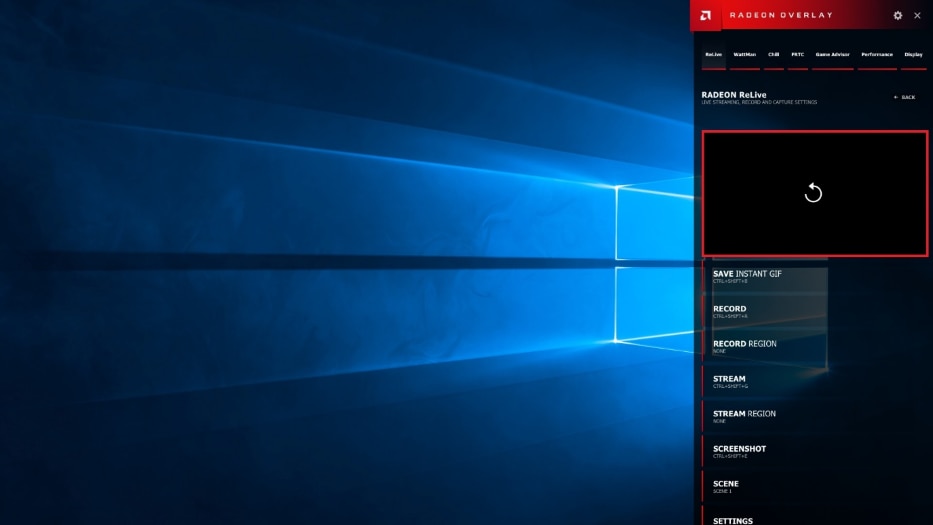
The last recorded Instant GIF can now be viewed in a preview window (in the Radeon Overlay), as shown below.
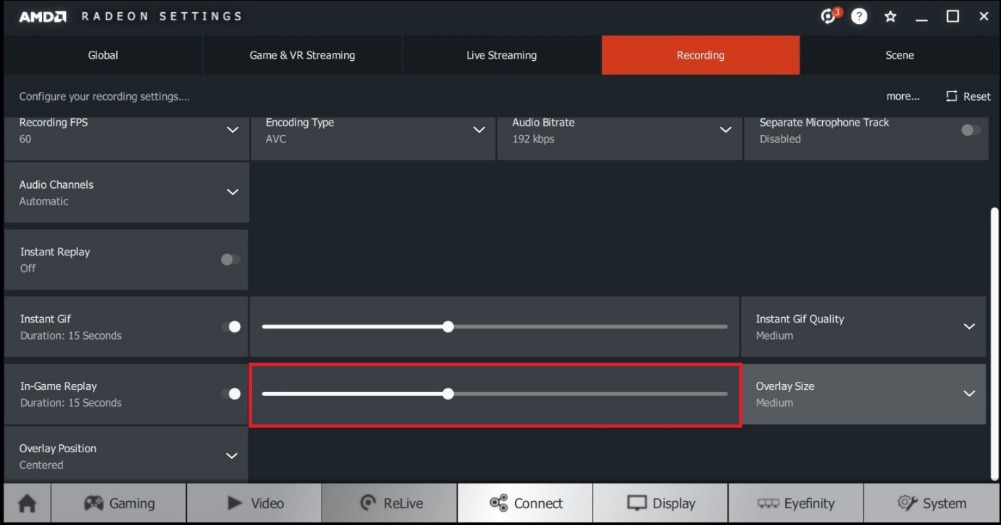
In-Game Replay
In Game Replay provides the user with an immediate view of a short clip of recorded Instant Replay video, overlaid on the game screen, without having to interrupt gameplay.
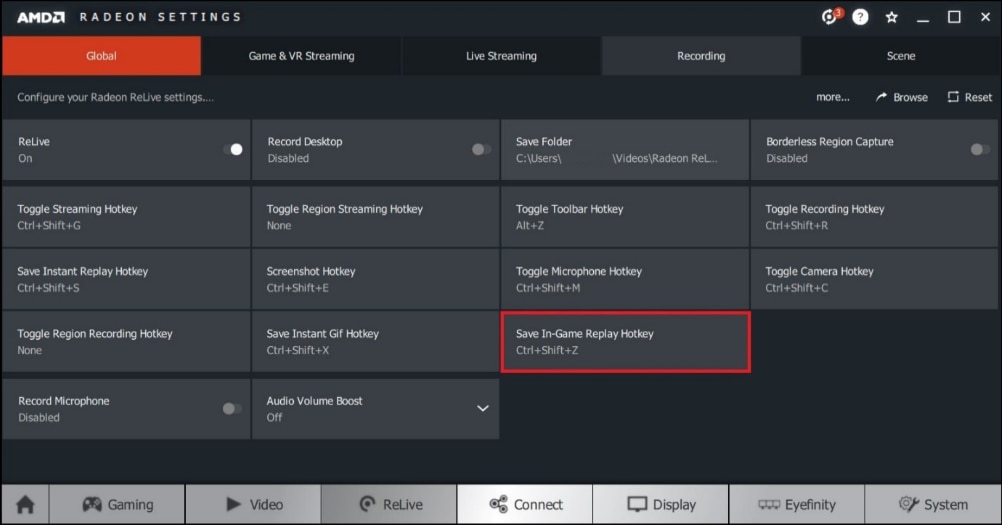
Press the assigned hotkey to bring up the In-Game Replay window, which will be displayed over your game screen. The hotkey assigned to In-Game Replay is available on the Global tab, as shown below.
Click on In-Game Replay on the Recording tab to enable the In-Game Replay feature.
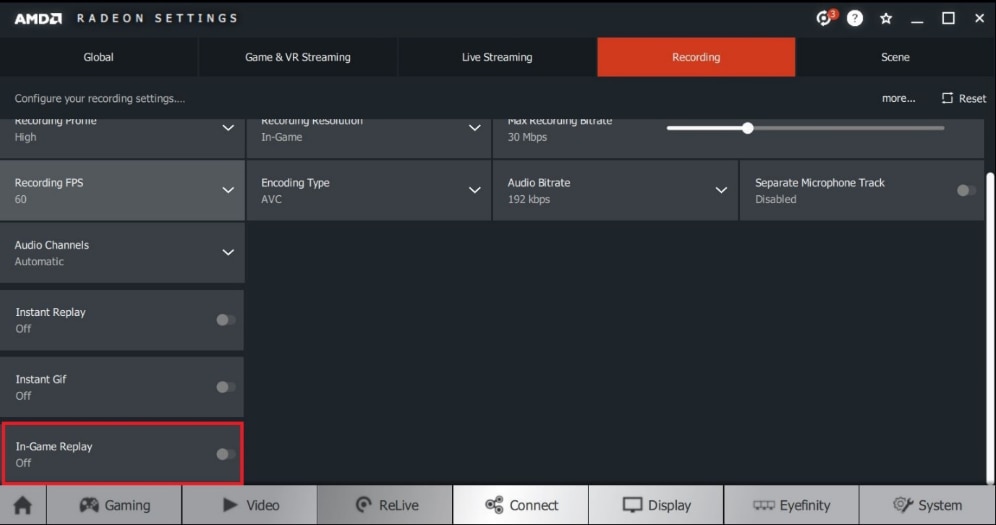
NOTE! Instant Replay must be enabled in order for In-Game Replay to work.
Drag the slider to increase the length, in seconds, of the In-Game Replay recording. Values can range from 5 to 30 seconds.
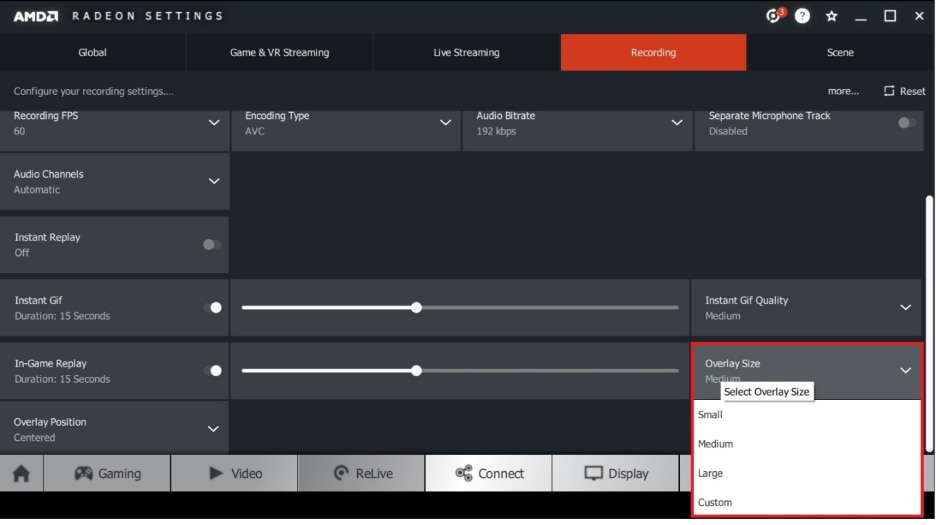
Click on the Overlay Size option and choose between Small, Medium, Large and Custom options for the size of the Instant Replay overlay window.

If Custom is selected, you can choose the Width and Height of the Overlay and its position on the screen.
Click on the Overlay Position option and choose where you wish to have the In-Game Replay window positioned on the screen. You can choose any of the four corners of the screen or centered in the middle.
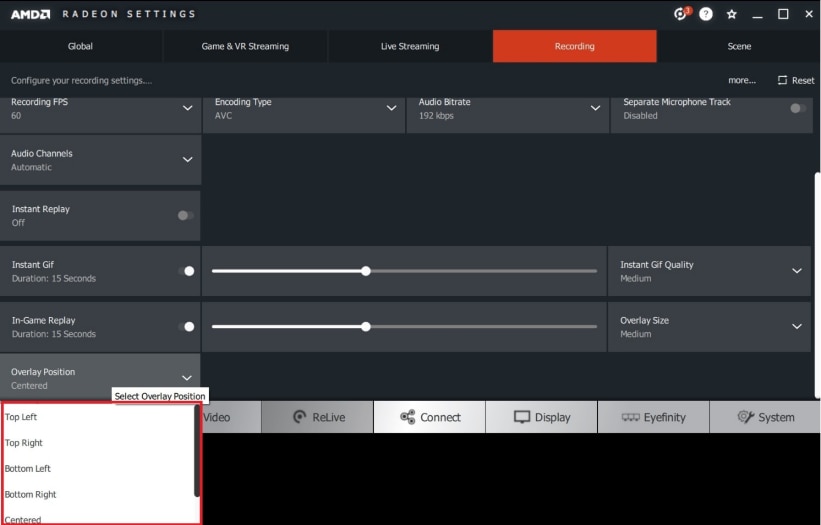
Now you have configured the In-Game Replay settings. Begin playing the game and press the assigned hotkey to display the In-Game Replay overlay. This overlay will be displayed on the existing screen, at the position and for the duration specified.
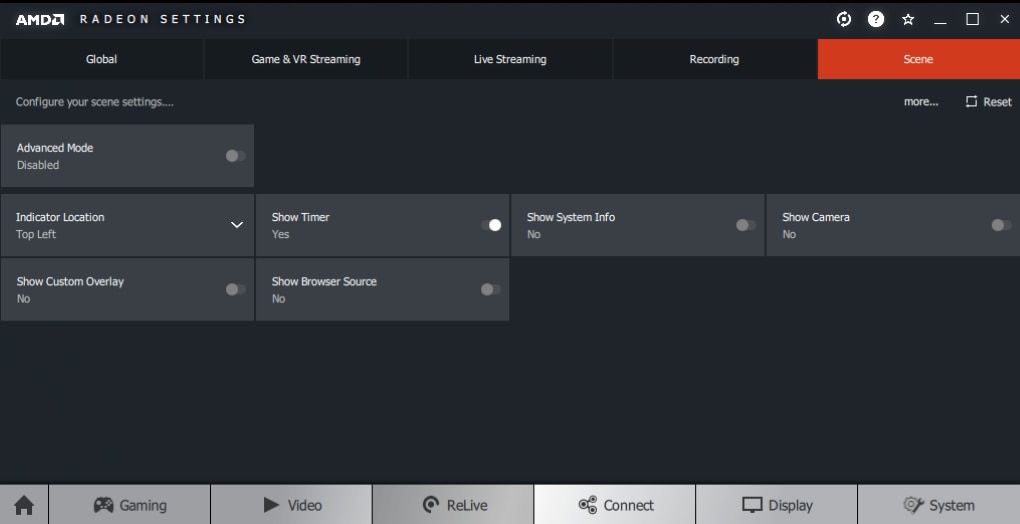
Scene Settings
The Scene tab allows customization of system information and graphics that appear on your recording or stream. These include:
- Indicator Location
- Show Timer
- Show System Info
- Show Camera
- Show Custom Overlay
- Show Browser Source
NOTE! Show Timer and Show Browser Source are new features introduced with Radeon Software Adrenalin 2019 Edition (18.12.2)
Indicator Location
The Indicator Location option enables customization over the location of the Radeon ReLive Indicator and provides a visual notification that content is being captured.
The Indicator Location drop down arrow allows repositioning of the Indicator into different corners of the screen.

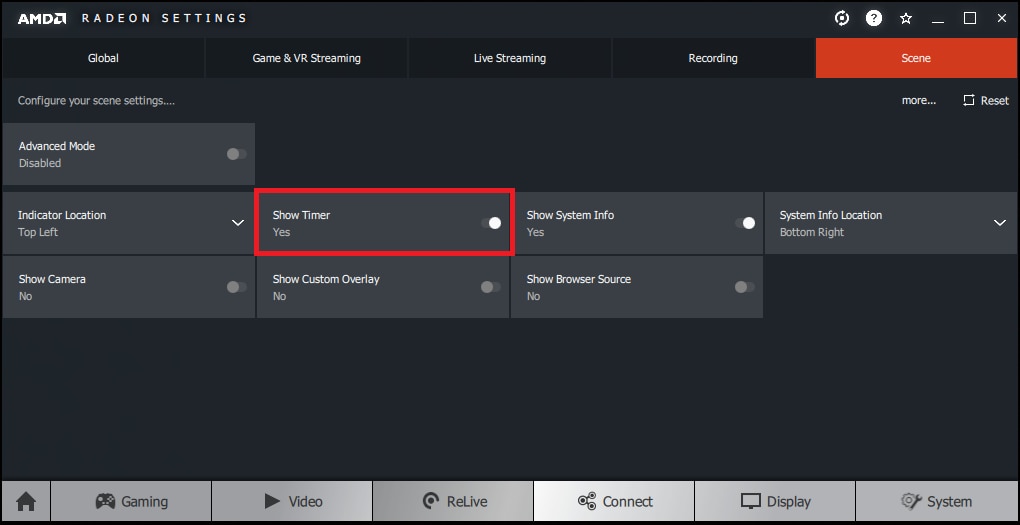
Show Timer
The Show Timer option provides a visual notification that appears on screen indicating the elapsed time for the Recording/Streaming session.
Show System Info
Show System Info enables a notification banner which contains CPU, GPU and System Memory information to appear at the start of a recording or stream.
Show System Info can be set to Yes or No.
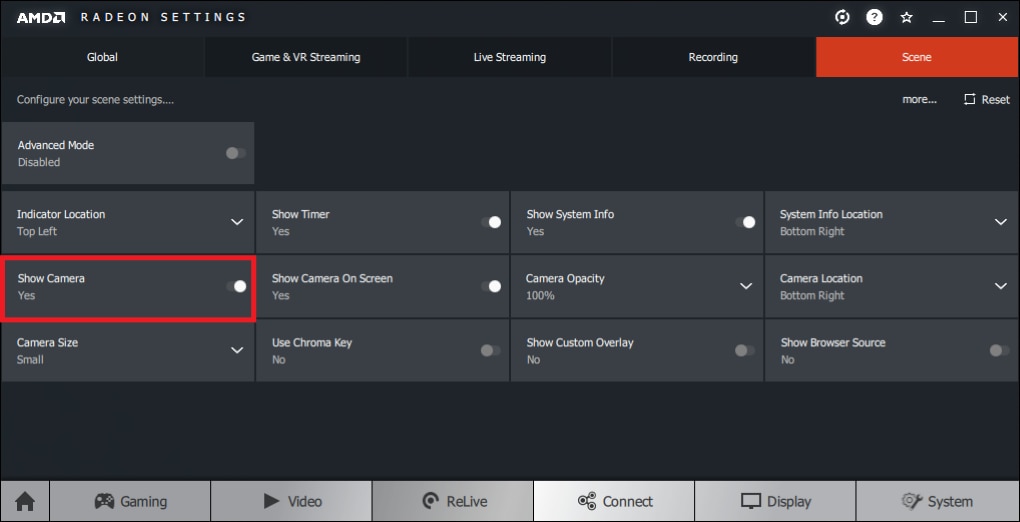
Show Camera
Enabling Show Camera allows a camera connected to the computer to overlay a video image on top of the content being streamed. This allows the streamer to be visible to the viewers whilst providing live commentary.
The Show Camera option enables customization of camera settings when set to yes, these settings include:
- Show Camera on Screen
- Custom Camera Location
- Camera Opacity
- Camera Size
- Use Chroma Key
- Show Custom Overlay
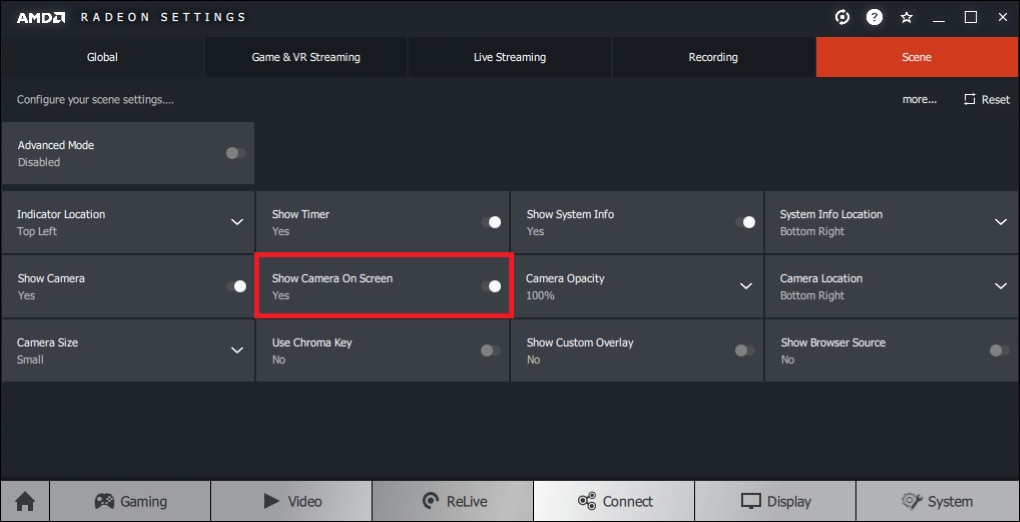
Show Camera on Screen
Enable this option to overlay the camera video image on top of content.
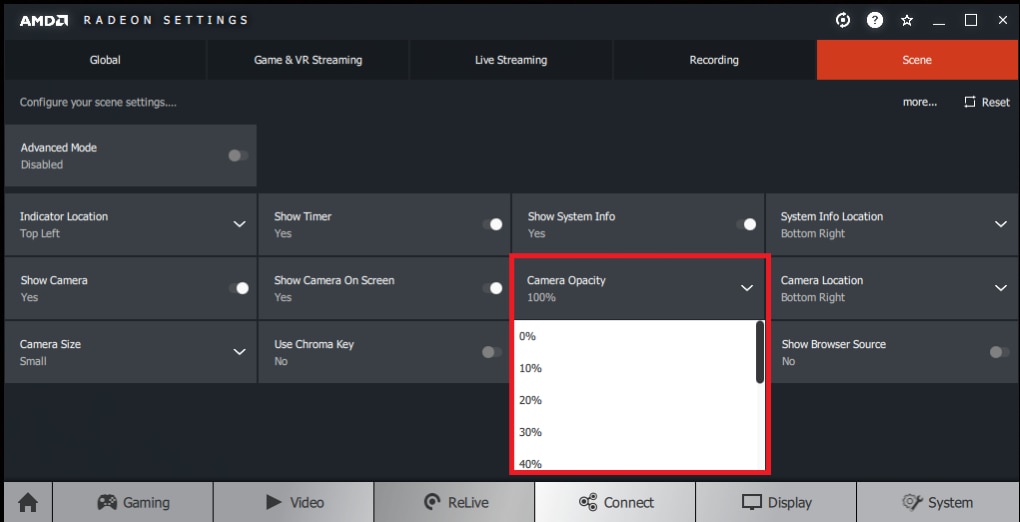
Camera Opacity
Camera Opacity enables control over the level of transparency applied to the video overlay of the Camera image.
The Camera Opacity drop down arrow allows selection of Opacity from 0% up to 100% increasing in increments of 10%
Camera Location
By default, the camera is positioned at the bottom right of streamed content. Custom Camera Location allows repositioning of the camera video image.
The Camera Location drop down arrow allows repositioning of the Camera video image at different corners of the screen.
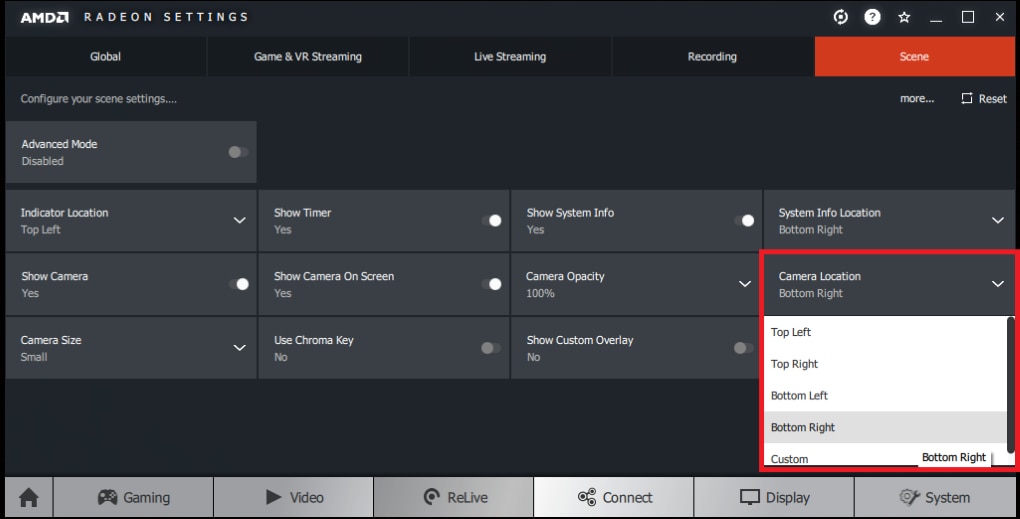
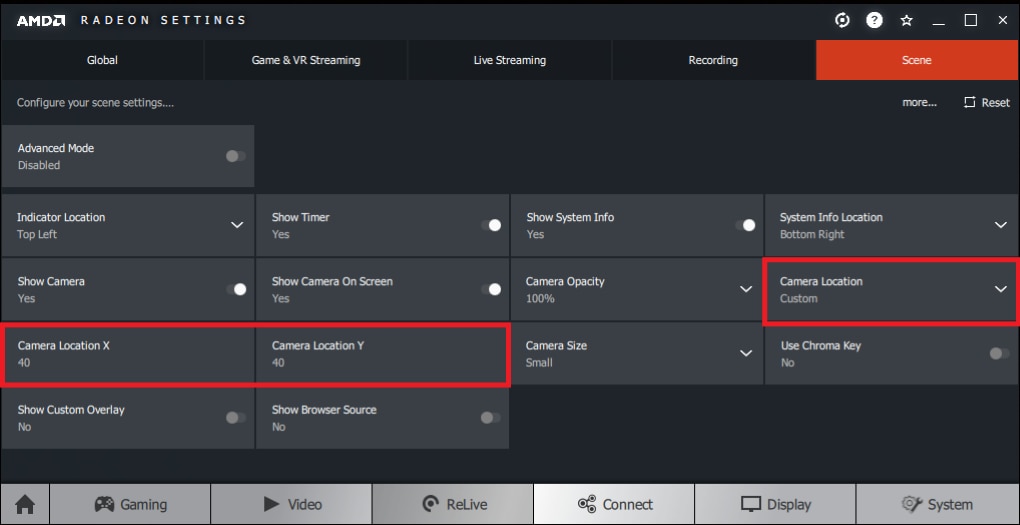
If the Custom is selected, the Camera Location Options X (horizontal) and Y (vertical) represent the number of pixels from the upper left corner of the screen that the camera video frame will display in.
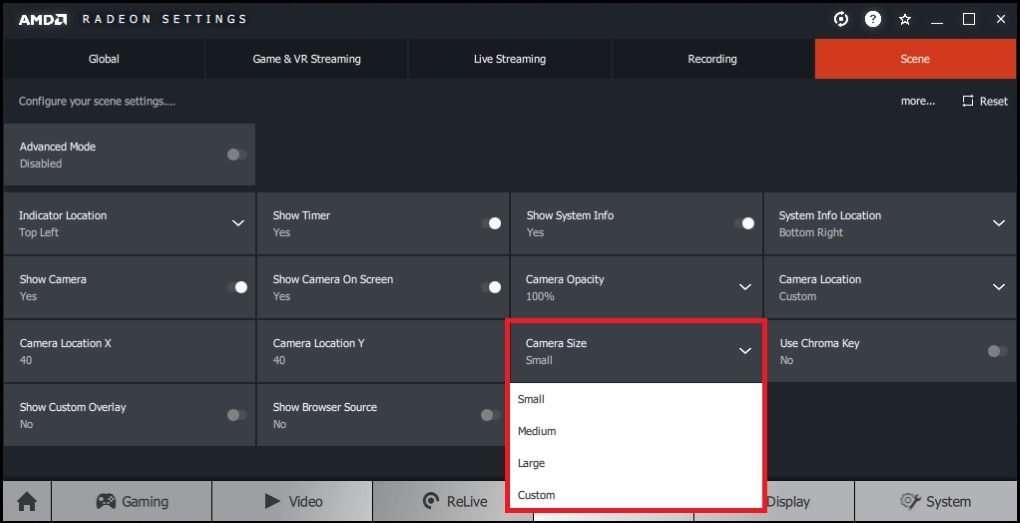
Camera Size
The Camera Size option allows you to select the size of the Camera video image, these sizes include:
- Small
- Medium
- Large
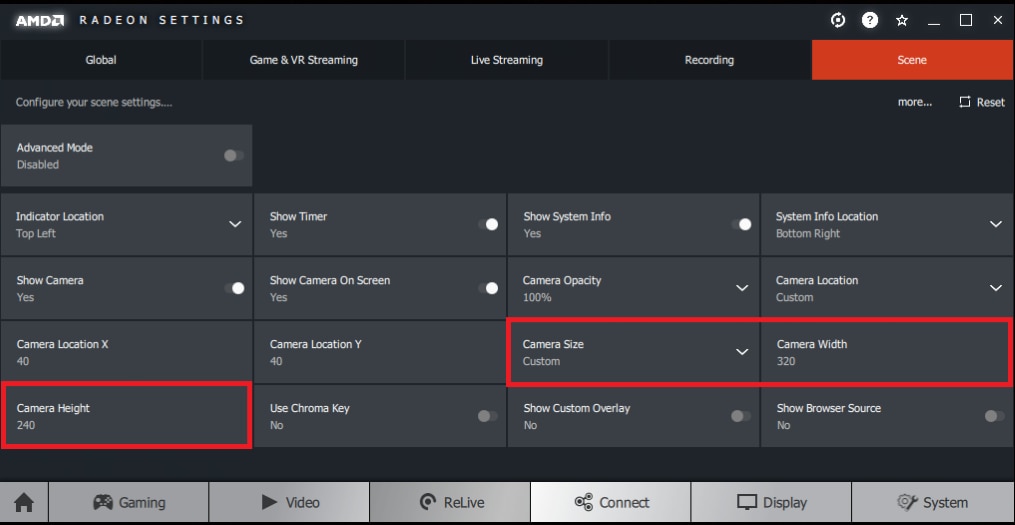
- Custom
If the Custom Camera Size option is selected, the Camera Width and Height (in pixels) can be manually entered.
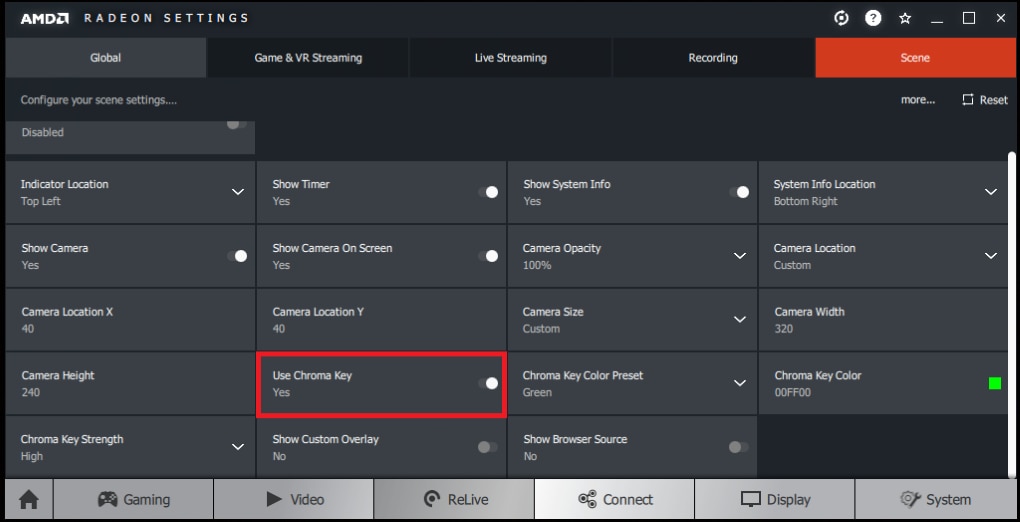
Use Chroma Key
Use Chroma Key provides background transparency when using a web camera for streaming content.
Chroma Key can be fine-tuned with colour removal strength pre-sets and custom colours.
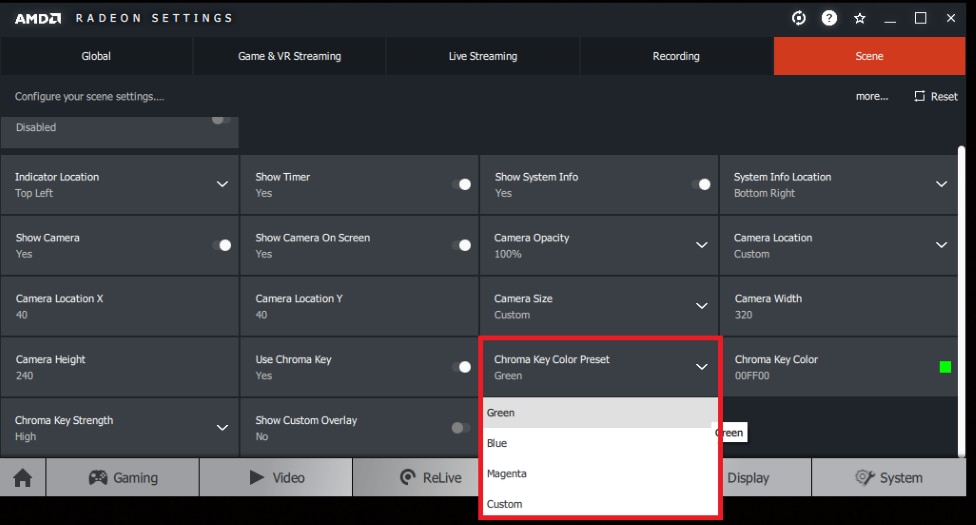
The Chroma Key Colour drop down arrow allows selection of Colour presets, these include:
- Green
- Blue
- Magenta
- Custom
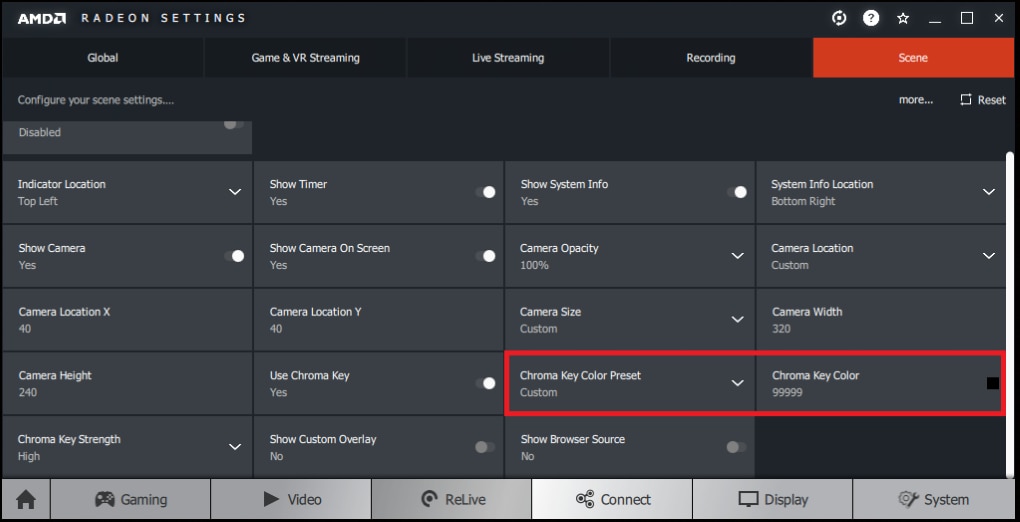
The Custom option allows fine grain control over Chroma Key Colours by using Hex colour codes.
More information about Chroma Key and Hex Colour Codes can be found online.
Enter the desired Hex Colour Code into Chroma Key Colour, in the example below 99999 was used.
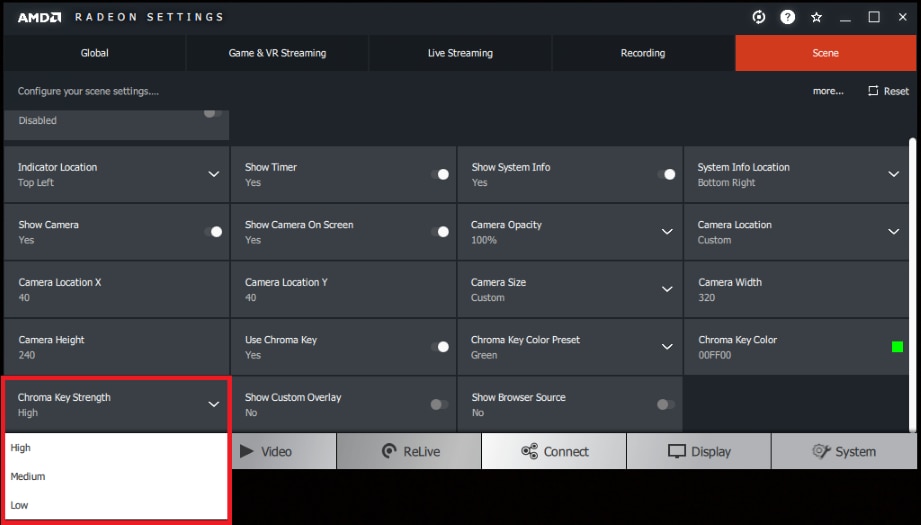
Chroma Key Strength
Chroma Key Strength controls the level of transparency of the Chroma Key and has three presets, these include:
- High
- Medium
- Low
Show Custom Overlay
The Show Custom Overlay option allows a custom image to be imported and displayed on the live stream. This can be useful for branding purposes or to provide information such as Twitter handle, Facebook page, etc. to the viewers.
Enable the Show Custom Overlay option, select Custom Overlay Image and point to the overlay image on your system.
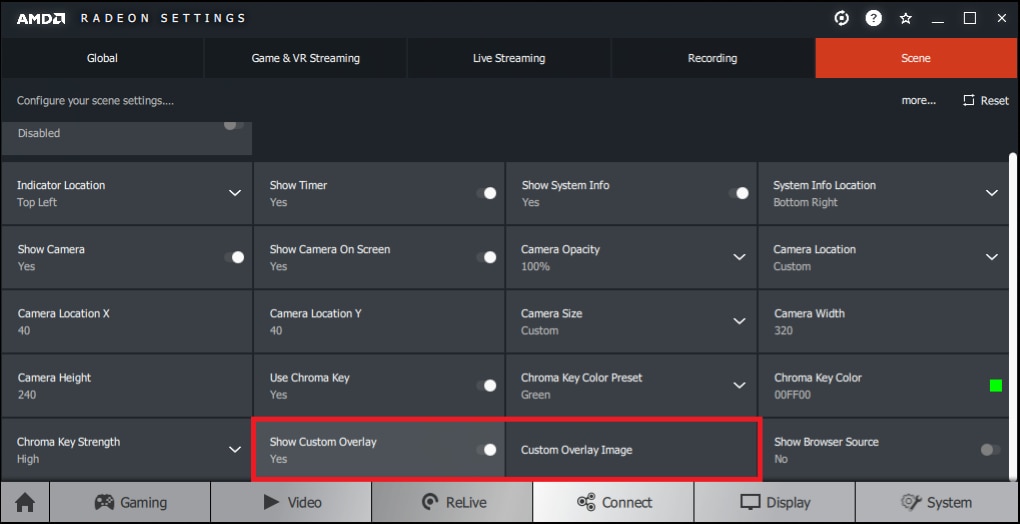
Note! The image must be in PNG format.
Show Browser Source
Browser Source allows embedding of a web page into the video stream. This can be used to display web-based content based on the URL specified.
The Scene option also offers an Advanced Mode which allows greater control over positioning of on-screen elements. To switch to Advanced Mode, click on the Advanced Mode Toggle.
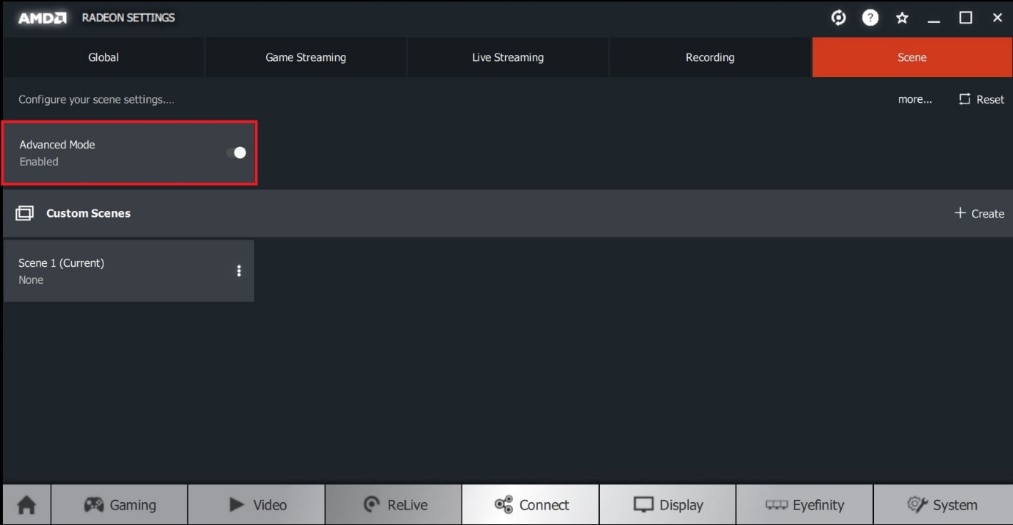
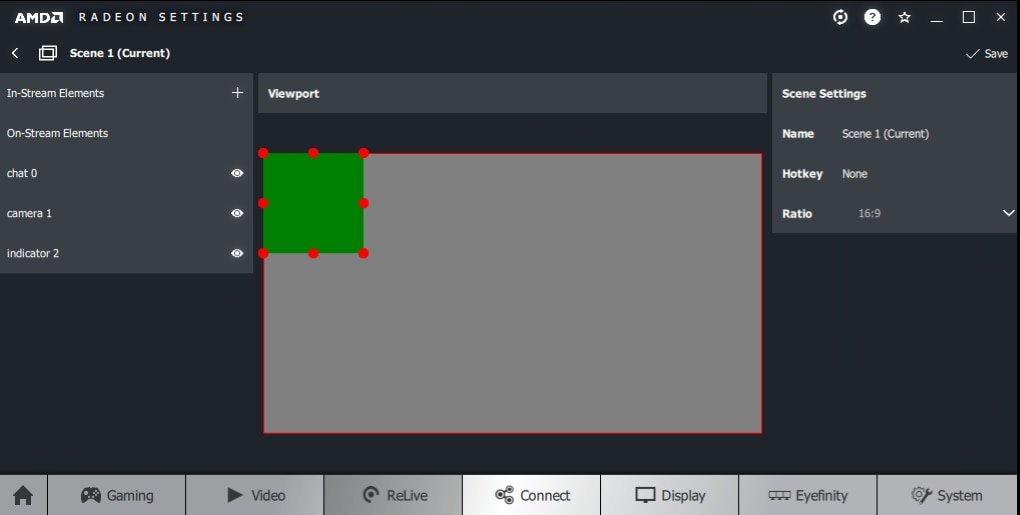
Once Advanced Mode is enabled, it will automatically create a Scene profile, with various screen elements that can be customized as shown below.
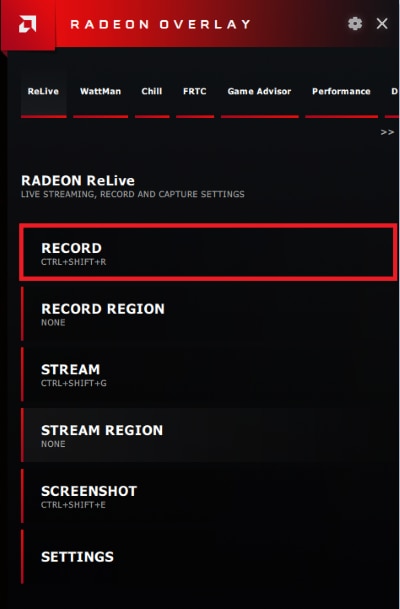
Radeon™ Overlay ReLive Settings
Radeon Software Adrenalin Edition 17.12.1 introduced Radeon Overlay, a feature that allows quick access to some common Radeon ReLive settings without having to toggle out of the current application.
The settings from top to bottom are:
- Record
- Record Region
- Stream
- Stream Region
- Screenshot
- Settings
Press the default Hotkey combination (Alt+Z) to bring up the Radeon ReLive options within Radeon Overlay.
NOTE! Some other options can be enabled by using a hotkey which will be listed below the option.

Record
Click Record to start recording content.
Click Stop to end the recording.
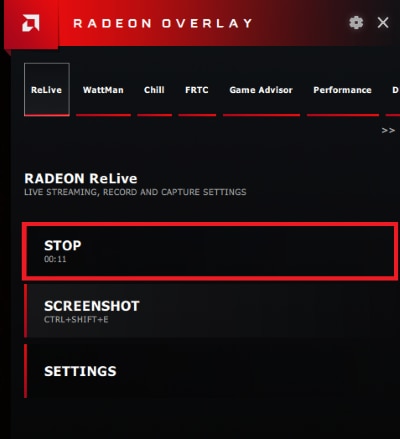
NOTE! Protected content cannot be recorded.
Record Region
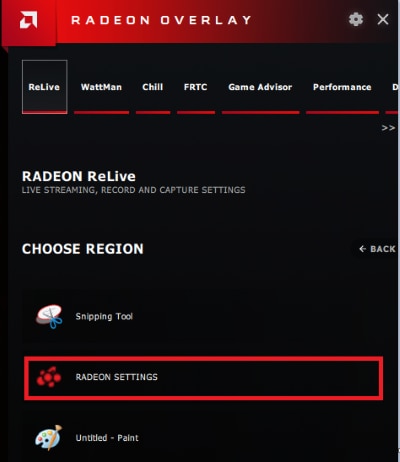
Record Region allows a selected application window to be captured. When you click Record Region a list of currently running applications will be displayed.
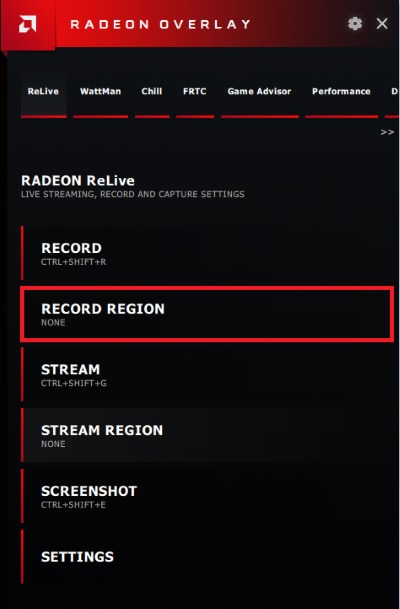
Click Record Region and then select the desired application window.
In the example below we selected Radeon™ Settings as the application to be recorded.

Stream
Click Stream to start streaming content.
For more information on Streaming, please refer to the section Live Streaming Settings Live Streaming Settings.
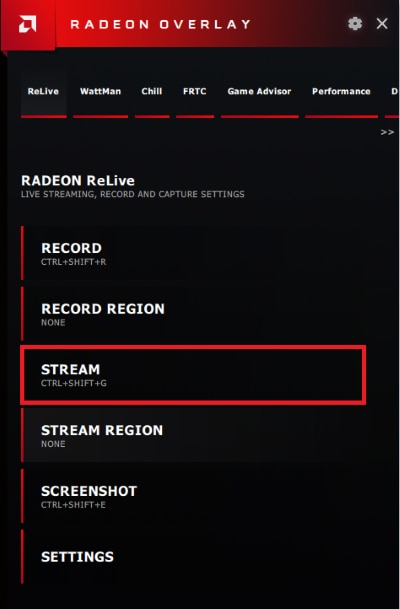
Click Stop to end the stream.
NOTE! Protected content cannot be streamed.
Stream Region
Stream Region allows a selected application window to be broadcasted. When you click Stream Region a list of currently running applications will be displayed.
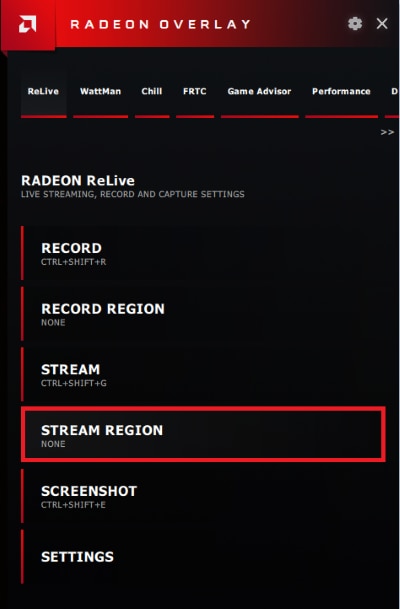
Click Stream Region and then select the desired application window.
In the example below we selected Radeon™ Settings as the application to be streamed.
NOTE! Protected content cannot be streamed.
Screenshot
Click Screenshot to take a screenshot.

Settings
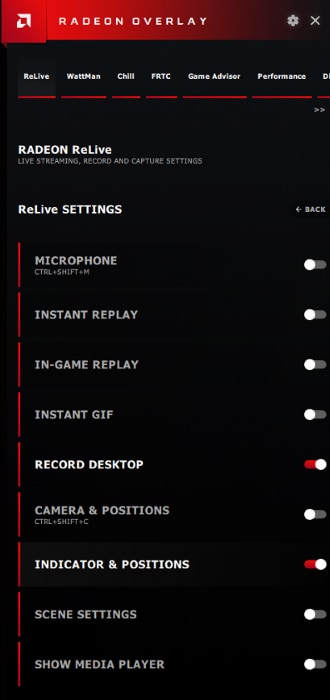
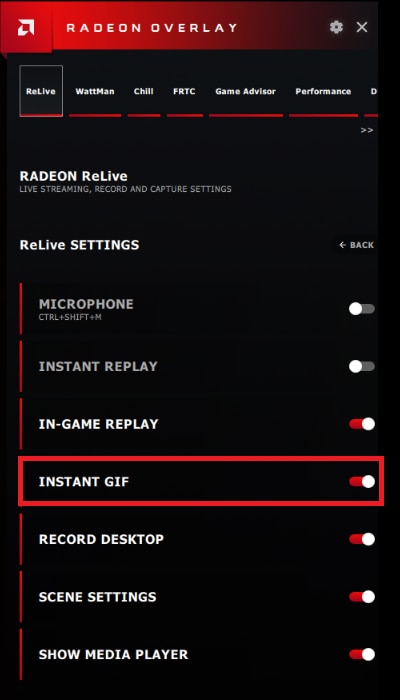
Click on Settings icon to adjust the Radeon ReLive options using Radeon Overlay.
- Back (Return to Previous Menu)
- Microphone
- Volume
- Instant Replay
- In-Game Replay
- Instant Gif
- Record Desktop
- Camera & Positions
- Indicator & Positions
- Scene Settings
- Show Media Player
NOTE! In-Game Replay, Instant Gif, Scene Settings and Show Media Player are new features introduced with Radeon Software Adrenalin 2019 Edition (18.12.2).
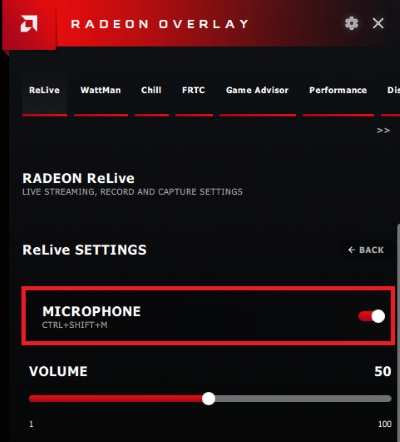
Microphone
The Microphone can be toggled on/off. (The Microphone is off by default)
The default Microphone volume is 50% and can be adjusted in increments of 1%.
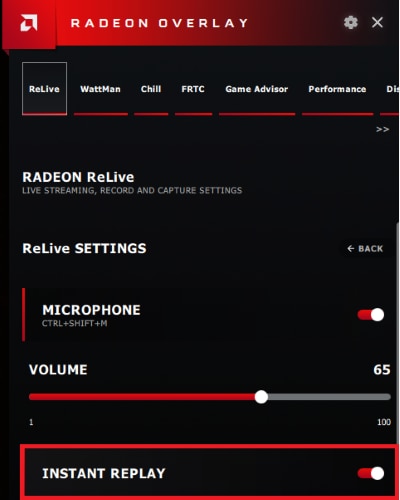
Instant Replay
Radeon ReLive can be configured to automatically record your gameplay, as explained in the previous section of this document.
Instant Replay can be toggled on/off.
Instant Gif
Instant Gif allows the recording of short sections of gameplay in Gif format. Instant Gif can be toggled on/off.
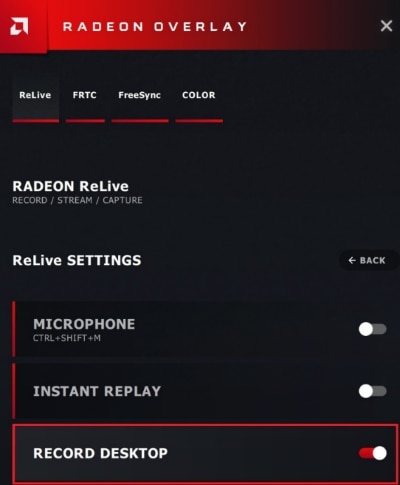
Record Desktop
Record Desktop allows capture of content directly from your Windows desktop. Record Desktop can be toggled on/off. OpenGL applications may be recorded using the Record Desktop feature when running in windowed mode.
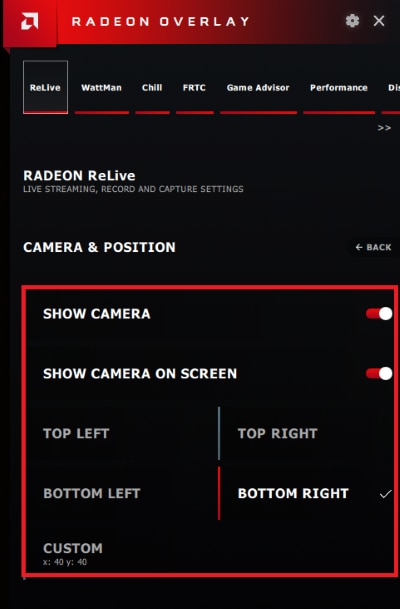
Camera & Positions
Show Camera allows a camera connected to the computer to overlay a video image on top of the current content.
Camera position can be adjusted to different positions on the screen as shown below.
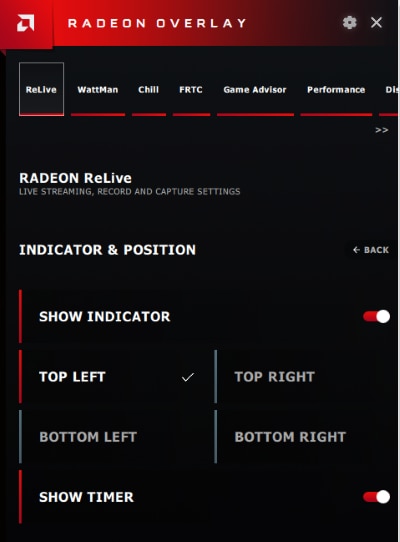
Indicator & Positions
The Indicator is a visual notification that appears on screen during content capture.
When Show Indicator is enabled, Indicator position can be adjusted to different corners of the screen.
Scene Settings
Scene Settings allows you to select from screen profile that was created using the Scene’s Advanced Mode option.

Show Media Player
The Show Media Player toggle will enable a media player for quick viewing of the most recent Instant Replay or Instant Gif Recordings.

