Article Number: DH-026
Overview of Radeon Overlay Menus
Radeon™ Overlay was first introduced in Radeon™ Software Adrenalin Edition 17.12.1 and enhanced in Radeon™ Software Adrenalin 2019 Edition (18.12.2). It is an on-screen display (OSD) menu providing quick access to certain Radeon™ Settings features without needing to open the full Radeon Settings user interface. Changes made via Radeon Overlay are also applied and saved to Radeon Settings.
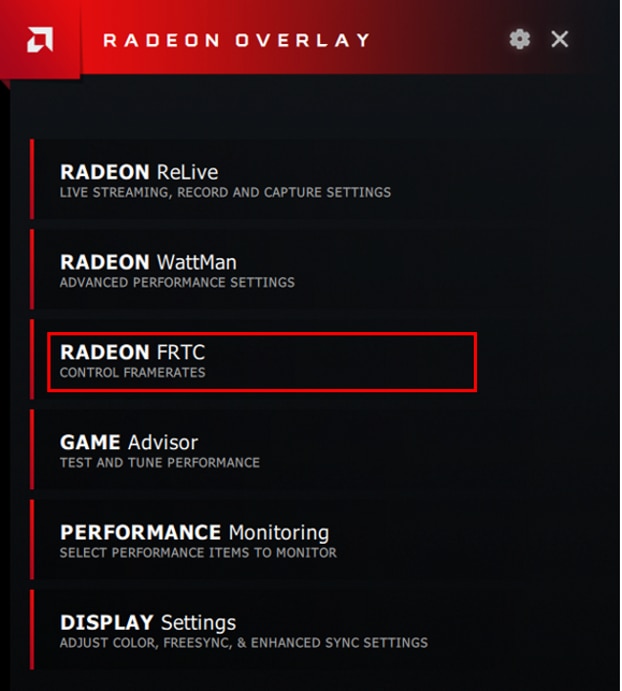
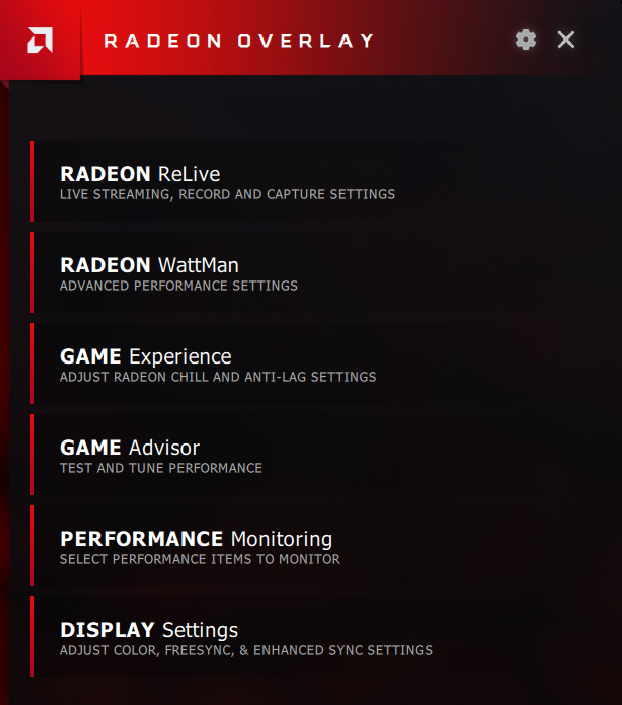
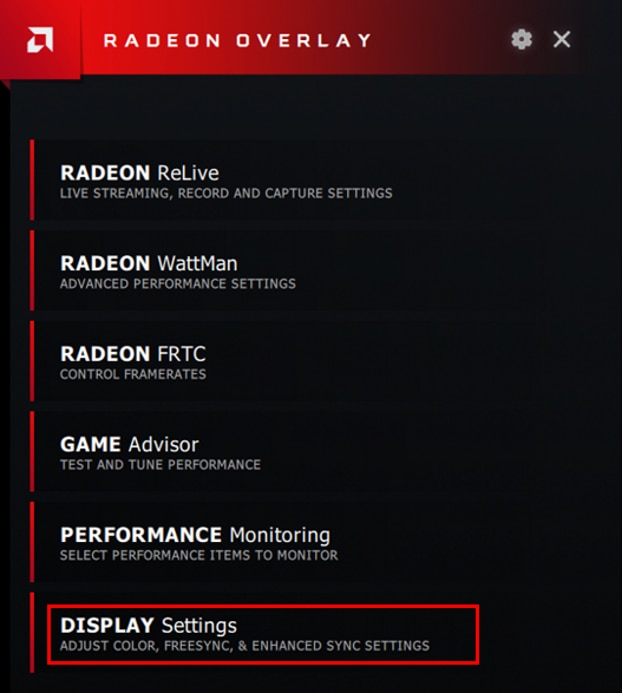
The following Radeon Settings features are accessible using Radeon Overlay:
- Radeon ReLive
- Radeon WattMan
- Radeon FRTC
- Game Dynamics
- Game Advisor
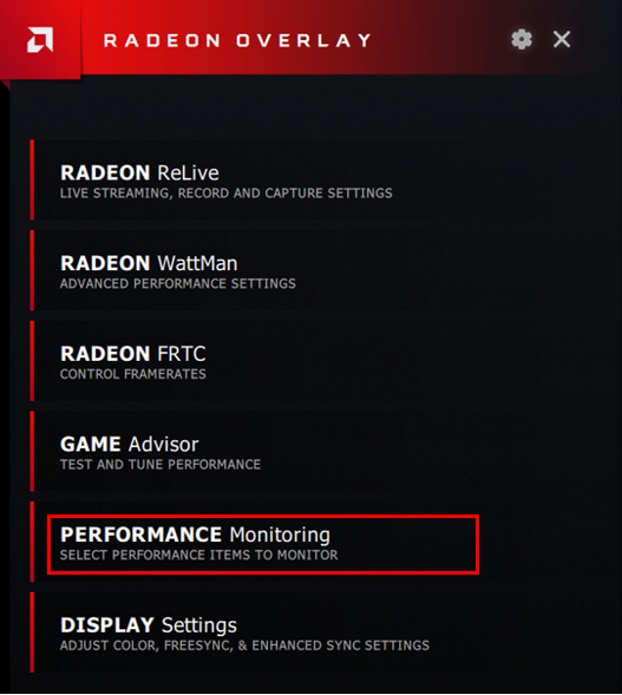
- Performance Monitoring
- Display Settings
NOTE! Radeon FRTC option is only available in 2D application environment and Game Dynamics option is only available when running 3D applications in full screen or borderless windowed modes.
Radeon Overlay is enabled by default and can be access using the Alt+R hotkeys. Options to disable Radeon Overlay or assign hotkeys can be done within the Radeon Settings user interface under the Preference section (as shown below).
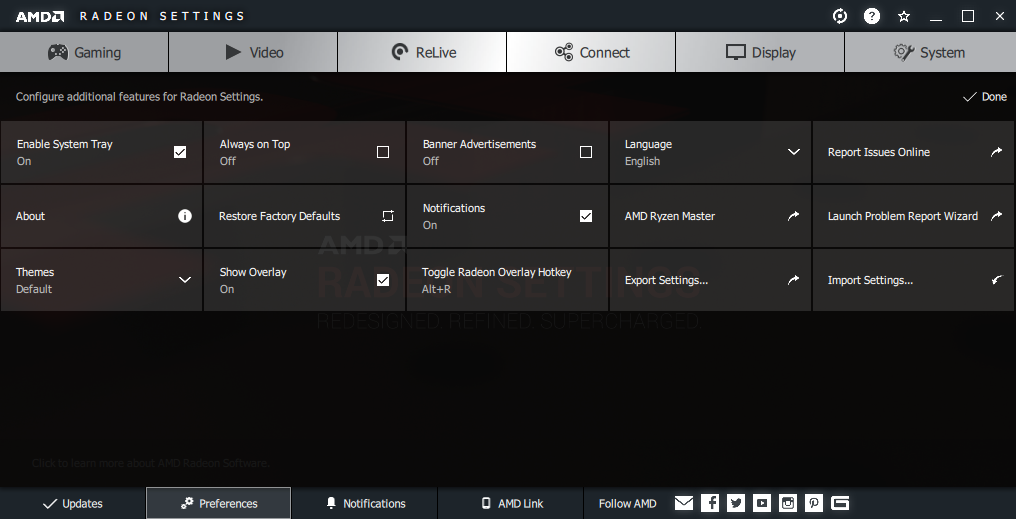
To disable or enable Radeon Overlay, uncheck or check Show Overlay. To change the hotkeys, click on the Toggle Radeon Overlay Hotkey tile and press the hotkeys of your choosing.
NOTE! Hotkeys must include the CTRL and/or ALT keys. Do not choose hotkeys reserved by the operating system or another application (for example, Alt+F4 is used by Windows® to close the current application).
Adjust Radeon™ ReLive Recording Settings Using Radeon Overlay
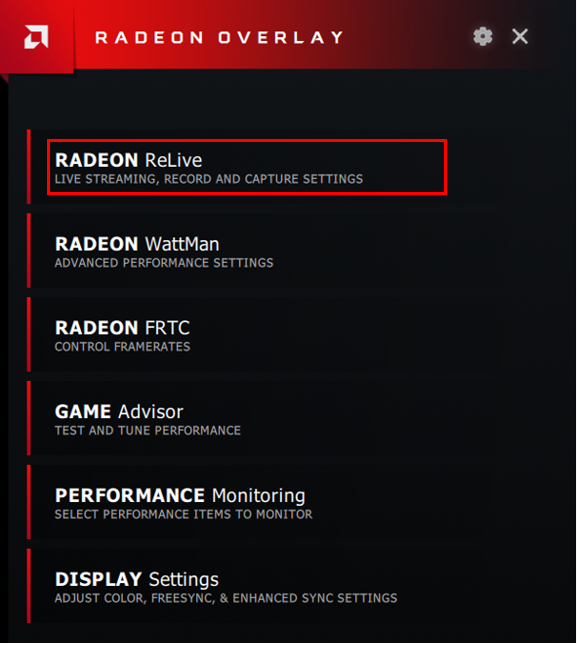
Radeon™ ReLive allows users to capture, stream and share gameplay videos and screenshots. To adjust Radeon ReLive using Radeon™ Overlay, bring up Radeon Overlay by using the assigned hotkeys (default is Alt+R) and select Radeon ReLive.
For information on adjusting Radeon ReLive settings using Radeon Overlay, please refer to Radeon™ Overlay ReLive Settings section of KB article: How to Capture and Stream Gameplay Using Radeon ReLive
Adjust Radeon™ WattMan Settings Using Radeon™ Overlay
Radeon™ WattMan is a power management utility that controls GPU voltage, core clocks, memory clocks, fan speed and temperature. For detailed information about configuring Radeon WattMan, please refer to article: How to Tune GPU Performance Using Radeon WattMan
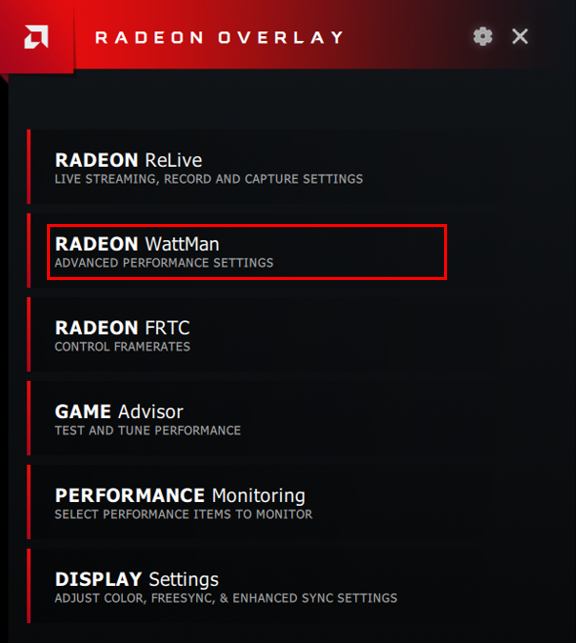
To adjust Radeon WattMan using Radeon™ Overlay, bring up Radeon Overlay by using the assigned hotkeys (default is Alt+R) and select Radeon WattMan.
NOTE! A disclaimer will be displayed when accessing Radeon WattMan for the first time or after a reset. Read the disclaimer carefully and if you agree, click Accept to continue.
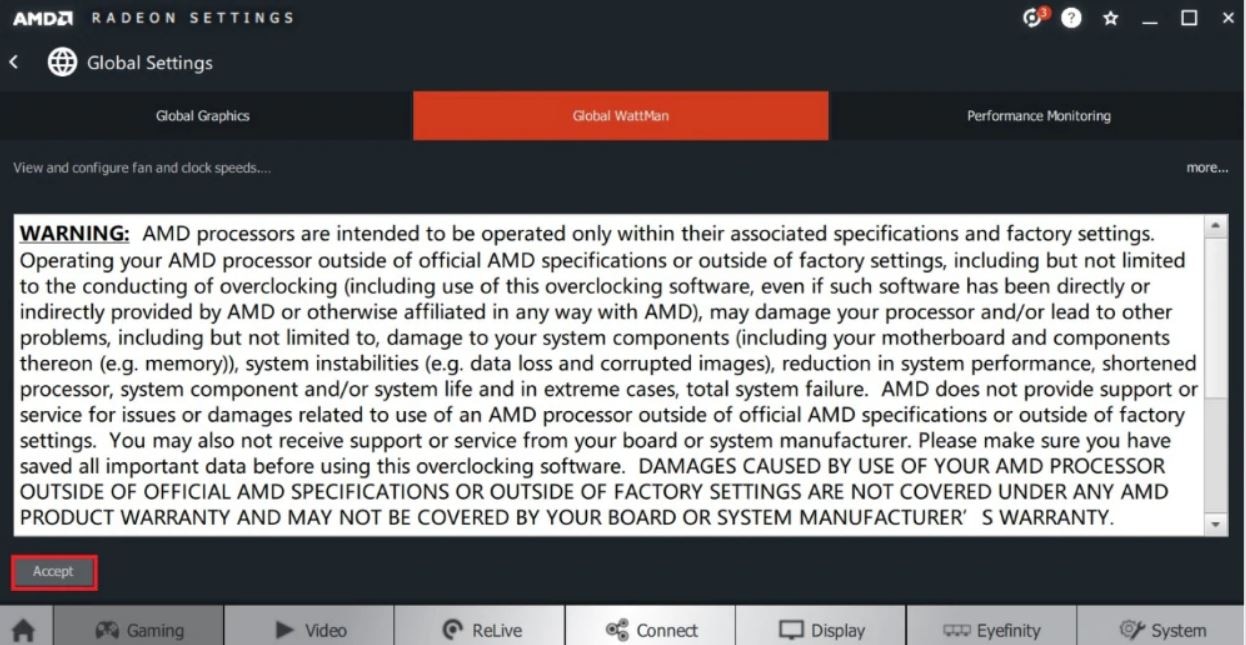
NOTE! AMD PRODUCT WARRANTY DOES NOT COVER DAMAGES CAUSED BY OVERCLOCKING, EVEN WHEN OVERCLOCKING IS ENABLED VIA AMD HARDWARE AND/OR SOFTWARE.
Radeon Overlay provides access to configure the following Radeon WattMan options:
- Performance WattMan
- Tuning Control
- GPU
- Memory
- Fan
- Temperature
- Load/Save Profiles
NOTE! The availability of specific Radeon WattMan features will depend on the GPU being used.
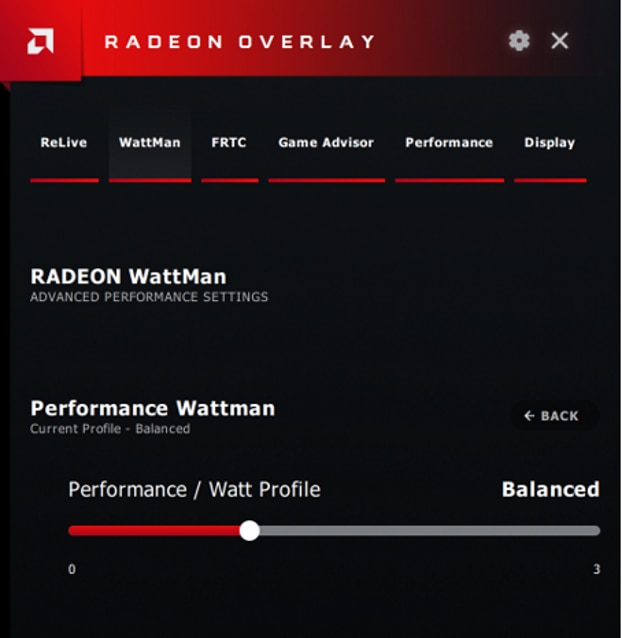
Performance WattMan:
This feature provides three preset profiles for the GPU performance and power draw, and a Custom option for additional tuning control (see Tuning Control). Performance WattMan option is available only on Radeon™ RX Vega 64 and RX Vega 56 Series graphics.
Performance WattMan offers the following profile presets:
- Power Save
- Balanced
- Turbo
- Custom
Select the desired Performance WattMan profile using the slider, then click Apply to save changes.
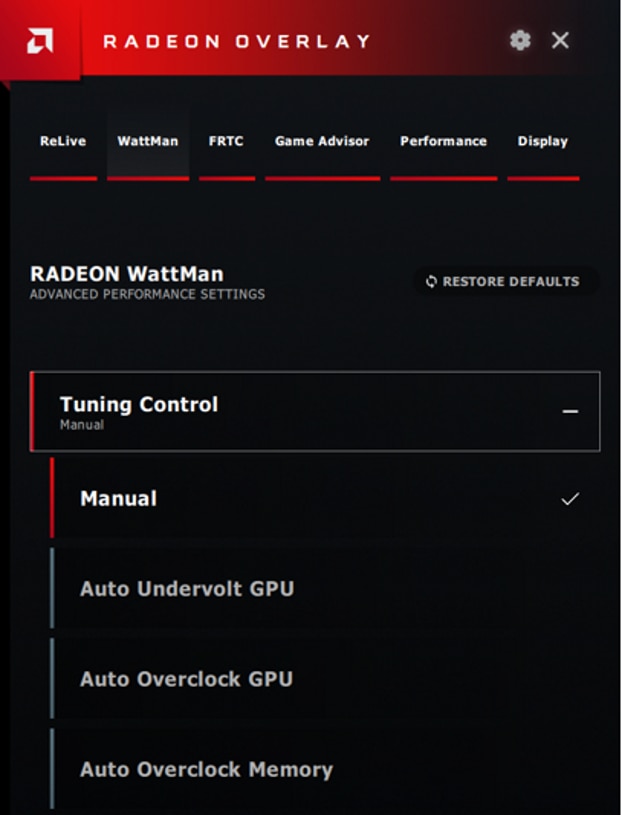
Tuning Control:
This feature allows Radeon WattMan to dynamically calculate suitable overclock settings for your system. Selecting an automatic tuning control option will disable some Radeon WattMan settings. To revert changes and re-enable features, select the Manual option and click Apply.
Tuning Control is currently supported on Radeon™ VII, Radeon™ RX 5700 Series, and Radeon™ RX Vega 64 and RX Vega 56 Series graphics.
NOTE! For Radeon™ RX Vega 64 and RX Vega 56 Series graphics, the Performance WattMan option must be set to Custom for Tuning Control options to become available.
Tuning Control provides the following options:
- Manual: Default setting
- Auto Undervolt: Reduces voltage while maintaining the same clock frequency in order to improve performance per watt.
- Auto Overclock GPU: Runs a GPU-based algorithm to automatically overclock the GPU to improve performance.
- Auto Overclock Memory: Runs a memory-based algorithm to overclock the video memory to improve performance.
Select the desired Tuning Control option and click Apply to save your changes.
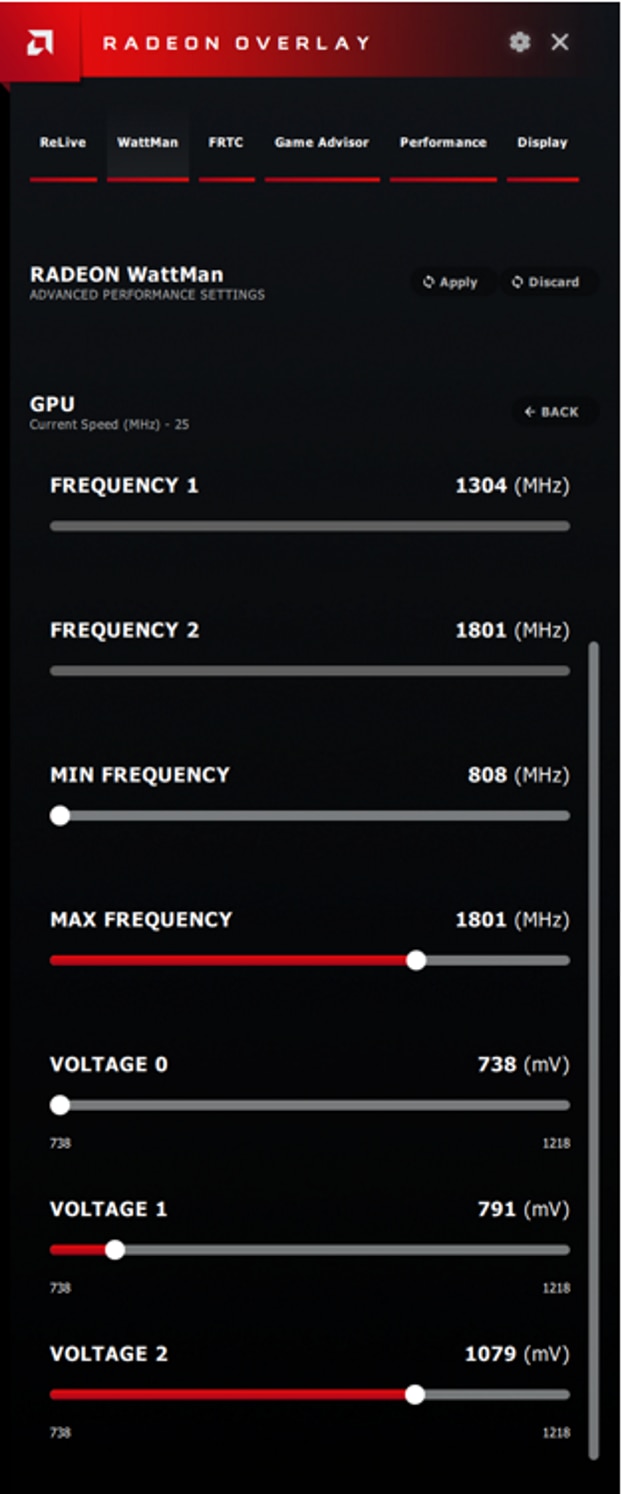
GPU:
Depending on your GPU, this selection provides the following options:
- Frequency/Voltage
- Frequency
- Voltage Control
GPU Frequency/Voltage option is only available for Radeon™ VII and Radeon™ RX 5700 Series graphics. By default, this option is set to automatic. When set to Manual mode it provides the ability to set the GPU minimum and maximum frequency and relative voltages. Click Apply to save your changes.
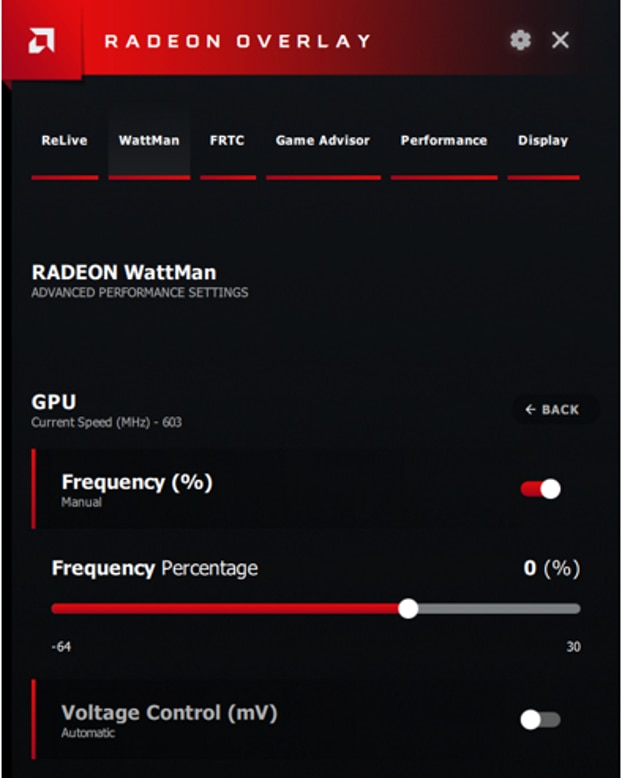
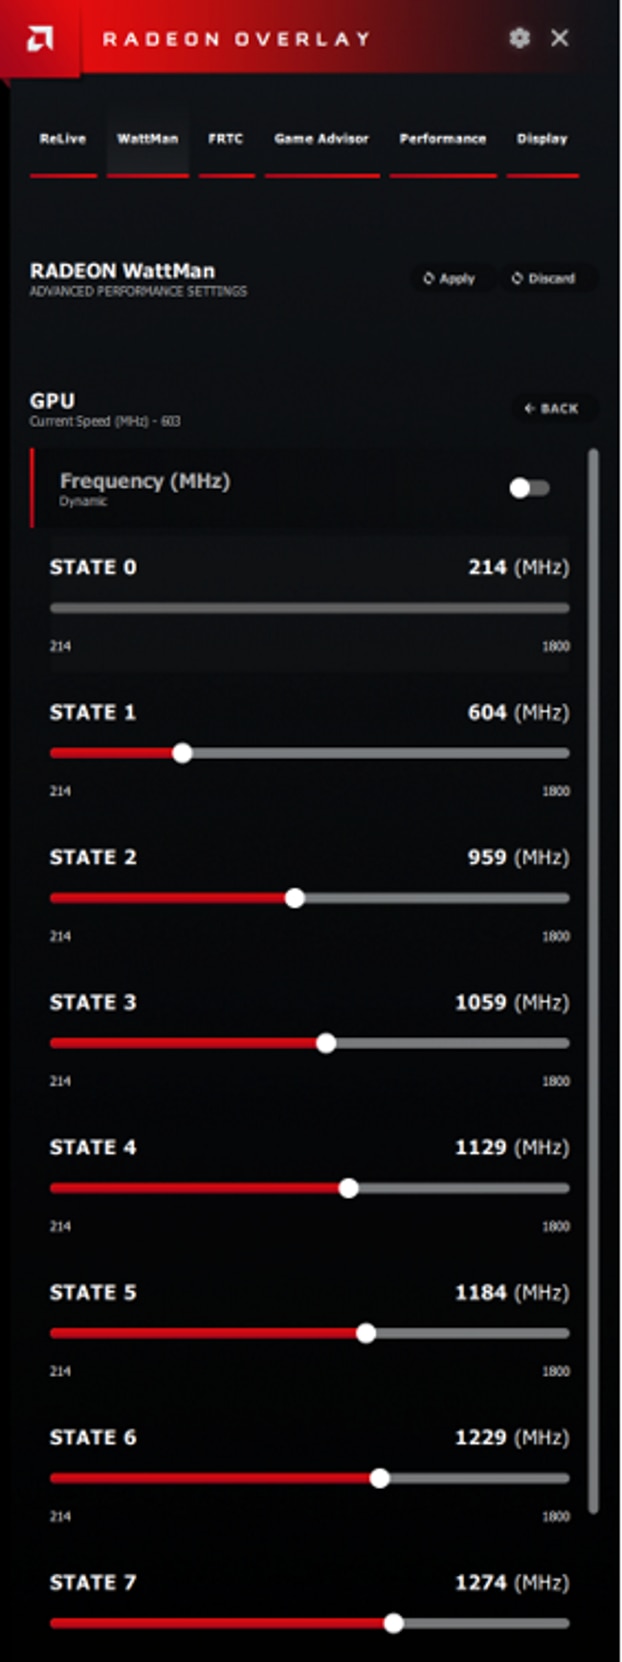
GPU Frequency option offers two different modes for adjusting GPU clocks, these are:
- Frequency (%): Adjust the GPU clock speeds using a percentage slider. A change in Frequency (%) is applied to all seven States simultaneously.
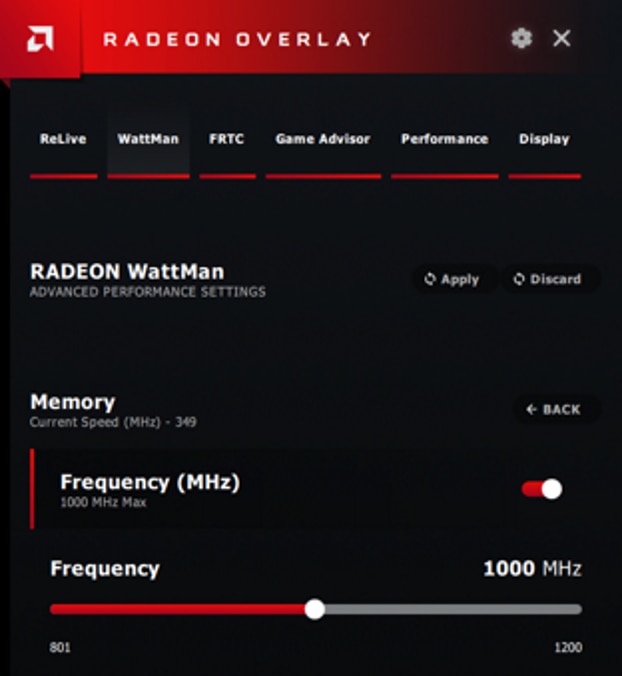
- Frequency (MHz): Adjust the clock speed in megahertz for each seven States individually. This mode allows offers greater customization of performance and can be accessed by toggling the Frequency button.
NOTE! GPU Frequency option is not available for Radeon™ VII and Radeon™ RX 5700 Series graphics.
In Frequency (%) mode (default mode), move the slider right or left to increase or decrease the GPU frequency in increments of 0.5%. Click Apply to save your changes.
In Frequency (MHz) mode, set the desired frequency for each clock state and click Apply to save your changes.
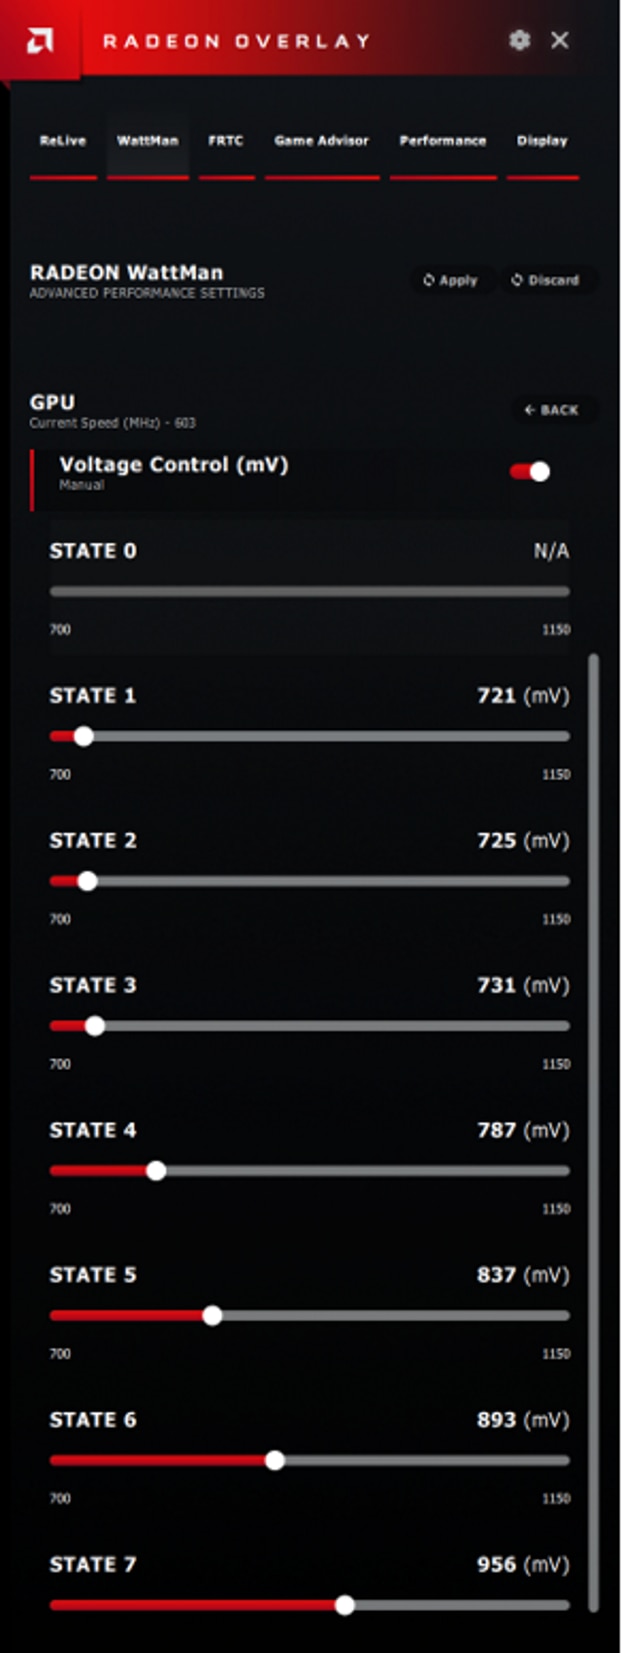
GPU Voltage Control is set to automatic by default. When set to Manual mode it provides the option to set the amount of voltage applied to the GPU per clock state. This can help to stabilize the GPU when increasing clock frequency but will require more power and generate more heat, potentially resulting in higher fan speeds and fan noise.
NOTE! This feature is not available for Radeon™ VII and Radeon™ RX 5700 Series graphics.
To switch to Manual mode, toggle the Voltage Control button, changing it from Automatic to Manual. In Manual mode, each of the seven GPU clock states can be adjusted in increments of 1mV. Click Apply to save your changes.
Memory:
Depending on your GPU, this selection provides the following options:
- Frequency
- Voltage Control
- Memory Timing
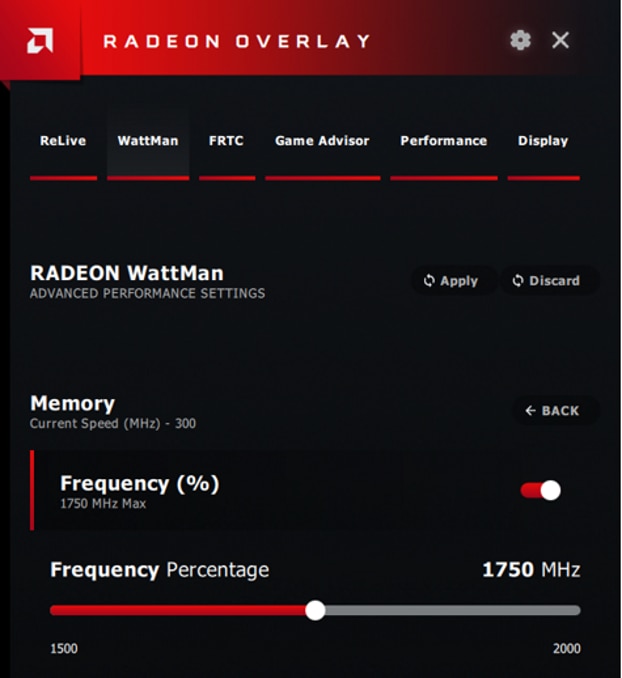
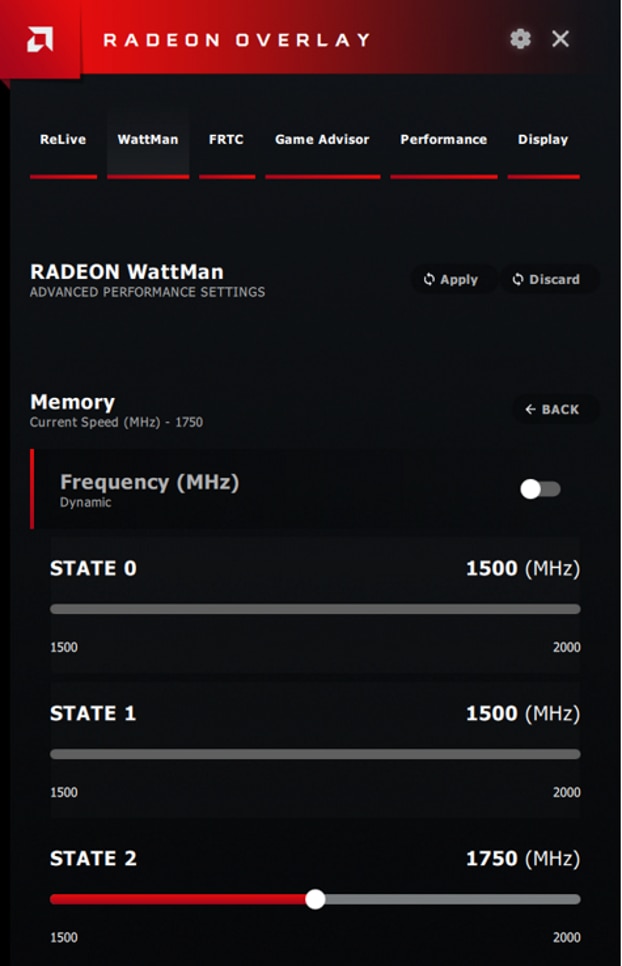
Memory Frequency option offers two different modes for adjusting video memory clocks, these are:
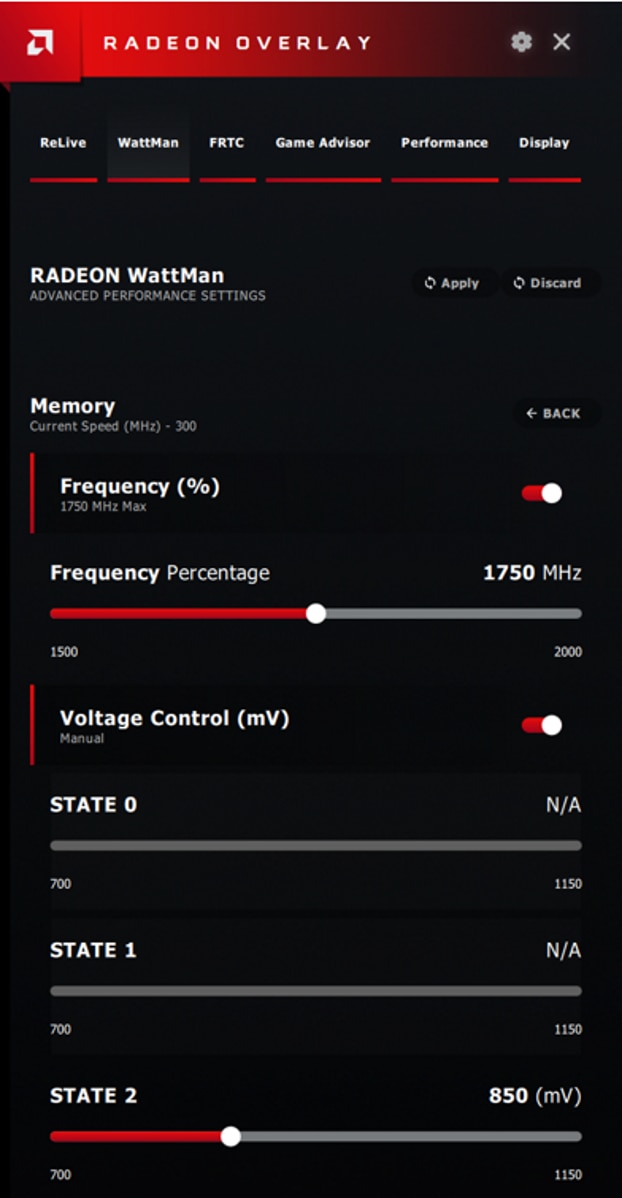
- Frequency (%): Adjust the video memory clock speed for the highest memory state using a percentage slider.
Frequency (MHz): Provides a view of all video memory clock states and allows adjusting the highest memory state (State 2). This mode can be accessed by toggling the Memory Frequency button.
In Frequency (%) mode (default mode), move the percentage slider right or left to increase or decrease the video memory frequency in increments of 5 MHz. Click Apply to save your changes.
In Frequency (MHz) mode, move the slider left or right to reduce or increase the video memory frequency for the highest state (State 2) in increments of 5 Mhz. Click Apply to save your changes.
NOTE! For Radeon™ VII, Radeon™ RX 5700 Series, Radeon™ RX Vega 64 and RX Vega 56 Series graphics, the Memory Frequency option is set to Automatic be default. Toggle the Memory Frequency button to adjust the memory frequency in increments of 1 MHz. Click Apply to save your changes.
Memory Voltage Control is set to Automatic by default, click the Voltage Control toggle button to switch to Manual mode.
NOTE! Memory Voltage Control option is not available on Radeon™ VII, Radeon™ RX 5700 Series, Radeon™ RX Vega 64 and RX Vega 56, AMD Radeon™ Pro Duo, Radeon™ R9 Fury Series, and Radeon™ R9 Nano Series graphics.
Manual mode provides the option to adjust the amount of voltage applied to the highest memory state (State 2) in increments of 1 mV. Click Apply to save your changes.
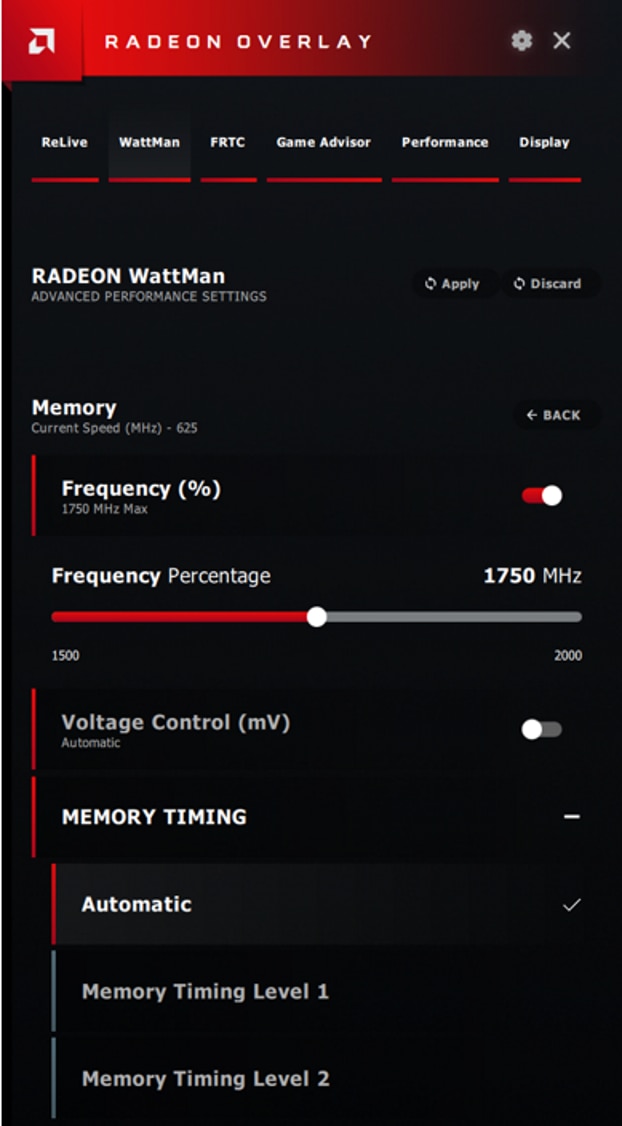
Memory Timing helps reduce memory latency based on the selected level. A lower memory latency level may improve performance in some applications.
NOTE! This option is only available on Radeon™ VII, Radeon™ RX Vega 64 and RX Vega 56, and Radeon™ RX 500 Series and RX 400 Series graphics.
Memory Timing provide three presets:
- Automatic (default)
- Memory Timing Level 1
- Memory Timing Level 2
Select the desired Memory Timing Level and click Apply to save your changes.
Fan:
Depending on your GPU, this selection provides the following options:
- Fan Speed
- Minimum Acoustic Limit
- Zero RPM
Fan Speed shows the current GPU fan speed expressed in revolutions per minute (RPM).

Minimum Acoustic Limit allows setting the baseline frequency which the GPU will operate in. If the GPU clock frequency (MHz) drops below the minimum acoustic limit value set, the fan speed will increase as required to regulate the GPU temperature so that the baseline frequency can be maintained. Select the desired settings and click Apply to save your changes.
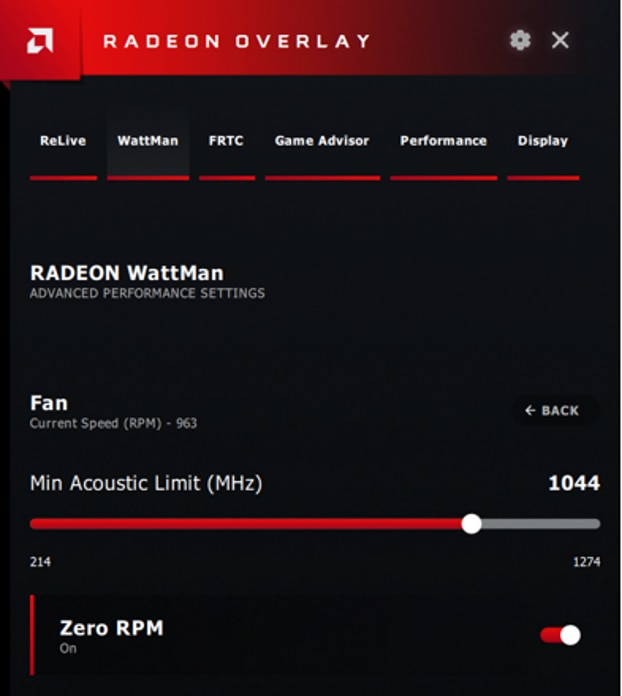
Zero RPM enables quiet operation while the GPU is under light load and is enabled by default. The GPU fans should spin up as the GPU is put under load and temperature increases. Toggle the Zero RPM button to turn this feature on/off. Click Apply to save your changes.

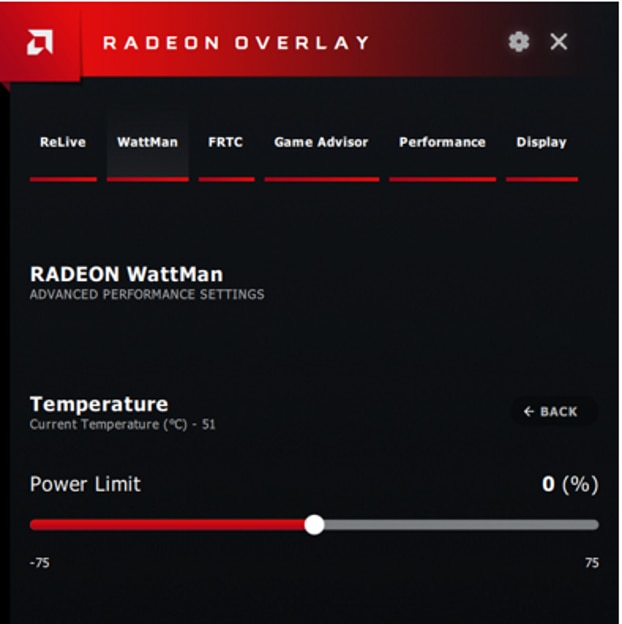
Temperature:
This selection provides the following options:
- Temperature
- Power Limit
Temperature shows the current GPU temperature expressed in Celsius (°C).

Power Limit allows adjusting the GPU Power Limit using a slider. Move the slider left or right to reduce or increase the GPU Power Limit in increments of 1%. Click Apply to save your changes.
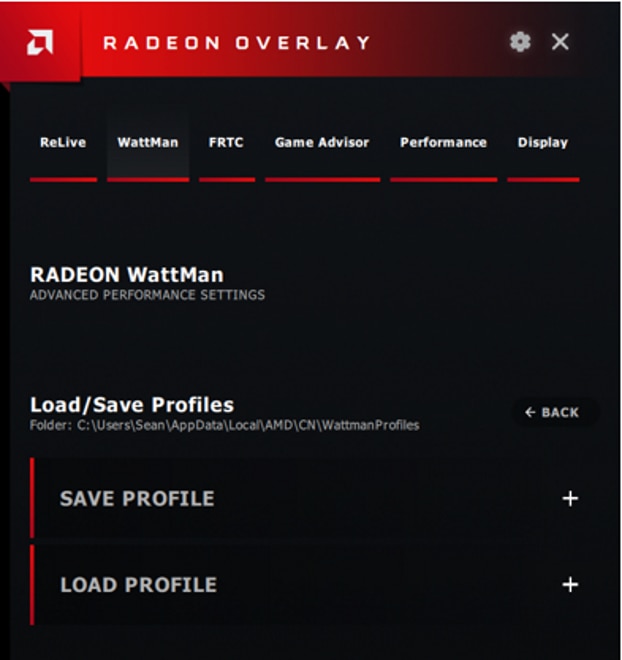
Load/Save Profiles:
This selection allows quick saving and loading of Radeon WattMan profiles. By default, Radeon WattMan profiles are stored in C:\Users\[Username]\AppData\Local\AMD\CN\WattmanProfiles
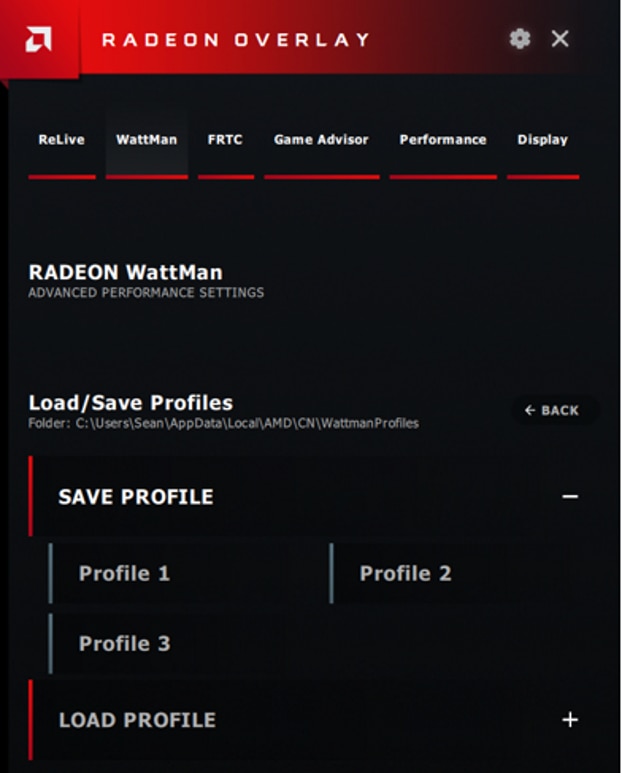
To save a Radeon WattMan profile, click Save Profile. Then select from Profile 1, Profile 2, or Profile 3 to save the current Radeon WattMan settings to the corresponding profile.
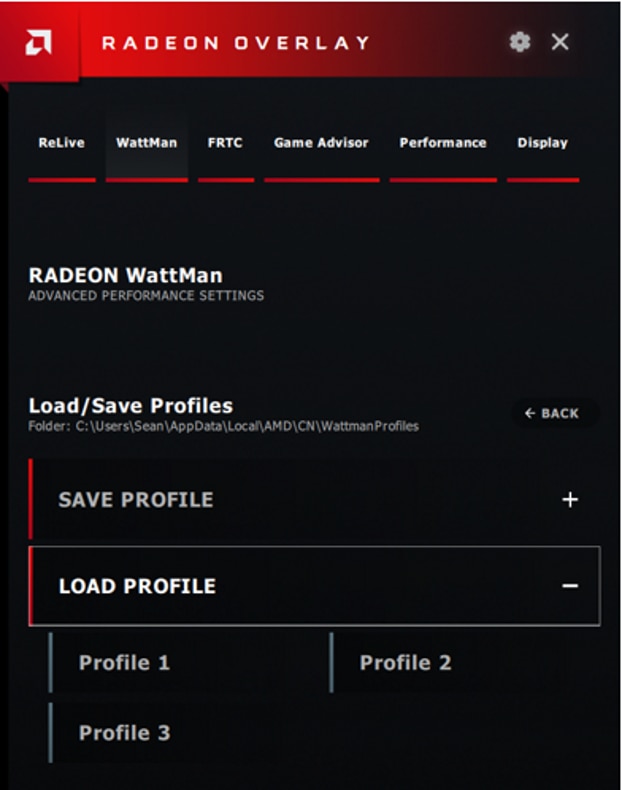
To load a Radeon WattMan profile, click Load Profile. Then select from Profile 1, Profile 2, or Profile 3 to load the corresponding Radeon WattMan settings profile that was previously saved
Adjust Radeon™ FRTC Settings Using Radeon Overlay
Available only in 2D application environment, Radeon™ Frame Rate Target Control (FRTC) enables users to set a target maximum frame rate when running a 3D application in full screen mode. The benefit being that FRTC can reduce GPU power consumption (great for games running at frame rates much higher than the display refresh rate) and therefore help reduce heat, fan speeds, and noise generated by the graphics card.
NOTE! Changes to the FRTC must be done prior to launching the game.
To adjust Radeon FRTC using Radeon Overlay, bring up Radeon Overlay by using the hotkeys described earlier (default is Alt+R) and select Radeon FRTC.
FRTC is disabled by default, toggle the FRTC button to enable/disable the feature. When enabled drag the FRTC Value slider left or right to decrease or increase the frame rate cap. Frame rate cap can range between 30 and 300 frames per second (FPS). To restore Radeon FRTC to the default setting, click Reset.

Adjust Game Experience Using Radeon Overlay
Game Experience menu provides Radeon™ Anti-Lag and Radeon™ Chill options and is only available when running 3D game/application in full screen or borderless windowed modes.
For detailed information about Radeon Chill and Radeon Anti-Lag, please refer to article: How to Configure Radeon Chill and Radeon Anti-Lag
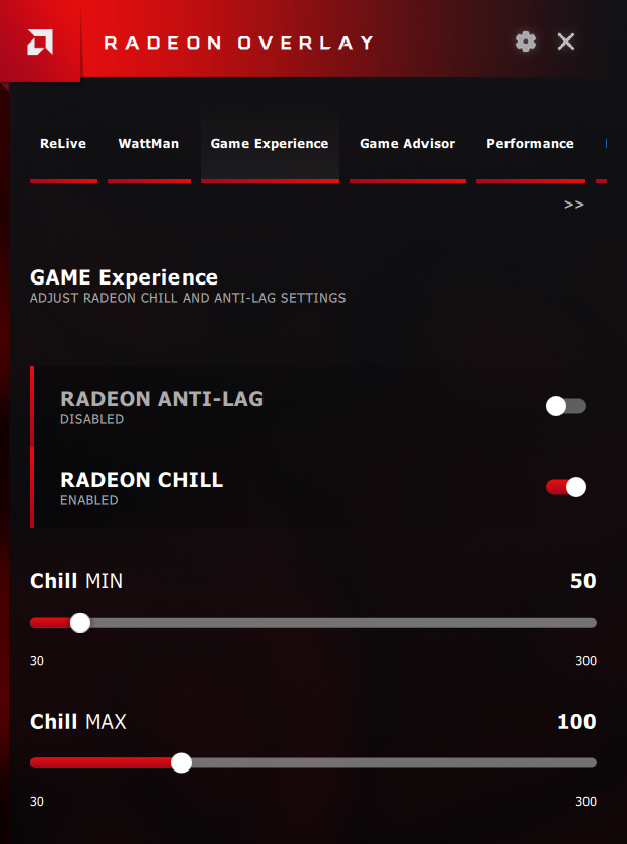
NOTE! Radeon™ Chill and Radeon™ Anti-Lag cannot be enabled at the same time. When Radeon Chill is enabled, Radeon Anti-Lag will automatically be disabled, and vice versa.
To adjust Game Experience using Radeon Overlay, bring up Radeon Overlay by using the hotkeys described earlier (default is Alt+R) and select Game Experience.
Radeon™ Anti-lag is disabled by default. It can be turned enabled/disabled during gameplay by toggling the Radeon Anti-Lag button.
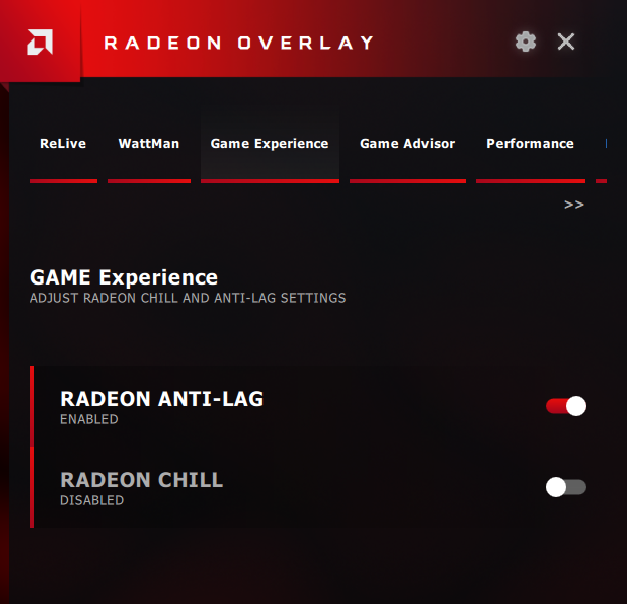
Radeon Chill is disabled by default. It can be enabled/disabled during gameplay by toggling the Radeon Chill button. Once enabled, Radeon Chill provides the option to set the Chill Min and Chill Max values.
Using Game Advisor Within Radeon Overlay
Game Advisor is a tool that can analyze game performance in real time and provide recommendations on how to improve the gaming experience through available in-game graphics settings. The recommendations are based on creating a balance between performance and image quality in the game.
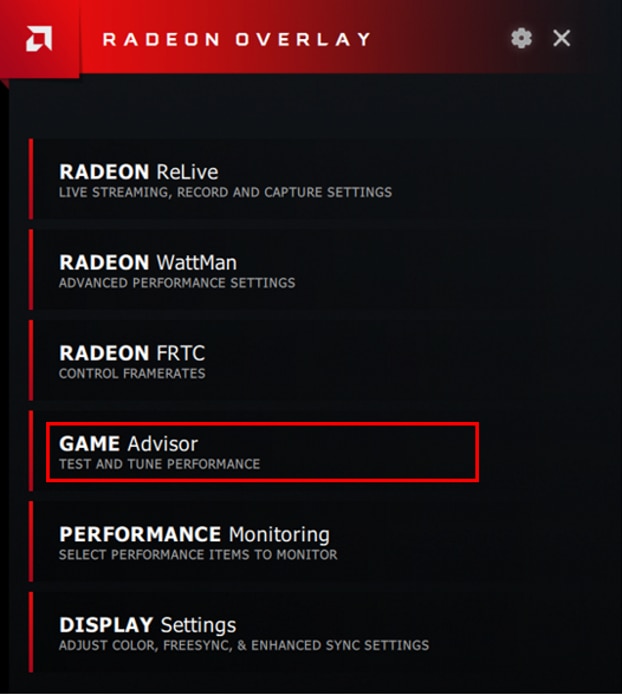
For information on how to use Game Advisor, please refer to article: How to Use Game Advisor Within Radeon Overlay
Monitor System Performance Using Radeon Overlay
Radeon Overlay provides a separate on-screen display (OSD) which allows monitoring of system performance during 3D gameplay. Individual performance metrics can be selected as well as the display area to show the Performance Monitoring OSD. Performance data can also be saved to a file for later analysis.
To monitor system performance using Radeon Overlay, bring up Radeon Overlay by using the hotkeys described earlier (default is Alt+R) and select Performance Monitoring..
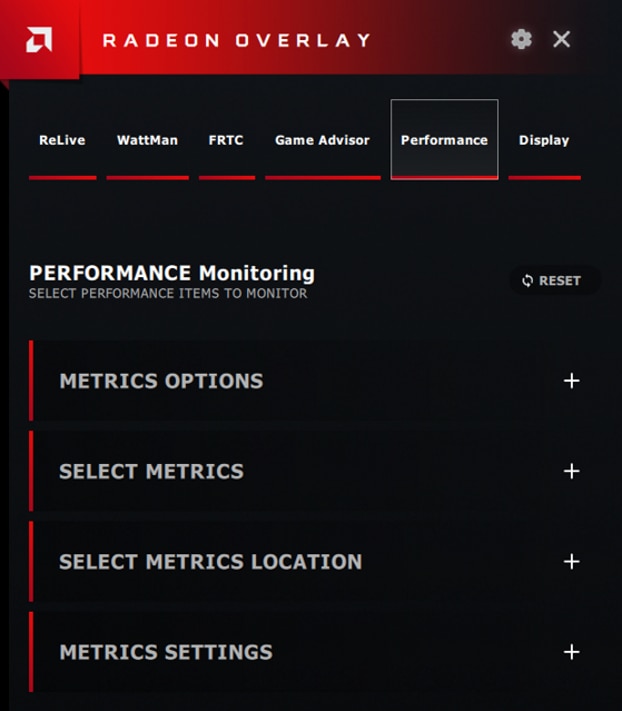
Performance Monitoring feature provides the following options:
- Metrics Options
- Select Metrics
- Select Metrics Location
- Metrics Settings
Metrics Options provides access to sub-options, as shown and explained below:
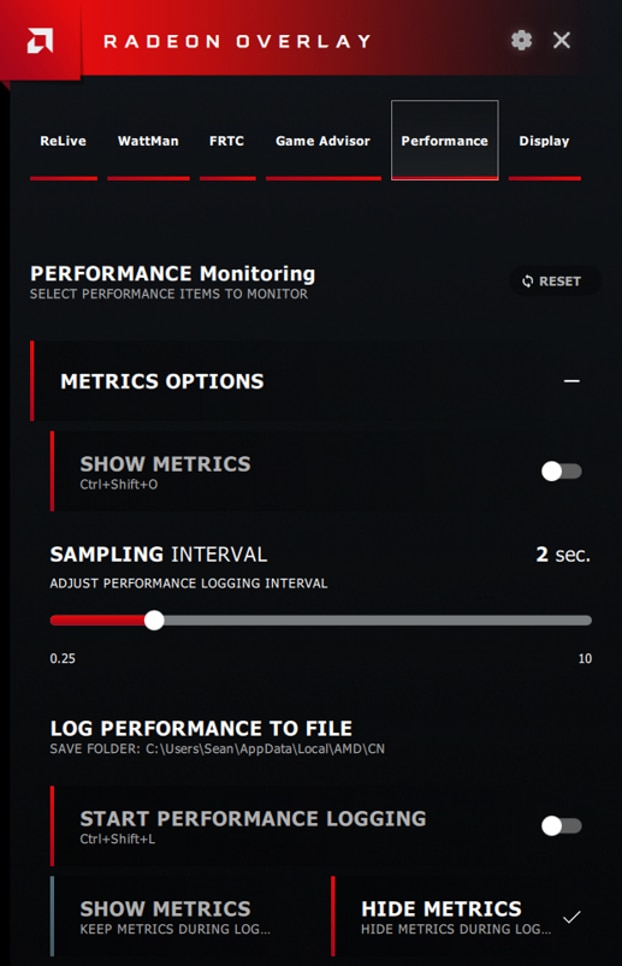
- Show Metrics: This is a toggle option to show or hide the Performance Monitoring OSD, the hotkeys (CTRL+Shift+O) can also be used.
- Sampling Interval: The time between each update of performance data. Sampling intervals can range from 1 to 10 seconds and can be adjusted in increments of 1 sec.
- Log Performance to File: Indicates where performance logs are saved to – Performance logs are saved as CSV files.
- Start Performance Logging: Start/Stop logging performance data
- Show Metrics: Show the Performance Monitoring OSD while logging data
- Hide Metrics: Hide the Performance Monitoring OSD while logging data
Select Metrics allows choosing available performance metrics to have displayed and/or logged. Available metrics are shown and explained below:
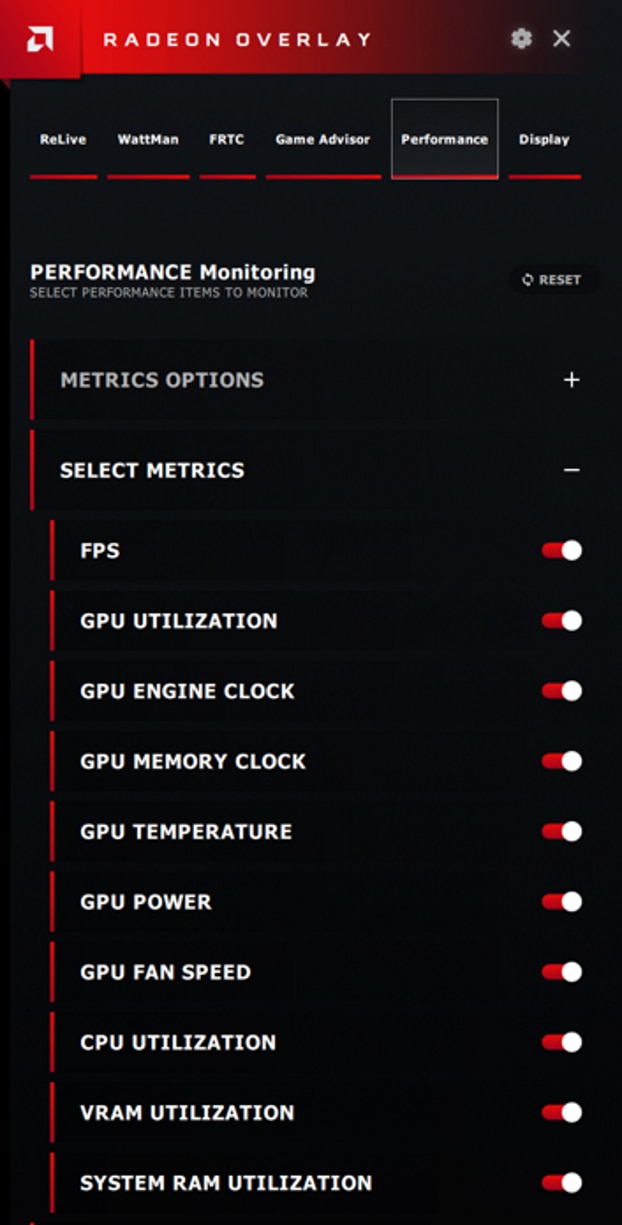
- FPS: Number of frames per second
- GPU Utilization: Reported as percentage (%)
- GPU Engine Clock: Reported in megahertz (MHz)
- GPU Memory Clock: Reported in megahertz (MHz)
- GPU Temperature: Reported in Celsius (°C)
- GPU Power: Reported in Watts
- GPU Fan Speed: Reported in revolutions per minute (RPM)
- CPU Utilization: Reported as percentage (%)
- VRAM Utilization: Reported in gigabytes (GB)
- System RAM Utilization: Reported in gigabytes (GB)
Select Metrics Location provides the option to set the placement of the Performance Monitoring OSD. Placement options are shown and explained below:
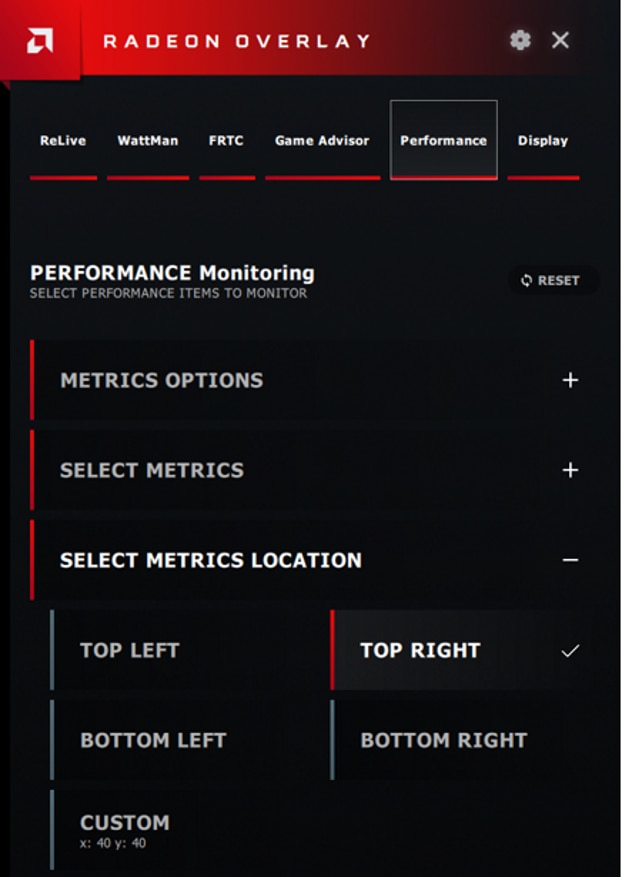
- Top Left: Performance Monitoring OSD is shown in the upper left corner of the display.
- Top Right: Performance Monitoring OSD is shown in the upper right corner of the display.
- Bottom Left: Performance Monitoring OSD is shown in the bottom left corner of the display.
- Bottom Right: Performance Monitoring OSD is shown in the bottom right corner of the display.
- Custom: Specify the display location for the Performance Monitoring OSD to appear using vertical (X) and horizontal (Y) sliders.
Metrics Settings allows for customizing the appearance of the Performance Monitoring OSD. Customization options are shown and explained below:
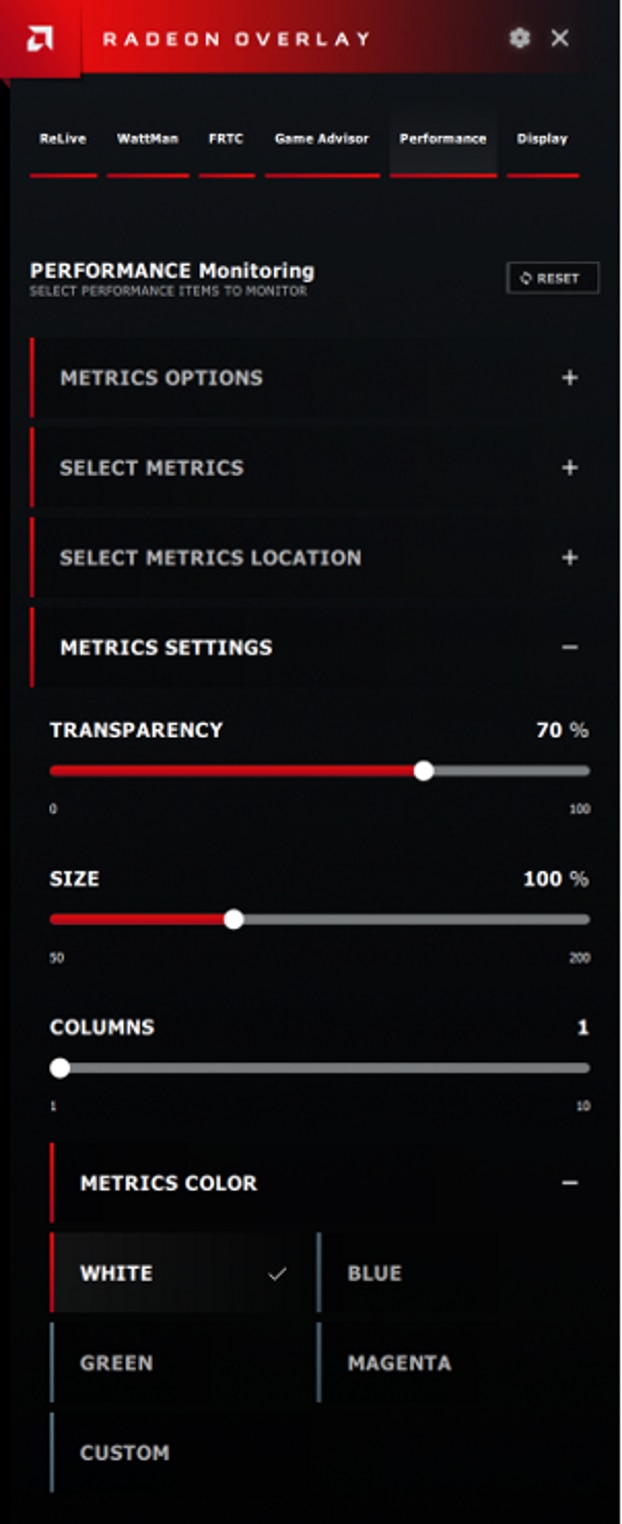
- Transparency: Sets the level of transparency of the Performance Monitoring OSD.
- Size: Sets the size of the Performance Monitoring OSD
- Columns: Sets the number of columns for performance metrics to be displayed in.
- Metrics Color: Sets the color of the Performance Monitoring OSD.
NOTE! To return Performance Monitoring settings back to their default values and selections, click Reset.
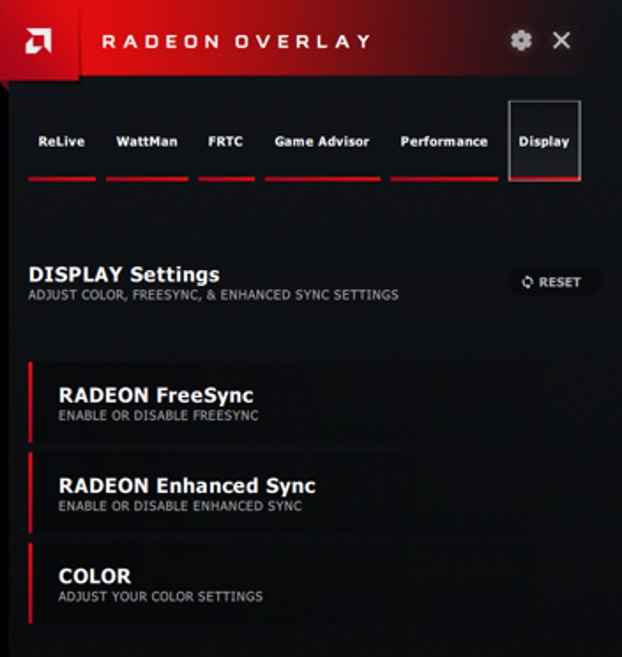
Adjust Display Settings Using Radeon Overlay
Display Settings menu provides option to adjust display specific features.
The available Display Settings options are listed and explained below:
- Radeon™ FreeSync™
- Radeon™ Enhanced Sync
- Color
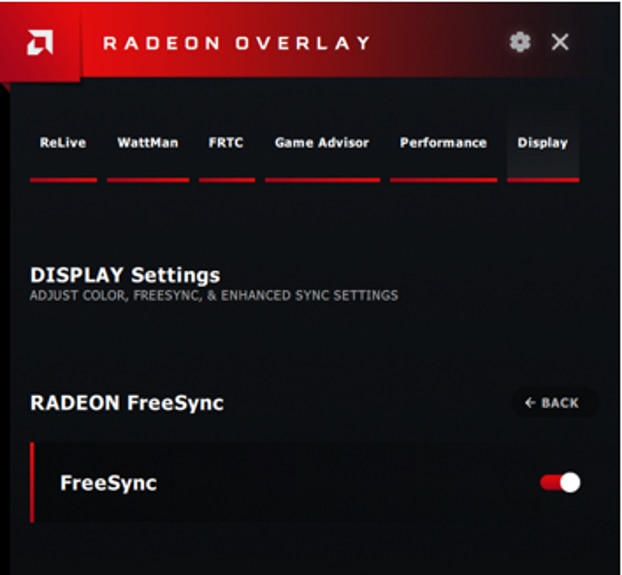
Radeon FreeSync™ is an AMD technology designed to eliminate stuttering and/or tearing in games and videos by locking a display's refresh rate to the frame rate of the graphics card. For more information on Radeon FreeSync, please visit: Radeon™ FreeSync Technology
To enable this feature using Radeon Overlay, bring up the Radeon Overlay by using the hotkeys described earlier (default is Alt+R). Select Display Settings then select Radeon FreeSync.
Click on the toggle button to enable FreeSync. Click on the toggle button once again, to disable FreeSync.
Radeon Enhanced Sync is an AMD technology designed to enable low latency gameplay and offer a tear-free experience when the games frame rate exceeds your display’s refresh rate. For more information on Radeon Enhanced Sync, please visit: AMD Enhanced Sync Technology
To enable this feature using Radeon Overlay, bring up the Radeon Overlay by using the hotkeys described earlier (default is Alt+R). Select Display Settings then select Radeon Enhanced Sync.
Enhanced Sync is disabled by default. Click on the toggle button to enable Enhanced Sync. Click once again, to disable Enhanced Sync.

Radeon Overlay allows quick color adjustments to the connected display. Color changes are applied globally and take effect immediately.
To adjust Color settings using Radeon Overlay, bring up Radeon Overlay by using the hotkeys described earlier (default is Alt+R) and click on Display Settings then select Color.
Color settings can be individually adjusted for each display connect to your system. Select the desired display by clicking on the Display # (as shown below).
The following settings can be adjusted for each connected display:
- Color Temperature: Adjusts the 'coolness' or 'warmth' of the display. This is measured in K (Kelvin) and values can range from 4000 for a cooler (emphasis on blues and greens) to 10,000 for a warmer (emphasis on reds and yellows) image.
- Brightness: Adjusts the brightness of the image. Values can range from -100 for a darker image to +100 for a brighter image.
- Hue: Adjusts the hue of the image. Values can range from -30 to +30.
- Contrast: Adjusts the contrast of the image. Values can range from 0 to 200.
- Saturation: Adjusts the saturation of the image. Values can range from 0 to 200.
NOTE! To return the color values back to the default, click Reset.