Article Number: DH3-005
Last Updated: November 8th, 2024
Display Brightness and Controls
In environments with lots of light, increasing the display brightness can make it easier to view objects shown on screen. Conversely, in dark environments, lowering the brightness may help reduce eye strain.
For help adjusting the brightness level for an external display, refer to Microsoft® article: Change screen brightness in Windows.
To adjust brightness level for a built-in display (laptops, all-in-one), use either method below:
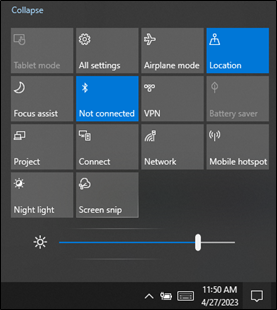
Windows Action Center
- Click on the Notifications icon or press Windows logo key + A. Drag the brightness slider to the desired setting, as highlighted in the example below.
Windows Mobility Center
- Right-click on the Start (Windows) button, then select Mobility Center from the menu. Drag the Display brightness slider to the desired level as highlighted in the example below:

Vari-Bright
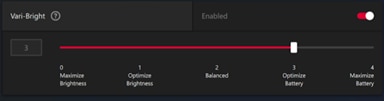
Vari-Bright is a power saving feature for laptops that adjusts display brightness. Vari-Bright comes with five different brightness levels.
Note: Level 2, 3 and 4 are designed for use when the device is operating on battery power.
To enable Vari-Bright with AMD Software: Adrenalin Edition, follow these steps:
- From the Taskbar, click the Start button (Windows icon), type AMD Software, and select the app under best match.
- In AMD Software, enter "Display" into the search box (highlighted below), and click on the "Display Settings" result displayed.

- Set Vari-Bright to enabled and then move the slider to the desired setting.
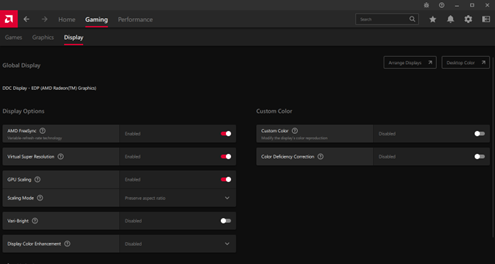
- Set Vari-Bright to enabled and then move the slider to the desired setting.
Display Resolution
Display resolution is expressed by the number of horizontal and vertical pixels. For example, a display with a native resolution of 1920 x 1080 has a total of 2,073,600 pixels on-screen. Displays capable of higher resolutions (i.e., 4K UHD 3840 x 2160) can provide better image detail and more screen area to fit viewable content. The list of supported resolutions is determined by the display connection and sometimes the cables/adapters used. For more information about supported resolutions for your display, please refer to its user manual.
Note: While it is generally recommended to use the native resolution of the display, some applications may require specific resolutions for optimal performance.
For help adjusting the resolution on your display, refer to Microsoft article: View display settings in Windows
Display Refresh Rate
Display refresh rate, which is expressed in Hertz (Hz), refers to the number of times the screen is redrawn per second. Typical displays devices may support refresh rates of 60Hz, 75Hz, or higher. For more information about supported refresh rates for your display, please refer to the user manual.
For help changing the refresh rate on your display, refer to Microsoft article: Change your display refresh rate in Windows
Display Rotation
Display rotation is the process of changing the orientation of a display screen from its default landscape mode to a portrait mode, or vice versa. This can be done by Display Hotkeys within Radeon Software or Windows® Display Properties.
The purpose of display rotation is to provide a better viewing experience when working with content that is better suited to a specific orientation. For example, reading long documents or web pages might be more comfortable in portrait mode, while viewing images or videos maybe be more enjoyable in landscape mode.
Display rotation can be performed using AMD Software or via Windows Display Settings.
Rotate Displays Using AMD Software
Display Hotkeys must be set to enabled via the Hotkeys menu in order to rotate displays with AMD Software. To do this follow these steps:
- From the Taskbar, click the Start button (Windows icon), type AMD Software, and select the app under best match.
- In AMD Software, enter "Hotkeys" into the search box (highlighted below), and click on the "Display Hotkeys" result displayed.
Set Use Hotkeys and Use Display Hotkeys to Enabled.
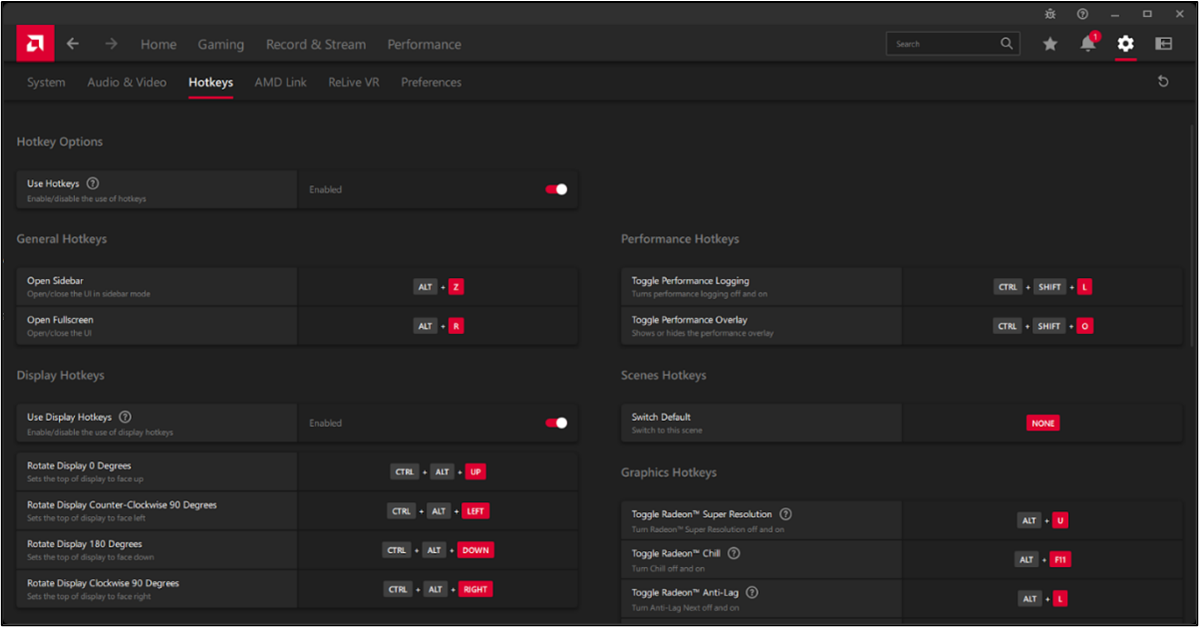
- CTRL + ALT+ UP: Landscape mode – The default display orientation.
- CTRL + ALT+ Down: Landscape (flipped) mode – same as landscape mode with the display rotated 180 degrees.
- CTRL + ALT+ LEFT: Portrait mode: Rotates the display 90 degrees counterclockwise.
- CTRL + ALT+ RIGHT: Portrait (flipped) mode - Rotates the display 90 degrees clockwise.
Note: Display Hotkeys do not work during gameplay or when Eyefinity is enabled.
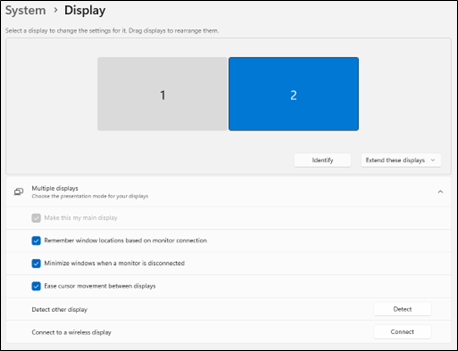
Note: Display Rotation feature is only available on the main display. If there is more than one active display, set the desired display as main Display in Windows display settings first. In the example below, display 2 was selected as the main display.
Rotate Displays using Windows® Display Settings
For instructions on how to rotate displays please refer to this Microsoft® article Change screen orientation
Configure Multiple Displays
For instructions on how to configure multiple displays please refer to these Microsoft® articles:
© 2024 Advanced Micro Devices, Inc. The information contained herein is for informational purposes only and is subject to change without notice. While every precaution has been taken in the preparation of this document, it may contain technical inaccuracies, omissions and typographical errors, and AMD is under no obligation to update or otherwise correct this information. Advanced Micro Devices, Inc. makes no representations or warranties with respect to the accuracy or completeness of the contents of this document and assumes no liability of any kind, including the implied warranties of non-infringement, merchantability or fitness for particular purposes, with respect to the operation or use of AMD hardware, software or other products described herein. No license, including implied or arising by estoppel, to any intellectual property rights is granted by this document. Terms and limitations applicable to the purchase or use of AMD's products are as set forth in a signed agreement between the parties.