Article Number: PIBRMATS1
Overview
When a PC is turned on, a set of diagnostic tests known as the Power-On-Self-Test (POST) are performed to verify that all required hardware components are connected and functioning properly. A bootup failure could therefore be the result of a POST failure. Other common causes of a PC that does not boot up successfully could be due to power and/or display issues which are described below.
Common Symptoms
System boot failures could be due to one or more of the following reasons:
- No Power - The PC is not receiving power; the fans are not moving and there are no lights on the motherboard.
- No Display – The PC is receiving power, but the monitor is not receiving a signal or displays a black screen.
- No Boot – The PC is receiving power but does not complete the POST process or passes POST but fails to load the operating system.
Troubleshooting boot failures will therefore depend on the symptoms encountered.Navigate to the relevant section of this article for troubleshooting suggestions. If you have identified and corrected any of the problems described in the troubleshooting section below, check to see if the PC now boots up before proceeding onto the next step.
Troubleshooting
No Power - This symptom may be caused by the external power source or the internal power connections. To determine where the issue lies, follow the steps below:
- The first step is to confirm the power source is working. Use another electrical device such as a lamp, to check that the power source is functional. Once verified, make sure the power source is turned on.
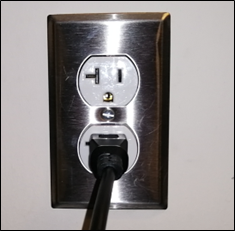
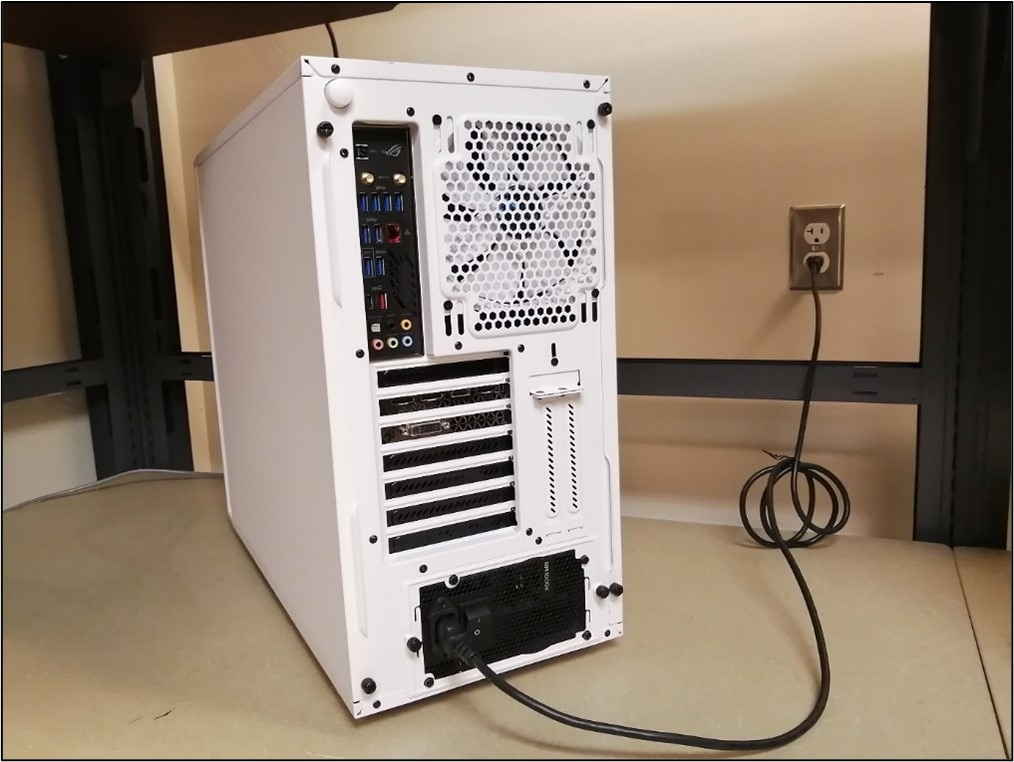
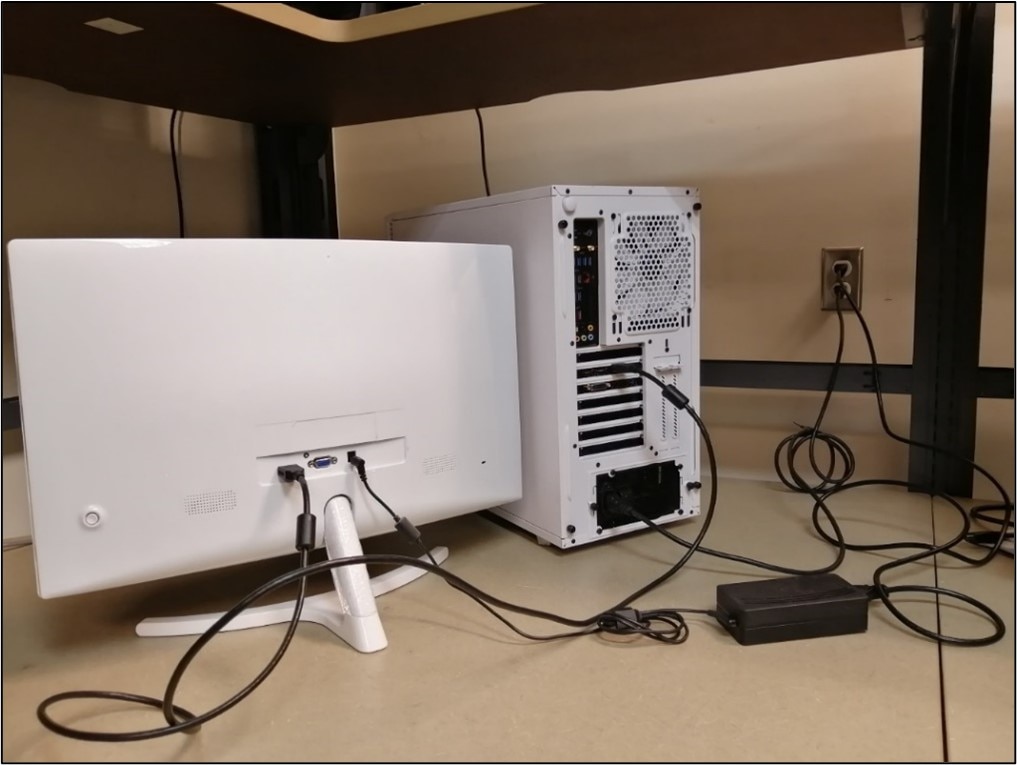
- Next check that the power switch found on the back of the Power Supply Unit (PSU) is set to ON and that the power cable is plugged in securely into the back of the PSU. Connect the PSU plug directly to the wall socket, making sure not to use any power bars or extenders.

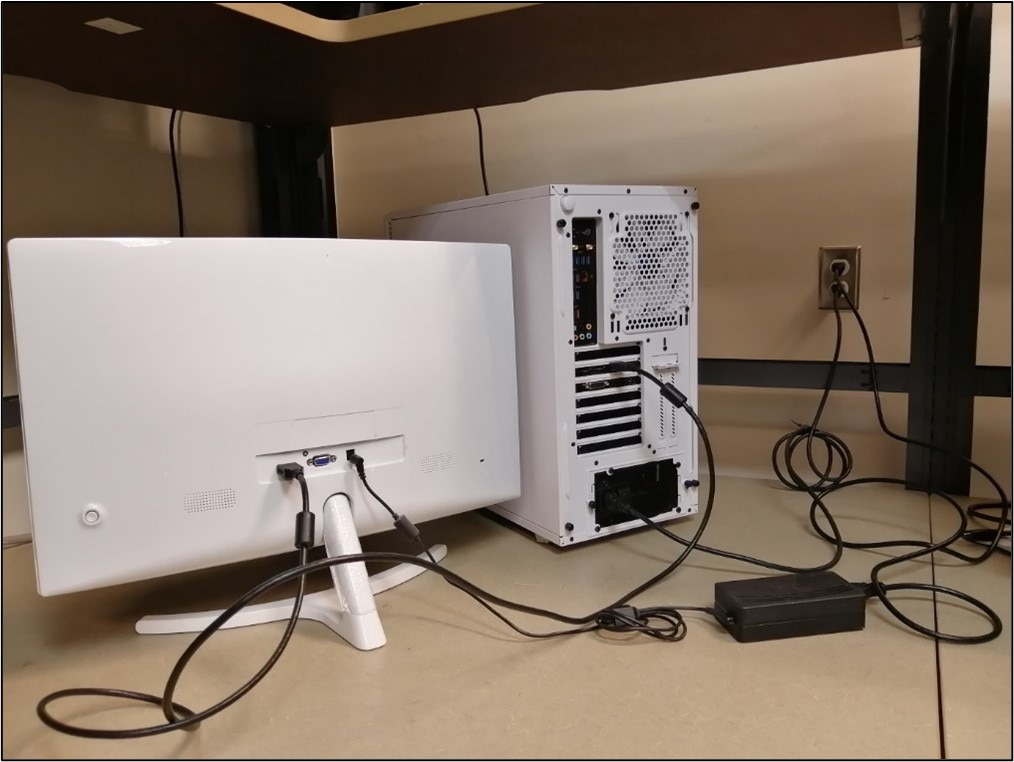
- Confirm that the monitor power cable is connected directly to a known working wall socket and the monitor indicator light is illuminated to confirm that it is receiving power and switched on.
- If the system is not receiving power at this stage, there could be an issue with the internal power connections. For example, the ATX_PWR (motherboard 24 pin connectors), the ATX_12V (CPU 4/8pin connectors) and the PCI-e (graphics Card 6/8 pin connectors). Open the chassis and confirm that the power supply cables are connected securely to the motherboard and other hardware components such as the processor and graphics card. For tips and best practices on handling sensitive electronic components, please refer to this article. Note: Before opening the system chassis, please verify that doing so does not void the manufacturer warranty.
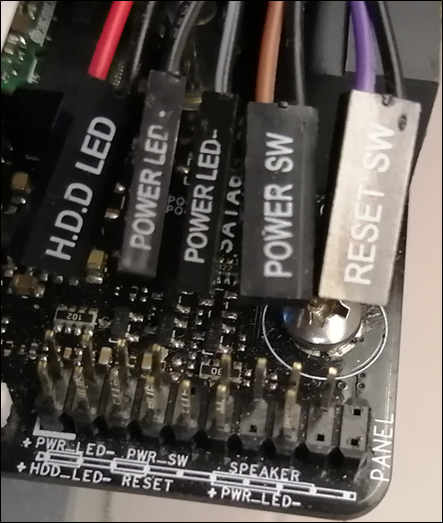
- Inspect the front panel connectors to confirm that the wires from the chassis are connected to the correct pins on the Motherboard. If the front panel connectors are not seated properly into the correct location, the chassis power/reset buttons may not function. For more information about front panel connectors, refer to the motherboard user manual.
- If there is no power to the system at this stage, it could be due to a faulty PSU or motherboard. For help troubleshooting power supply issues, refer to article: How to Troubleshoot Power Supply Issues. For help troubleshooting the motherboard consult the user manual or contact the manufacturer for assistance.
No Display -This symptom may be caused by issues with the monitor, graphics card or the cables connecting these devices. To determine where the issue lies follow the suggestions below:
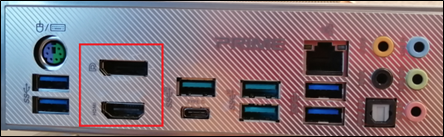
- Check that the display cable is connected securely to the graphics card output on the PC and the monitor. If the PC does not have a discrete graphics card, ensure that the processor has integrated graphics support and is connected to a compatible display output on the motherboard. Note: It is recommended to use the display cable that came with the monitor.
- Confirm that the monitor plug is connected directly to the wall socket and the monitor indicator light is illuminated to confirm that it is receiving power and switched on.
- If the monitor has multiple display inputs, use the on-screen display (OSD) button to select the port that the display cable (from the graphics card) is connected to. If feasible, test a spare known working display cable.
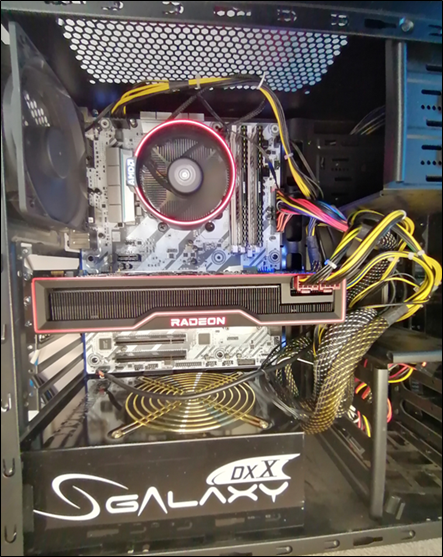
- For PCs with a discrete graphics card, confirm it is seated correctly in the primary PCI-e slot on the motherboard and connected to the PSU (if required) using independent cables directly from the power supply. For more information refer to video: How to Install Your AMD Radeon™ Graphics Card.

- Reseat the graphics card securely on the primary motherboard PCI-e slot and reconnect the power and display cables. If using a PCI-e riser cable, remove it and seat the graphics card directly onto the primary PCI-e slot of the motherboard. For more information about PCI-e risers/cable refer to this article.
- If feasible, perform a swap test with a known working graphics card. If the computer provides a display output with the spare graphics card, the primary graphics card could be faulty.
No Boot -This symptom may be caused by a POST failure, operating system, and/or hard drive issues. To determine where the issue lies, follow the steps below:
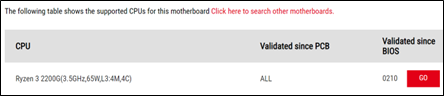
- For new and upgraded systems, confirm that the BIOS version on the motherboard is compatible with the processor. The required BIOS version is available from the motherboard manufacturer website, as shown in the example below. For more suggestions, refer this article.
- If there was a recent change to the BIOS settings, it may be corrupt. To resolve this try performing a power flush or clear the CMOS to restore the BIOS.
Power flush:
Turn off the computer.
Unplug all cables from the computer.
Press and hold the power button on the chassis for 20 seconds to drain all power from the computer.
Reconnect all cables to the computer.
Clear CMOS: Refer to the motherboard user manual for instructions specific to your motherboard model.
- If clearing the CMOS and power draining the system did not help, consider these alternatives if supported by the motherboard:
Switch to a backup BIOS for the Motherboard
Reflash/update the BIOS using the USB flash back option
Note: Refer to the motherboard user manual for instructions specific to your motherboard model.
- Confirm that the system memory kit(s) is seated and installed correctly in the recommended DIMM slots. Please refer to the motherboard user manual for recommendations.
- Typically, the DIMM slots will be designated as A1, A2, B1, B2 starting from the bank that is closest to CPU socket.
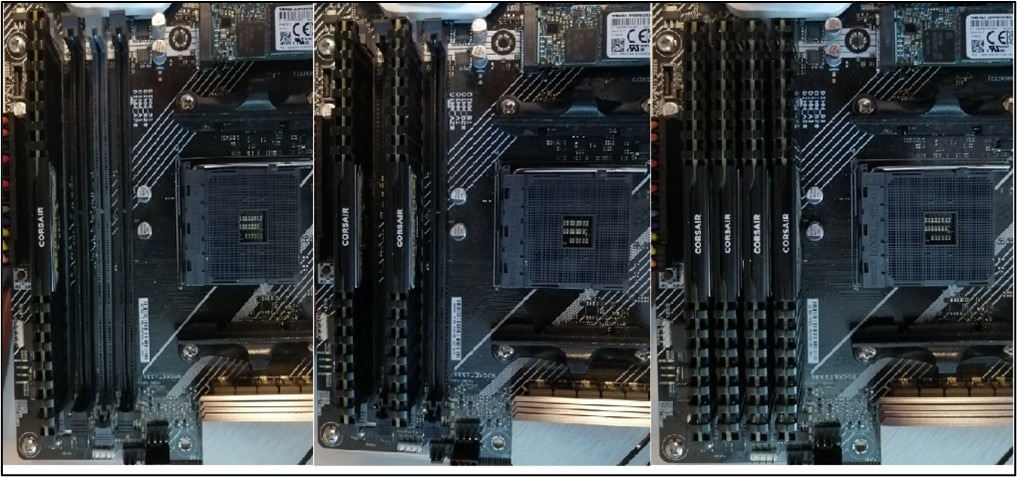
- If you have more than one memory stick (DIMM), test with each stick separately and on different slots to see if the system will POST successfully. This could help identify a faulty memory stick and/or DIMM slot.
- Ensure that the processor cooler (heatsink & fan) is properly installed. Please consult the product manual for installation instructions.
- If the PC successfully completes POST but fails to boot into the operating system, it could be due to a corrupted OS and/or failing hard drive. To determine the where the problem lies, perform a fresh installation of the OS on a different hard drive.
If the boot failure persists after performing the steps above, a warranty service may be required for your processor. Please continue with your warranty claim and include the results of your troubleshooting in the problem description field.